
Creating Mix.dialog Applications
Mix.dialog is a multichannel dialog design development tool for creating conversational experiences. It works hand-in-hand with Mix.nlu. Use Mix.nlu to create NLU models to understand your users. In Mix.dialog, you build conversational interfaces to engage with them.
Get started
This section explains how to design a simple chat application. When you open a new project in Mix.dialog, a blank canvas appears in the center pane, with a Start node, a node palette, and the Components pane on the left. Once you have added nodes on the canvas, the Node properties pane becomes available on the right-hand side of the screen. Click Components or Node properties, on the toolbar, to collapse or expand those panes. You can change the position of the node palette by dragging it. Click the X button to close the palette. Click the ![]() icon in the upper-left corner of the canvas to open the palette again.
icon in the upper-left corner of the canvas to open the palette again.
As you add nodes and define their properties, the dialog flow takes shape in the form of a graph.
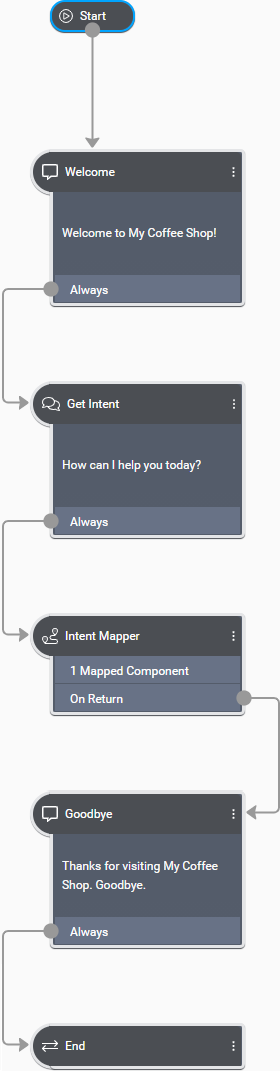
All applications start with a component called Main, which typically covers greeting the user and asking what they would like to do. Use a message node for the greeting, and a question and answer node for asking the user what they would like to do. Use an intent mapper node to connect the dialog flow to another component meant for a specific purpose, depending on the user’s response. For example, the chat application for an airline might let you book a flight, check the current status of a flight, and so on. In such an application, designing the dialog flow for booking a flight separately from the dialog flow for checking a flight’s status makes your dialog model more readable.
This scenario assumes you have created a Mix project. It does not require you to have already started developing the NLU model for your chat application in Mix.nlu—with its NLU panel, Mix.dialog also supports managing intents and entities. However, before you can preview a dialog design you might need to further develop the NLU model for the project by adding sample sentences and annotating them in Mix.nlu (refer to the Mix.nlu documentation).
Open your project in Mix.dialog
- On the Mix dashboard, click your new project if it is not already in focus.
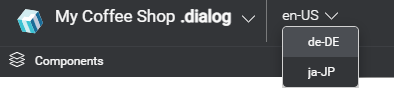
- Click the large .dialog button above the area where project details appear.

Mix.dialog opens with the DESIGN tab in focus, showing a Start node on a blank canvas in the center pane.

- If your project supports multiple languages, use the menu near the name of the project, to choose the language you want to start with.
Add NLU intents and entities
- Click NLU, on the toolbar, to open the NLU resource panel.
- Type a name for your intent—for example, ORDER_COFFEE—and click the Add Intent icon
 .
.
The new intent appears in the mapping table. - Next to ORDER_COFFEE, click Map this intent, and choose Create Intent Component.
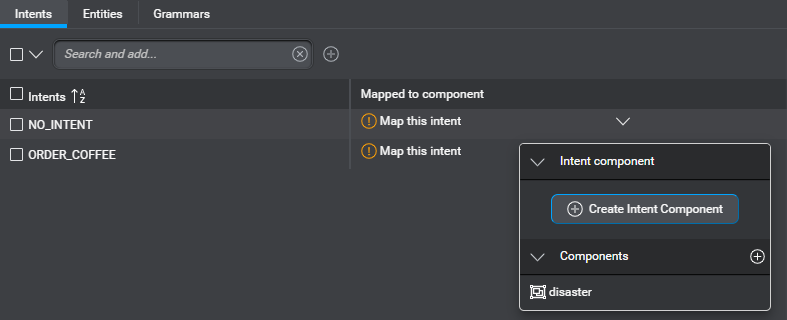
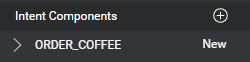
This adds a new ORDER_COFFEE intent component where you will design the part of the dialog to collect all the information required to fulfill this intent. The new intent component appears in the Components pane. This also sets a global default mapping from the ORDER_COFFEE intent to the corresponding ORDER_COFFEE intent component.
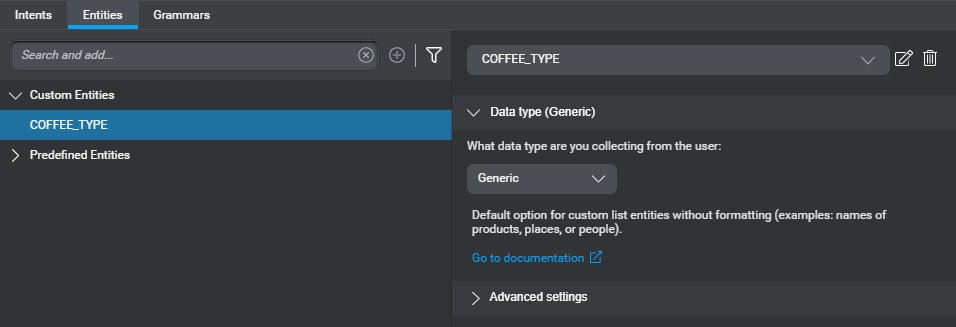
- Switch to the Entities tab.
- In the search field, type a name for an entity your application is meant to collect—for example, COFFEE_TYPE.
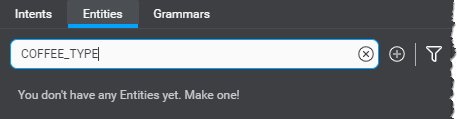
- Click the Add Entity icon .
- Select the desired data type for this entity (for example, Generic), from the list that appears in the upper-right area of the panel.

- Click the Add icon .
The new entity appears in the list of custom entities.
- Proceed in the same fashion to add, for example, COFFEE_SIZE.
- Click COFFEE_TYPE in the list of custom entities.
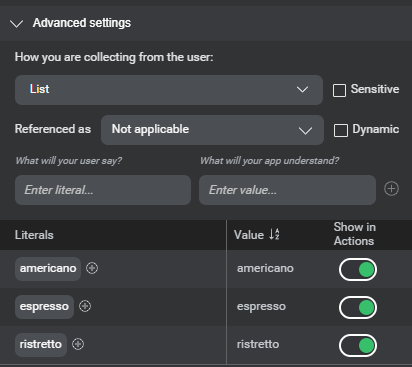
- Expand the Advanced settings section.
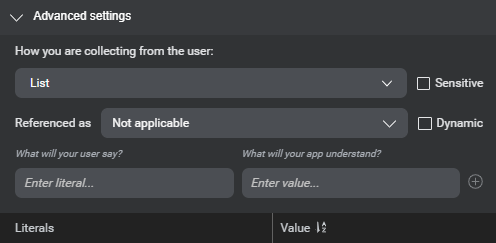
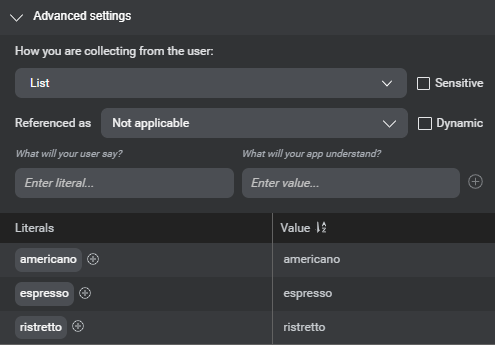
- Use the fields at the bottom of this section to add a few representative literal-value pairs—for example, enter literals espresso, ristretto, americano.
The literal text automatically doubles as the value, by default. If you want the value to be different, press Tab and type the desired value before pressing Enter.
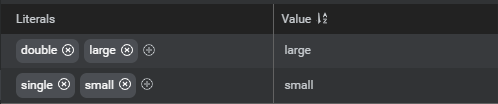
- Proceed in the same fashion to add a few representative literal-value pairs for the COFFEE_SIZE entity—for example, literals large, and small.
Multiple literals can have the same value, to help your application recognize the different ways a user might say an entity. - Click the Add icon next to the literal large, type double, and press Enter.
- Proceed in the same fashion to add the literal single, for the value small.
- Click NLU again, on the toolbar, to close the panel.
Design your dialog
Main component example
Build a dialog by adding nodes and configuring their properties to direct the dialog flow based on interaction with the user.
Greet the user
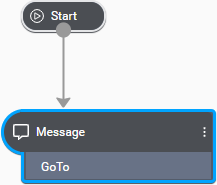
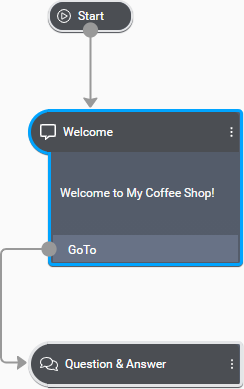
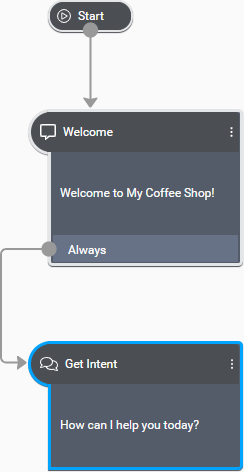
- Drag a Message node from the palette onto the Start node on the canvas.
This automatically connects the Start node to the message node.
The properties for this message node appear in the Node properties pane.
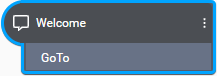
- Click the default node name, Message, at the top of the Node properties pane, and replace it with a unique name—for example, Welcome.
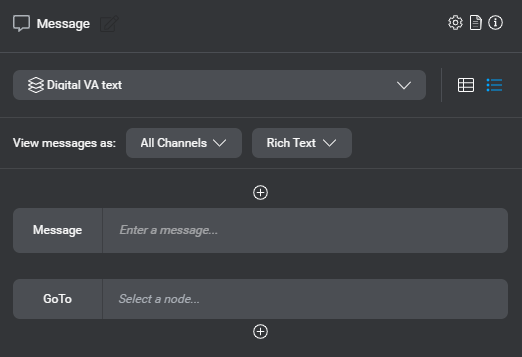
- Click the message placeholder.
The message editor appears. - Enter the desired greeting message—for example, Welcome to My Coffee Shop!
This automatically generates a message ID, based on the message text.

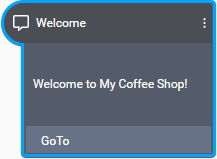
- Click outside the editor to close it.
The message appears on the Welcome node.
Collect the user intent
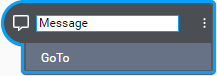
- Drag a Question & Answer node from the palette onto the GoTo area of the Welcome message node.
This automatically connects the message node to the question and answer node.
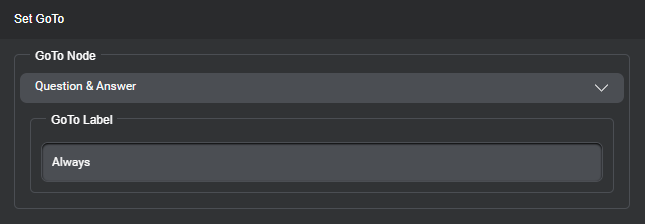
- (Optional) In the properties for the Welcome node, click the compact GoTo, to open the GoTo editor, and then replace the default GoTo transition label, with Always, to make it more obvious that this transition is not conditional.
Notice the GoTo Node field already indicates that the question and answer node is the next node in this flow.
- Click the question and answer node on the canvas.
The properties for this node appear in the Node properties pane.
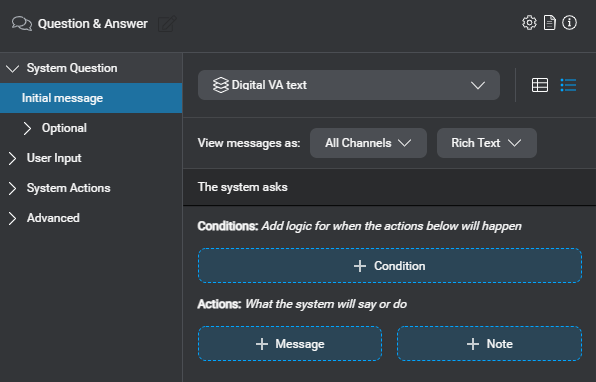
- Replace the default node name, Question & Answer, with a unique name—for example, Get Intent.
- Click + Message.
A message placeholder appears.

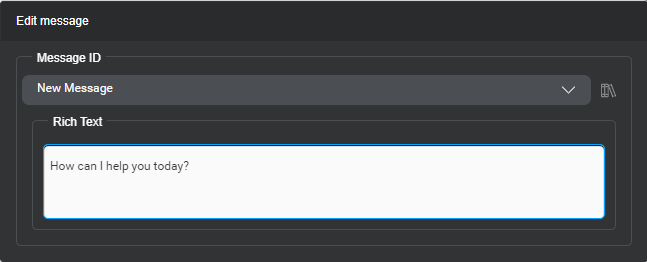
- Click the message placeholder.
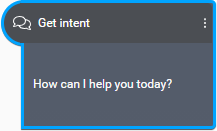
The message editor appears. - Enter the desired question—for example, How can I help you today?
- Click outside the editor to close it.
The question appears on the Get Intent node.
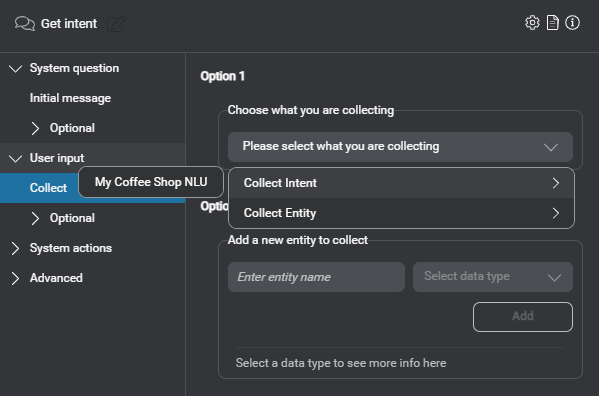
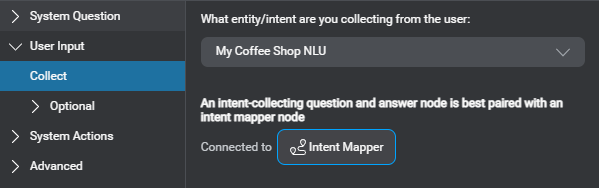
- Expand User Input and click Collect.
- Expand the selector, point to Collect Intent, and choose NLU for your project.
- Click Add Intent Mapper node.
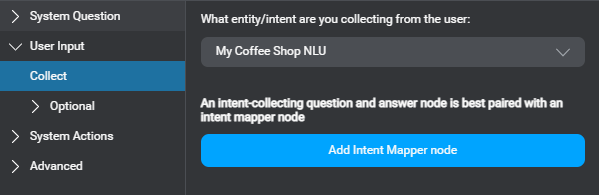
This automatically connects the Get Intent question and answer node to an intent mapper node.
Notice the intent mapper node indicates: 1 Mapped Component. This corresponds to the ORDER_COFFEE intent you defined earlier, in the NLU resource panel.
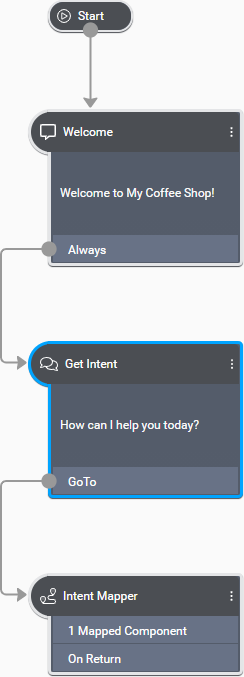
- Expand System Actions and click Default.
Notice the compact GoTo already indicates that the intent mapper node is the next node in this flow.
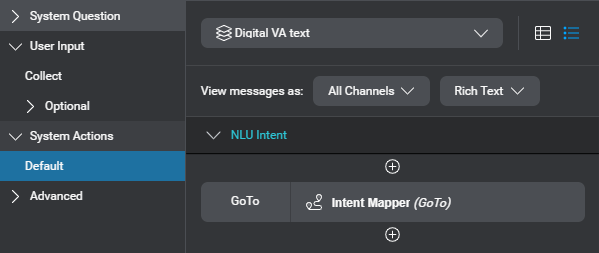
- (Optional) Click the compact GoTo, to open the GoTo editor, and then replace the default GoTo transition label, with Always, to make it more obvious that this transition is not conditional.
Say goodbye to the user
- Click the intent mapper node on the canvas.
The properties for this node appear in the Node properties pane.

- Click the GoTo placeholder.
The GoTo editor appears. - Expand the GoTo Node list, point to Add new, and choose Message.
This automatically connects the intent mapper node to a message node.
This transition determines what happens when the dialog returns to this intent mapper node from an intent component, after the interaction associated with a specific intent is complete. - Click the Message node on the canvas.
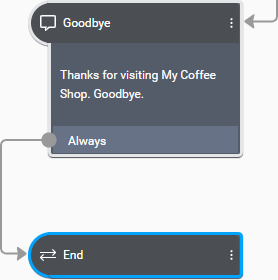
- Replace the default name of the message node with a unique name—for example, Goodbye.
- Click the message placeholder.
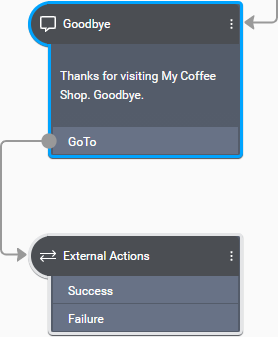
The message editor appears. - Enter the desired parting message—for example, Thanks for visiting My Coffee Shop. Goodbye.
- Click outside the editor to close it.
The message appears on the Goodbye node on the canvas. - Click the GoTo placeholder.
The GoTo editor appears. - Expand the GoTo Node list, point to Add new, and choose External Actions.
This automatically connects the Goodbye node to an external actions node.
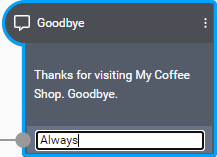
- (Optional) On the canvas, double-click the GoTo area of the Goodbye node, and replace the default GoTo transition label, with Always.
- Click the external actions node.
- Replace its default name with a unique name—for example, End.
- Under Action Type, choose End.
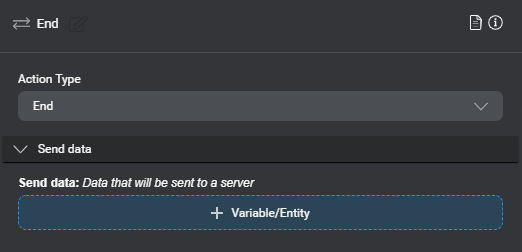
The End node represents the end of the conversation.
Fulfill the intent
Intent component example
- In the Components pane, click your ORDER_COFFEE intent component.
- Drag a Question Router node from the palette onto the canvas.
The properties for the question router node appear in the Node properties pane.
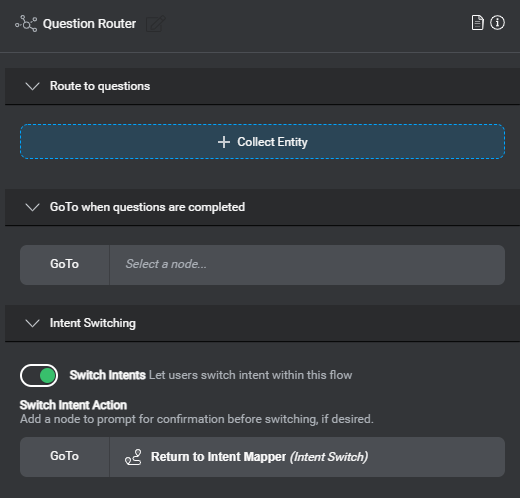
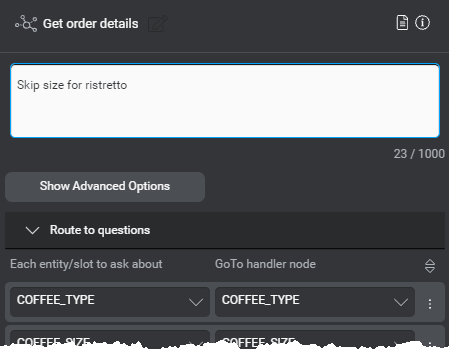
- Replace the default node name, Question Router, with a unique name—for example, Get Order Details.
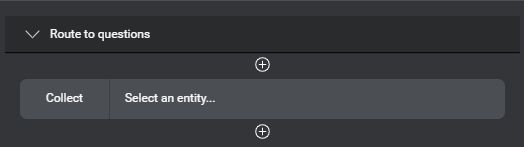
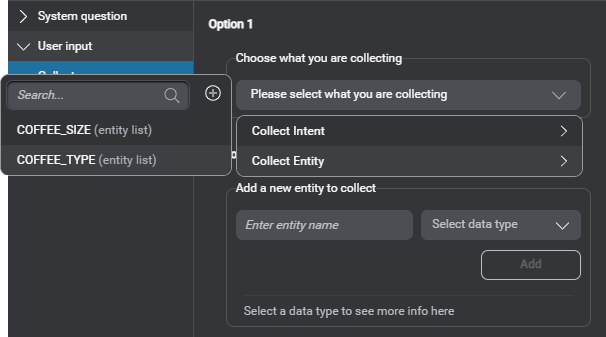
- Under Route to questions, click + Collect Entity.
A Collect placeholder appears.
- Click the placeholder.
An editor appears.
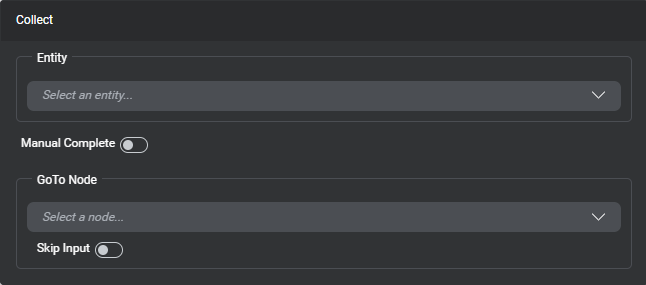
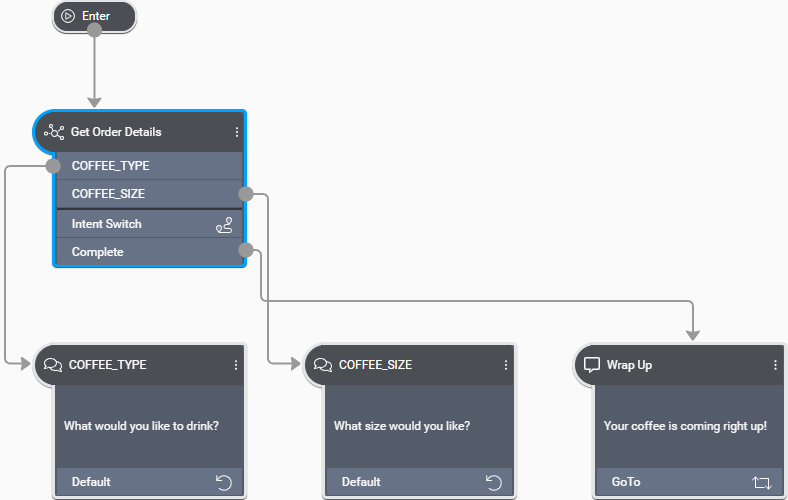
- Expand the Entity list, and choose the first piece of information to be collected—COFFEE_TYPE, in this scenario.
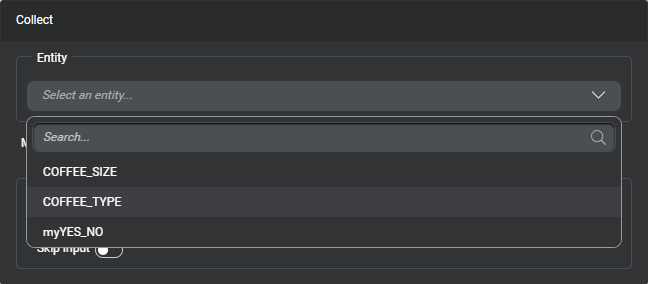
- Expand GoTo Node, point to Add new, and choose Question & Answer.

- Click outside the editor to close it.
On the canvas, notice the Get Order Details question router node is now connected to a new question and answer node named COFFEE_TYPE, after the entity to collect.
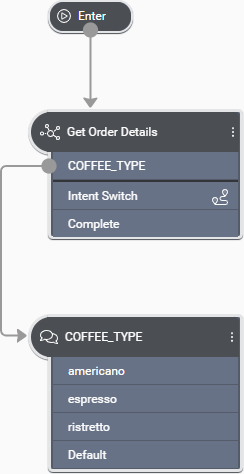
- In the Node properties pane, click the Add icon , below the compact Collect parameter.
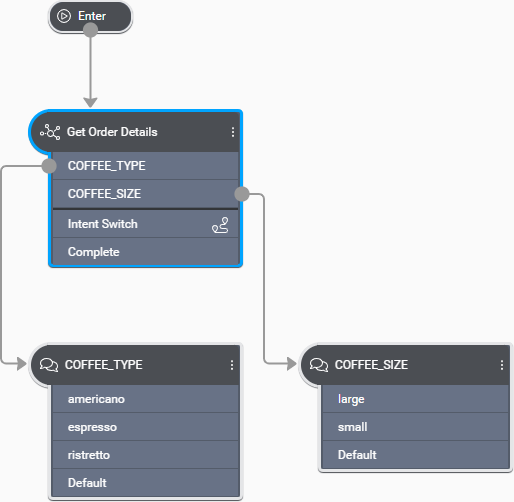
- Proceed in the same fashion (from step 5 above) to add another question and answer node for the remaining piece of information to be collected—that is, the COFFEE_SIZE entity.
Collect entities
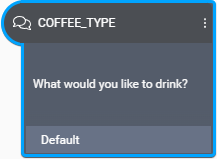
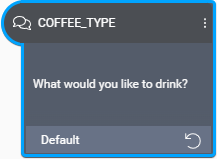
- Click the COFFEE_TYPE question and answer node.
The properties for this node appear in the Node properties pane.
- Click + Message.
A message placeholder appears.
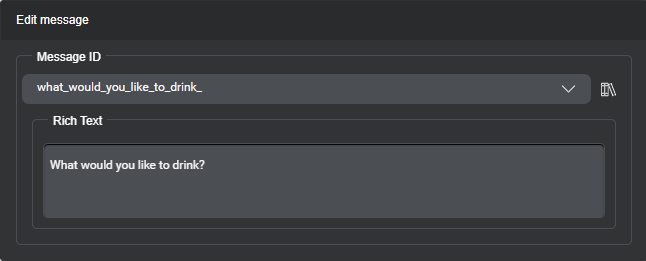
- Click the message placeholder. The message editor appears.
- Enter the desired question—for example, What would you like to drink?
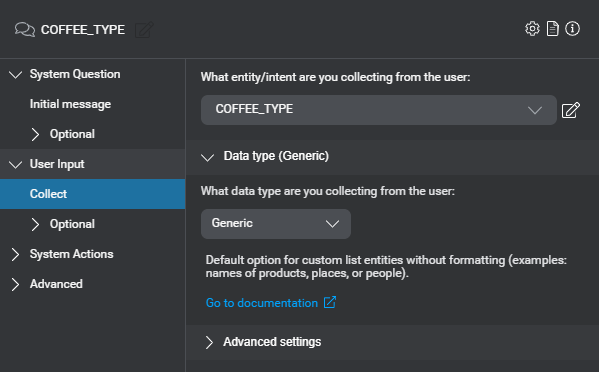
- Expand User Input and click Collect.
- Expand Advanced settings.
- Since this scenario does not require the dialog flow to take different paths depending on the collected value, turn off all Show in Actions switches.
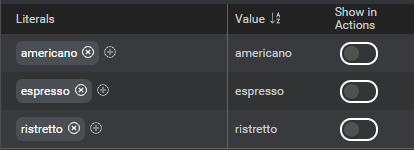
Notice the values no longer appear on the COFFEE_TYPE node, on the canvas.
- Expand System Actions and click View All.
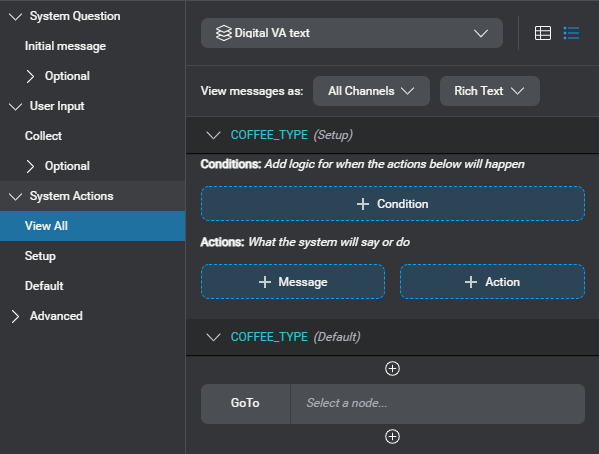
- Under COFFEE_TYPE (Default), click the GoTo placeholder.
The GoTo editor appears. - Expand the GoTo Node list, point to Return to, and choose Get Order Details.

This means that, once the question and answer node has collected information relevant to the active intent—that is, any entities required to fulfill the intent—, the dialog flow goes back to the question router node. The question router node determines whether information still remains to be collected.
A symbol representing the Return To transition appears next to the transition label on the COFFEE_TYPE node.
- Configure the COFFEE_SIZE question and answer node in the same fashion:
- Add a question—for example, What size would you like?
- Turn off all Show in Actions switches.
- Set a Return To transition to return to the Get Order Details question router node.
Wrap up
- Click the Get Order Details question router node on the canvas.
- In the Node properties pane, under GoTo when questions are completed, click the GoTo placeholder.
The GoTo editor appears. - Expand the GoTo Node list, point to Add new, and choose Message.
This connects the question router node to a new message node. - Click the new message node on the canvas.
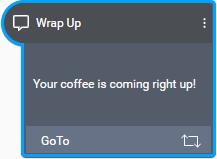
- Replace the default name of the message node with a unique name—for example, Wrap Up.
- Click the message placeholder. The message editor appears.
- Enter the desired message—for example, Your coffee is coming right up!
The message appears on the Wrap Up node on the canvas. - Click the GoTo placeholder.
The GoTo editor appears. - Expand the GoTo Node list, and choose Return.
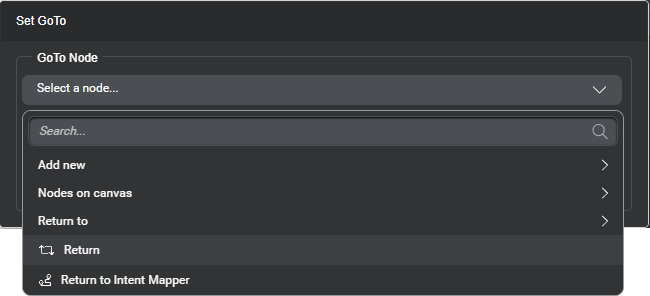
When the dialog reaches this node, all interaction associated with the ORDER_COFFEE intent is complete and the dialog returns to the intent mapper node in the component from where this intent component was called.
A symbol representing the Return transition appears next to the GoTo label on the Wrap Up node.
Validate your design
- Click the gear icon
 and, under Validate Design Panel, click Show.
The validation panel appears.
Tip: You can change its position by dragging it. - Click Run Validation.
The panel reports any issues found in the design.
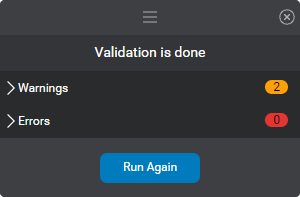
- If the panel reports warnings (or errors), click Warnings (or Errors) to expand the list of issues.
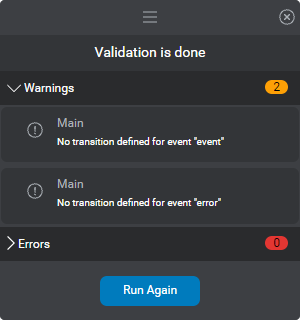
Note: With this simple dialog design, the validation panel reports missing transitions in the component called Main. This is because we haven't configured the two default global event handlers in the Start node. You can safely ignore these warnings for now. If the NLU model for your project is not yet available, this also generates a warning. You can train the NLU model now, or wait until you’re ready to preview your design. - Click an issue to bring the affected node into focus, and correct your design as needed.
In the Node properties pane, areas that require attention are outlined in red (error) or orange (warning).
Note: For issues related to a message, click the compact message to open the message editor. A link appears at the top of the editor, which lets you navigate directly to the Messages resource panel where you can address the issue. - (Optional) Click Run Again to validate your design again.
Preview your design
Dialog preview example
- Switch to the TRY tab.
Mix.dialog prompts you to train (or retrain) your NLU model. - Click Train NLU model (or Retrain NLU model), if appropriate; otherwise click Try anyway (or Use existing).
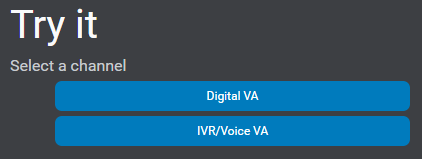
- Click one of the available channels.
Mix.dialog generates channel-appropriate code for your dialog app, validates the code, and reports any issues found in the code.
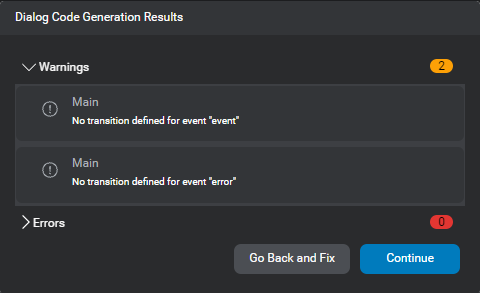
- Click Continue.
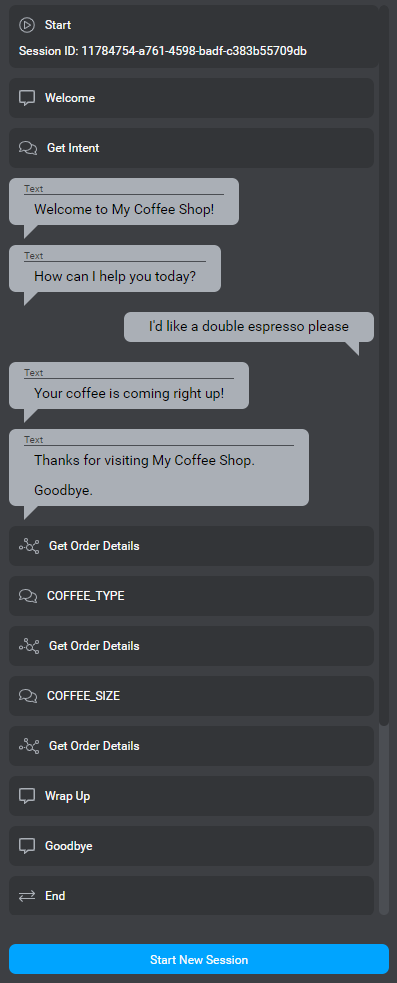
The Main flow of your dialog design appears in the main pane. - If your project supports multiple languages, use the menu near the name of the project, to choose the language you want to use for this session, as desired.
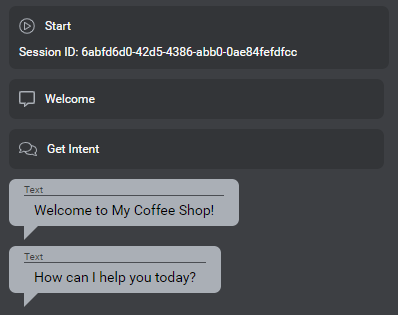
- Click Start, in the chat pane.
Your greeting and initial question appear in the chat pane.
- Type something in the chat box at the bottom of the pane and press Enter.
A response appears, based on what you typed. - Pursue the conversation until you are satisfied with your scenario.
If you reached the end of the dialog, your can click Start New Session.
Alternatively, click Restart at the top of the main pane, at any time, to try another scenario.
Refine your dialog
To further develop your dialog model you might consider these tasks:
- Add support for global commands (main menu, escalate, and goodbye)
- Set up global event handlers for generic events, generic errors, and the global command events
- Exchange data with an external system, for example, to get the price for the specified coffee type and size
- Add dynamic messages
- Support more intents, each with a dedicated intent component
- Prompt the user before switching intents
Naming guidelines
It’s a good practice to establish a naming convention for dialog elements and resources in Mix projects. This will help you avoid names that might conflict with keywords commonly found in programming languages. Inadvertent use of such keywords could generate errors at runtime in your client applications.
In some situations—for example, if you copy a name or an ID from a context that supports a wider set of characters, to reuse it in a more restrictive context—Mix.dialog automatically removes unwanted characters.
Reserved keywords
Don’t use JavaScript reserved words and Java keywords.
The words in this list are also reserved, within the Mix platform—don’t use them in your Mix projects:
- _
- appsessionID
- AUTO_INTENT_ ... (that is, anything prefixed with AUTO_INTENT_ cannot be used as an entity or intent name)
- channel
- ConfigurationModel
- id
- inputmodes
- library
- odm
- SLOTS
- version
Component names
Generic component names are limited to letters (A-Z, a-z), digits (0-9), and the characters _, ., :, ;, -, and ~, which you can use as separators, if desired. A generic component name must be unique across all nodes and components in your project.
Intent components are always named after the intent they handle. Intent names must not start with a number or hyphen (-), and cannot include spaces. Use underscores (_) or hyphens (-) as separators if desired. The name must be unique across all intents, entities and variables in your project.
Entity names
Entity names must not start with a number or hyphen (-), and cannot include spaces. Use underscores (_) or hyphens (-) as separators if desired. The name must be unique across all intents, entities, and variables in your project.
You cannot rename rule-based entities.
Event names
Custom event names are limited to 120 characters, and can only include letters (A-Z, a-z), and digits (0-9).
You cannot rename predefined events.
Intent names
Intent names are limited to 500 characters, must not start with a number or hyphen (-), and cannot include spaces. Use underscores (_) or hyphens (-) as separators if desired. The name must be unique across all intents, entities, and variables in your project.
Renaming an intent automatically renames the associated intent component, if any. You cannot rename an intent component as such, unless you first convert it into a generic component.
You cannot rename the NO_INTENT predefined intent.
Message identifiers
Message IDs are limited to alphanumeric characters and the characters _, [, and ].
Audio file IDs are static filenames for audio files to play in channels that use the Audio Script modality (the file extension is determined in the project settings). You cannot automatically generate the audio file ID for a message that isn’t used in the project. However, you can enter one manually (maximum 255 characters), if desired. If you must manually edit or specify audio file IDs, avoid using characters that might not be valid in filenames for the system hosting your audio files.
Node names
Except for the Start and Enter nodes, which you cannot rename, every node must have a unique name, across all nodes and components in your project.
Variable names
Variable names are limited to letters (A-Z, a-z), digits (0-9), the dollar sign ($) and the underscore (_). They must not start with a digit. The name must be unique across all intents, entities, and variables in your project.
The same naming rules apply to schemas, and schema fields. However, a variable can have the same name as a schema, and the name of a schema field must only be unique within its parent schema.
You cannot rename predefined variables, predefined schemas, and their fields.
Basic operations
This section describe basic operations you can perform in Mix.dialog.
Change the user interface language
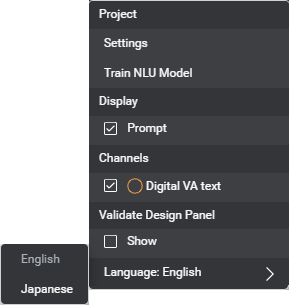
Click the gear icon ![]() , click Language, and choose the desired language.
, click Language, and choose the desired language.
The user interface appears in the specified language. (Warning and error messages will remain in English.)
Change the active language
If your project supports multiple languages, use the menu near the name of the project to switch to the desired language.
This lets you set messages and entity literals in the specified language, as well as language-specific settings.
Show or hide the Node properties pane
Click the Show/Hide Node properties icon ![]() , to hide the Node properties pane. Click the icon again to show the pane.
, to hide the Node properties pane. Click the icon again to show the pane.
Show or hide the Components pane
Click the Show/Hide Components icon ![]() , to hide the Components pane. Click the icon again to show the pane.
, to hide the Components pane. Click the icon again to show the pane.
Resize the Components pane
- Move your pointer to the border between the Components pane and the main pane.
The pointer switches to a left-right arrow handle.
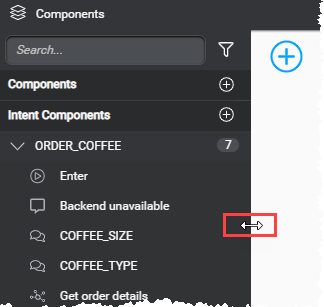
- Click and drag the handle until the pane is the desired width.
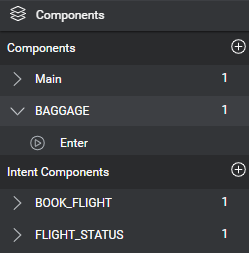
Resize sections of the Components pane
By default, the Components section and the Intent Components section of the Components pane are the same height.
- Click and drag the Intent Components section’s header up or down, as desired.
- Double-click a section header to expand the section.
This collapses the other section. - Double-click the header of a fully-expanded section to restore the default layout.
Switch to another component
In the Components pane, click the component you want to bring into focus (expand the Intent Components section, or the Components section, if needed).
The dialog design for the selected component appears in the center pane.
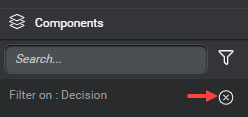
Filter the Components pane
You can narrow down the list of components and nodes that appear in the Components pane, by node type, keyword or both. For example you could choose to focus on decision nodes with the word “set” in their name.
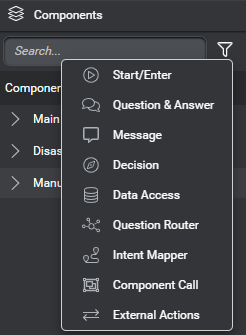
Filter the Component pane by node type
Click the Filter icon ![]() , and choose the desired type of node.
, and choose the desired type of node.
Only nodes of the type you chose remain visible in the Components pane.
To stop filtering by node type, click the Clear filter icon ![]() .
.
Filter the Component pane by keyword
Use the search field to narrow down the components and nodes displayed in the Components pane.
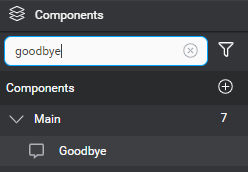
Any components or nodes with a name that matches the search string remain visible in the Components pane.
To stop filtering by keyword, click the Clear search icon ![]() .
.
Zoom and pan
When you open a project, or switch between components, the dialog design automatically appears with a predetermined layout at 100% scale.
- Use the zooming tool at the bottom left of the center pane to zoom in, zoom out, or reset the zoom factor to 100%.

- Click the canvas, and drag to bring the desired area of your design into view.
Train the NLU model
You can train (and retrain) the NLU model for the active language directly from within Mix.dialog. You might want to do this, for example, to be sure your NLU model is up to date before previewing your dialog design, or after you added entity literals that may not warrant annotating new samples in Mix.nlu.
- In a multilingual project, switch to the desired language, if it is not already the active language.
- Click the gear icon and, under Project, choose Train NLU Model.
You can follow the progress of the training operation in the Notifications panel.
Review notifications
Notifications panel example

The Notifications panel collects status messages from various operations, such as importing resource data, training NLU models, and building resources.
Click the Notifications icon ![]() , to open the Notifications panel.
, to open the Notifications panel.
Status messages appear in chronological order, with the latest messages at the top.
Choose between All projects (default), or Current project, if desired.
Filter by type of notification: All notifications (default), Completed, Failed, Started, Queued, if desired.
Click Clear All to dismiss all messages.
Click the Notifications icon again to close the panel.
Component operations
In addition to the component called Main, Mix.dialog supports two types of components: intent components and generic components. An intent component is a special type of component meant to handle one specific intent. A generic component can be used in different parts of a dialog design, to perform common tasks (for example, authentication, call transfer, check account balance), including fulfilling multiple intents.
This section describe basic operations you can perform to manipulate generic components and intent components in Mix.dialog.
Add a generic component
This section explains how to add a component that is not an intent component.
- Click the Add icon , next to Components.
- Enter a unique name for the component (see Naming guidelines).
The new component appears in the Components section of the Components pane.
Rename a generic component
- On the Options menu, choose Rename component.
- Modify the name as desired (see Naming guidelines).
Add an intent component
This section explains how to add an intent component, and create the associated intent, as a single operation. Although Mix.dialog will automatically map a new intent component with an existing intent, if they have the same name, using the NLU resource panel to add the desired intent component might be preferable in such situations.
- Click the Add icon , next to Intent Components.
- Type a valid intent name for the intent component, and press Enter.
The new component appears in the Intent Components section of the Components pane.
The corresponding intent and its new mapping also appear in the NLU resource panel.
Convert an intent component into a generic component
- On the Options menu, choose Convert to component.
A message appears prompting you to confirm your intention.
Note: This action cannot be undone. - Click Confirm.
The component now appears in the (generic) Components section of the Components pane.
Delete a component
- On the Options menu, choose Delete component (or Delete intent component).
A message appears prompting you to confirm your intention. - Click Confirm.
Relink an intent component
Relinking an intent component to the intent it is meant to handle ensures that their name is kept in sync: for example, if the intent name changes after you created the intent component, the intent component will be renamed accordingly. It also allows you to quickly identify if the intent meant to be handled by the intent component has been deleted from the NLU model: in such a case, a broken link icon ![]() marks the intent component, in the Components pane. If an intent component with a broken link icon was actually not meant to handle a specific intent, you should convert it into a generic component.
marks the intent component, in the Components pane. If an intent component with a broken link icon was actually not meant to handle a specific intent, you should convert it into a generic component.
- On the Options menu, point to Link to existing intent.
The list of all intents that are not currently linked to an intent component appears. - Use the search field to narrow down the list, if needed.
- If the intent you would like to use is not in the list, type the desired name in the search field, and click the Add icon , to create the intent on the fly.
- Choose the desired intent.
(If the intent name is different than the current intent component’s name, a message appears prompting you to confirm your intention: click Yes, link it, to dismiss the message.)
This automatically renames the intent component, which might move up or down in the Intent Components section of the Components pane where components appear in alphabetical order.
This also creates a global mapping, in the NLU resource panel, between the specified intent and this intent component.
If you chose the wrong intent by mistake, you can unlink the intent component.
Unlink an intent component
This section explains how to relink an intent component after you linked it to the wrong intent by mistake—that is, when you realize you chose the wrong intent while relinking an intent component that had a broken reference to the intent it was previously meant to handle.
- On the Options menu, choose Unlink intent component.
The unlinked intent component moves to the top of the Intent Components section, and a broken link icon appears next to it. - Relink the intent component to the desired intent.
- Open the NLU resource panel, and notice the mapping that was created by mistake is now broken: the warning “Mapped resource missing” appears next to the entity name.
- Proceed as appropriate, depending on the situation:
- Delete the intent, if you no longer need it.
- Remove the broken mapping, if you are not yet ready to map this intent.
- Remap the intent to another intent component, generic component, or node.
Open the Options menu for a component
In most situations, to expand the Options menu, you can bring your pointer to the badge that shows the number of nodes next to the desired component, and then click the More options icon ![]() that appears.
that appears.
In the case of an intent component for which the mapped intent has been deleted, or which has been intentionally unlinked, click the broken link icon ![]() .
.
Node operations
This section describe basic operations you can perform to manipulate the elements of a dialog design—that is, nodes and their interconnections—in Mix.dialog.
Add a node
- Drag a node from the design palette onto the canvas.
- Drag a node from the design palette onto any transition area of a question and answer node, a message node, or a decision node.
- Drag a node from the design palette onto the Success area or onto the Failure area of a data access node or external actions node set up for a transfer action.
- Drag a node from the design palette onto the Complete area of a question router node.
- Drag a node from the design palette onto the On Return area of an intent mapper node, or a component call node.
- Click Components on the design palette and drag the component you want to call onto the canvas or onto a transition area of a node. This adds a component call node.
Remove a node
- Click the More icon
 for the node you want to remove.
- Choose Delete.
Duplicate a node
You can duplicate a node within a component or to another component. This creates a new node with these properties:
- Name based on the original node’s name, with a numeric suffix
- Same conditions, actions, and notes as the original node (except for transitions when duplicating to another component)
- Same settings as the original node
- Duplicated messages (not linked to the messages from the original node)
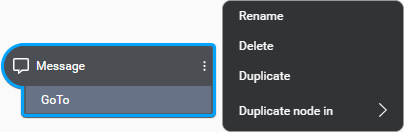
Duplicate a node within a component
- Click the More icon for the node you want to duplicate.
- Choose Duplicate.
Duplicate a node to another component
- Click the More icon for the node you want to duplicate.
- Point to Duplicate node in and choose the desired component.
Tip: Use the search field to narrow down the list of components, if needed.
Define node properties
Click the node you want to configure if it’s not already in focus. The properties for this node appear in the Node properties pane.
Depending on the node type, you can perform most or all of these tasks:
- Change the node name
- Add a description
- Assign variables
- Add messages
- Set the transition to the next node in the dialog flow
- Define conditions
- Assign variables based on conditions
- Add messages based on conditions
- Add transitions based on conditions
- Add notes
- Reorder messages, actions, notes, and conditions
See Design a dialog flow for more details.
Rename a node
Rename a node in the Node properties pane
- Click the node you want to rename if it’s not already in focus.
The properties for this node appear in the Node properties pane. - Click the default node name, at the top of the Node properties pane, and replace it with a unique name.
Rename a node directly on the canvas
Double-click the node name on the canvas, modify it, and press Enter.
Alternatively:
- Click the More icon for the node you want to rename.
- Choose Rename.
- Modify the name as desired and press Enter.
- Click the More icon
Add a description to a node
- Click the node you want to describe if it’s not already in focus.
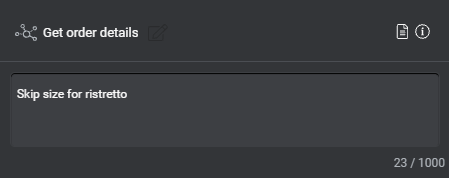
The properties for this node appear in the Node properties pane. - Click the Node description icon
 , next to the node name, at the top of the Node properties pane.
 - Enter the desired description (maximum 1000 characters), in the field that appears.
Tip: To force a new line in your node description, use Shift+Enter (or Shift+Return).
Show or hide a node description
When you click a node on the canvas, if the Node description icon has a blue indicator, this means there is a description for this node.

Click the Node description icon to show the description.
Click the Node description icon again, to hide the node description.
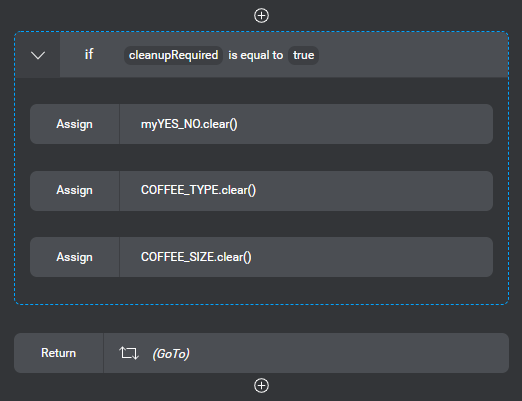
Move a message, action, note, or condition
- Bring your pointer to the right-hand side of the message, action, note, or condition you want to move.
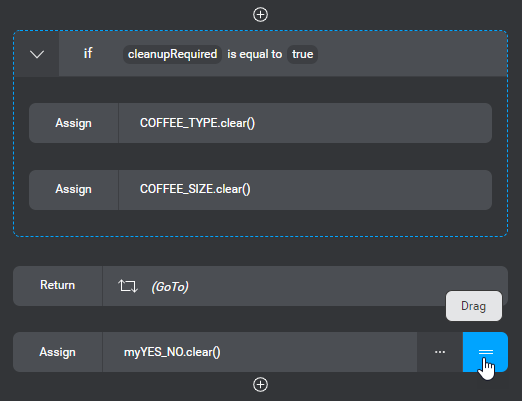
- Use the handle
 that appears, to drag the selected element up or down.

- Drop the selected element at the desired position, above or below another element, or inside a condition.
Channels
A channel defines a set of modalities that determine how your application will exchange information with its users. You determine the set of channels available for your project when you create it. You can use the Targets tab of the Mix dashboard, to add, modify, or disable channels after a project has been created, if desired. Disabled channels and modalities are not visible in Mix.dialog.
A channel can be applied to various channel integrations. For example:
| Channel | Channel integrations |
|---|---|
| IVR | IVR |
| Digital VA text | Android SDK, iOS SDK |
| Digital VA voice | WhatsApp, Apple Business Chat, Facebook Messenger |
In Mix.dialog, when you need to use a different message or set different actions, depending on the channel, you can undock a channel at any node where you want the dialog to support channel-specific messages and actions, or interactive elements. The Messages resource panel also allows you to set channel-specific variations for your messages.
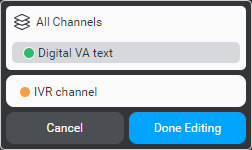
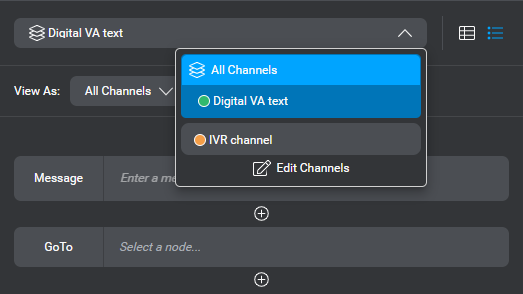
Undock a channel at a node
- Expand the main channel selector (at the top of the node properties).

- Click Edit Channels.
The channel dock switches to edit mode.
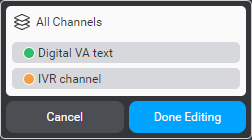
- Click the channel you want to undock at this node.
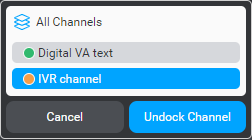
- Click Undock Channel.
- Repeat these two steps if you want to undock more channels at this node.
- Click Done Editing.
You can now select the undocked channel for which you would like to set channel-specific messages and actions, or interactive elements.
Dock a channel at a node
- Expand the main channel selector (at the top of the node properties).
- Click Edit Channels.
The channel dock switches to edit mode. - Click the channel you want to redock at this node.
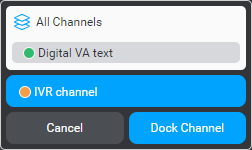
- Click Dock Channel.
A message appears prompting you to confirm your intention. - Click Confirm.
The channel is linked back to the default All Channels dock.
View channel-specific dialog flow
On the gear menu ![]() choose the desired channels.
choose the desired channels.
Global settings and behaviors
Project settings example showing default confirmation settings
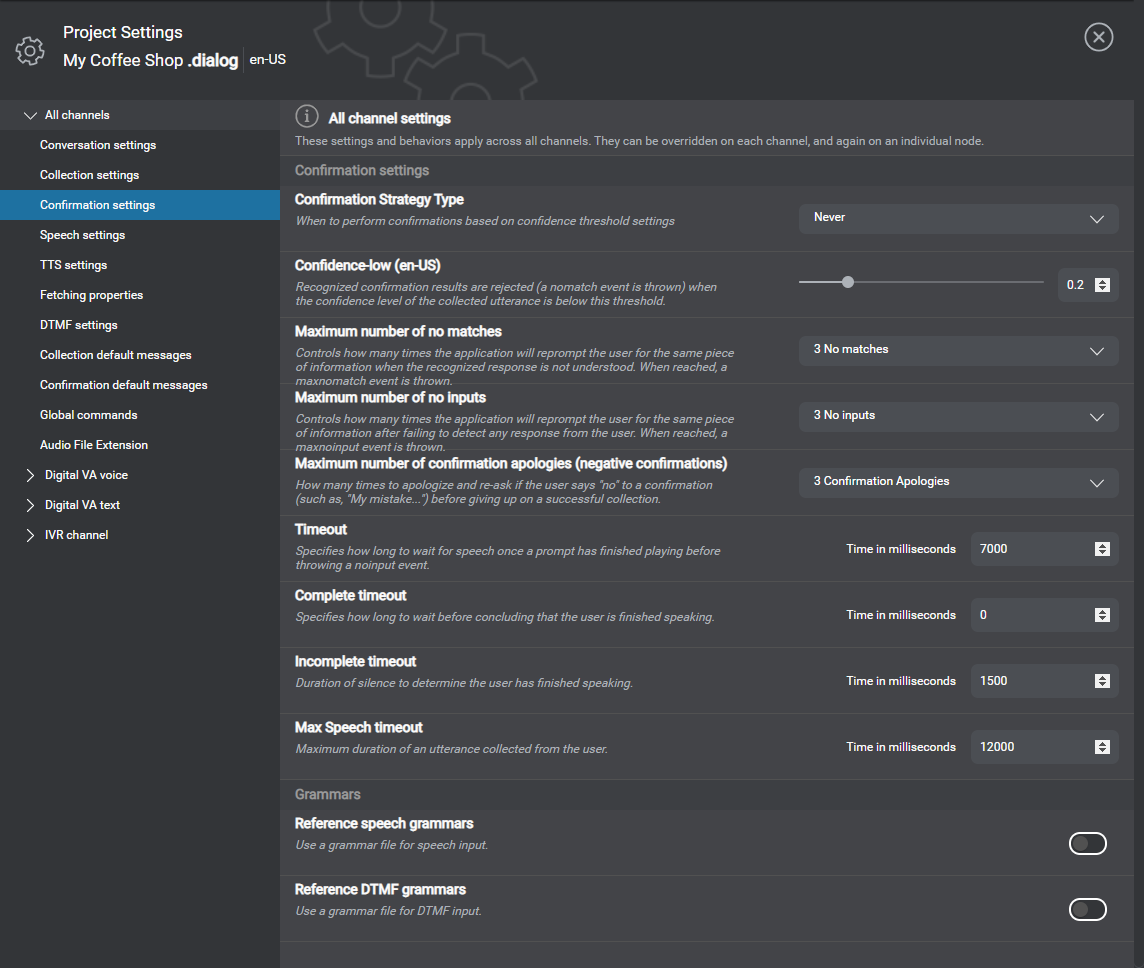
Global settings define common functionality such as error recovery and command handling. They determine how your application handles commands and events, and they define confirmation and recovery behaviors. You can define settings and behaviors for your application at different levels:
| Scope | Description |
|---|---|
| Global | The top-level settings apply to all channels, that is your whole project. |
| Channel | Settings you define for a specific channel take precedence over the global settings, in all parts of your project under the dialog flow for this channel. |
| Entity | Settings and behaviors you define for a specific entity will apply at any question and answer node where this entity might be collected, in the context of a specific channel. In an open dialog application where a question router node handles multiple entities to be collected, any of the question and answer nodes under the question router node is able to collect any of the entities. In such applications, setting entity behaviors at a specific question and answer node would not be sufficient. |
| Component | Event handling and error recovery behaviors you define for a specific component take precedence over the default behaviors set in the Start node of your project. Component-specific behaviors are set in a component’s Enter node. |
| Node | You can override some settings at the node level, for individual question and answer nodes and message nodes. Node-level settings take precedence over the global settings and any component-level overrides. |
| Message | You can prevent users from interrupting specific messages by disabling barge-in at the message level, in the Messages resource panel. |
Use the Project Settings panel to configure global behaviors for your whole project, and overrides for specific channels and for specific entities in your project. To open the Project Settings panel, click the gear icon ![]() and, under Project, choose Settings.
and, under Project, choose Settings.
The Project Settings panel is organized into these categories:
| Category | Description |
|---|---|
| Conversation settings | Set how many times the application will try to collect the same piece of information (intent or entity) before giving up. |
| Collection settings | Set the low-confidence threshold, below which the application rejects a collected utterance and throws a nomatch event, the high-confidence threshold above which it is not necessary for the application to prompt for confirmation, the number of nomatch event before the application throws a maxnomatch event, and how many times the application will try to collect the same piece of information after failing to detect any response from the user. You can also choose whether the initial message is to be used, or not, after nomatch and noinput recovery messages at question and answer nodes. You can set different high- and low-confidence thresholds separately, for each entity in your project. In a multilingual project, you can set different confidence thresholds separately, for each language. |
| Confirmation settings | Set the confirmation strategy for entities, including the low-confidence threshold below which the application rejects a collected utterance at the confirmation step and throws a nomatch event, and how many times the application will try to collect the same piece of information after the user responds negatively to the confirmation question. In multilingual projects, you can set different low-confidence thresholds separately, for each language. In projects meant to support a VoiceXML application, you can specify GrXML grammars—available at the project level only—for speech and DTMF confirmation interactions. When specified, confirmation grammars apply to all channels. |
| Speech settings | Set the desired recognition speed and sensitivity, the weight for the ASR domain language model, and the default barge-in type (speech vs. hotword). Barge-in is enabled by default, and can be disabled for individual messages in the Messages resource panel, or at the node level (in the speech settings of a question and answer node, or in the settings of a message node). |
| TTS settings | Choose the desired voice per language, including gender and quality, for the text-to-speech engine. No default values. Only available in projects with channels that support the TTS modality. |
| Fetching properties | Set how long to wait before delivering a latency message when a data access request is pending (fetch delay, default is 500 ms), and the minimum time to play the message once started (fetch minimum, default is 0 ms, applies to audio messages only). Available at the global (all channels) level, and at the node level for data access nodes. |
| DTMF settings | Only available in projects with channels that support DTMF input. |
| Grammars | Specify, for each channel, whether to allow referencing external speech or DTMF grammars in question and answer nodes. Only available at the channel level. |
| Collection default messages | Add default messages to handle situations when your application fails to recognize the user’s utterance, when it fails to detect any utterance from the user, and when it reaches the maximum number of turns, nomatch events, or noinput events. |
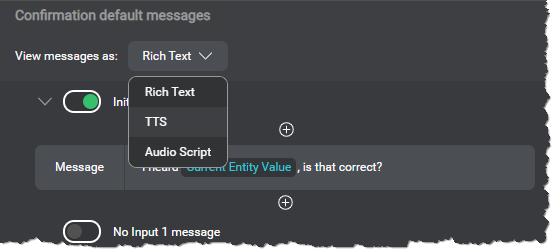
| Confirmation default messages | Add default messages to handle confirmation for entities, including recovery behaviors at the confirmation step. Creating confirmation default messages directly from the Project Settings panel allows you to reference the entity being collected in a generic way by using the Current Entity Value predefined variable. Note: Current Entity Value cannot be marked as sensitive, and therefore would never be masked in message event logs. If sensitive data is likely to be presented in confirmation messages, make sure to configure local confirmation messages, at every question and answer node that is set up to collect a sensitive entity. |
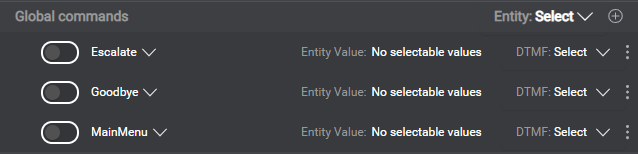
| Global commands | Global commands are utterances the user can use at any time and which immediately invoke an associated action; for example: main menu, operator, goodbye. Enable the commands you want to support and add new ones if desired. In projects meant to support a VoiceXML application, you can specify GrXML grammars for speech and DTMF command actions. Only available at the global (all channels) level. |
| Audio file extension | Extension to append to audio file IDs when exporting the list of messages: .wav (default), .vox, or .ulaw. Only available in projects with channels that support the Audio Script modality. |
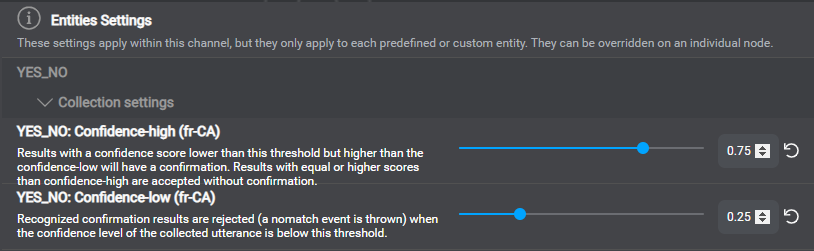
| Entities settings | Set a confirmation strategy for specific entities (predefined and custom), confirmation default messages, and other applicable settings in the collection, speech, TTS, and DTMF setting categories. Only available at the channel level. |
| Data privacy | Self-hosted environments: This setting category requires engine pack 2.1 (or later) for Speech Suite deployments; engine pack 3.9 (or later) for self-hosted Mix deployments. Marking a question and answer node as sensitive prevents all user input collected at this node from being exposed in application logs. At runtime, anything found in the interpretation results for input collected at a sensitive question and answer node will be masked in the logs (user text, utterance, intent and entity values and literals). This applies to NLU intent and entity collection, as well as to all events at that node: collection, recovery, confirmation, nomatch, noinput, max events, NO_INTENT, intent switching, and so on. For example, in the case of a question and answer node collecting a freeform entity, marking the node itself as sensitive will prevent the nomatch literal returned by the NLU service from being exposed in the logs. Only available at the node level for question and answer nodes. If the entity meant to be collected at a question and answer node that is marked as sensitive is likely to be used in dynamic messages or exchanged with an external system at runtime, make sure to also mark the entity itself as sensitive, to ensure that it will be masked in all dialog event logs. |
Detailed information appears on the panel itself, to help you understand the available settings. Click the Reset icon ![]() to revert any modified setting to its default value. Click the Close icon
to revert any modified setting to its default value. Click the Close icon ![]() to close the panel.
to close the panel.
Language-specific settings
Language-specific collection settings example for the YES_NO entity
To support language-specific settings and messages, choose the desired language from the menu near the name of the project.
Language-specific settings and messages are available in these categories:
- Collection settings (high- and low-confidence thresholds, at the project, channel and entity levels)
- Confirmation settings (low-confidence thresholds, at the project and channel levels)
- Speech settings (ASR domain language model weight, at the project, channel, and node levels)
- TTS settings (model, gender, voice, at the project and channel levels)
- Collection default messages (at the project and channel levels), recovery messages (at the node level)
- Confirmation default messages (at the project, channel, and entity levels), confirmation messages (at the node level)
Configure the weight of the ASR domain language model
Self-hosted environments: This feature requires version 1.3 of the Dialog service.
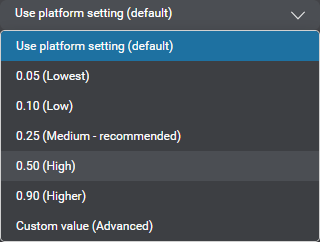
This setting lets you tune the weight of the ASR domain language model built from samples defined in Mix.nlu, and referenced at runtime, when the Dialog service orchestrates with the ASR service. This is a language-specific speech setting, available at the project, channel, and node levels.
A value of 0.25 is appropriate for most purposes. In some use cases, increasing the weight to 0.50 might improve recognition accuracy for domain-specific vocabulary.
This is an advanced feature: setting the weight of the ASR domain language model very high or low can adversely impact ASR recognition accuracy.
- Navigate to Speech settings, under All channels, or under the desired channel if the weight you want to configure is for a specific channel.
- Expand the Domain Language Model weight list, and choose the appropriate value (between 0.05 and 1) for your application.
Configure TTS settings
You can configure global TTS settings, and channel-specific overrides, for each language in your project:
- Navigate to TTS settings, under All channels, or under the desired channel if the settings you want to configure are for a specific channel.
- Choose the desired quality model: Enhanced, or Standard.
- Choose the desired gender: Female, Male, Any, or Neutral.
- Expand the TTS voice list and choose the desired voice (use the search field to narrow down the list if needed).
Alternatively—for example, to specify a voice that doesn’t appear in this list but you know is installed in your Mix environment—click the field and type the name of the desired voice.
Tip: To clear this field, if needed, click and delete the voice name.
Configure collection default messages
You can define default messages to be used—globally, or for specific channels—when recognition events occur at the collection phase of question and answer nodes. See Define local recovery behaviors for more information on how these messages and other node-specific messages are used during a conversation.
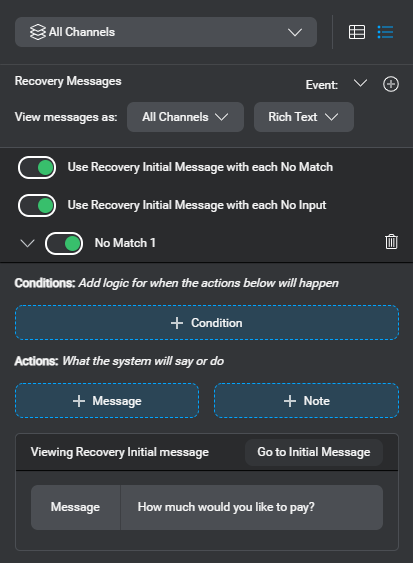
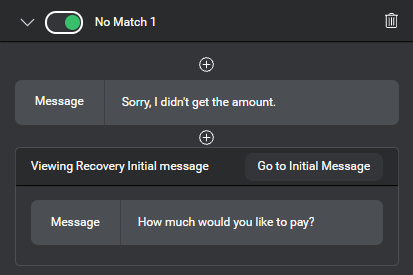
You can add collection recovery messages for these events: No Match 1, No Match 2, No Match 3, No Input 1, No Input 2, No Input 3, Max No Input, Max No Match, Max Turns.
Use the View messages as selector to review any message variations by modality, directly on the compact messages.

| Recovery message | Description |
|---|---|
| No Match 1, No Match 2, No Match 3 pre-messages | To set some context before prompting the user again, in case of a nomatch event—for example Sorry, I didn't get that. (with appropriate variations for the second and third nomatch events) |
| No Input 1, No Input 2, No Input 3 pre-messages | To set some context before prompting the user again, in case of a noinput event—for example Sorry, I couldn't hear you. (with appropriate variations for the second and third noinput events) |
| Max No Input, Max No Match, Max Turns | You might, for example, notify the user that the conversation is about to end, due to the lack of usable input |
Configure confirmation default messages
You can define default messages to be used when recognition events occur at the confirmation phase of question and answer nodes. See Define local confirmation behaviors for more information on how these messages and other node-specific messages are used during a conversation.
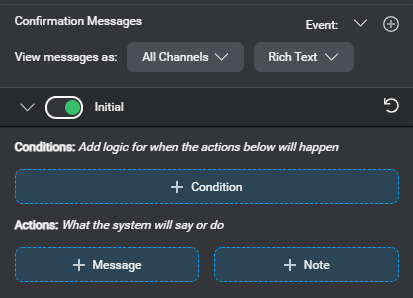
You can add global, channel-specific, and entity-specific confirmation messages for these events: Initial, No Match 1, No Match 2, No Match 3, No Input 1, No Input 2, No Input 3, Yes to confirm, No to confirm.
Use the View messages as selector to review any message variations by modality, directly on the compact messages.
| Confirmation message | Description |
|---|---|
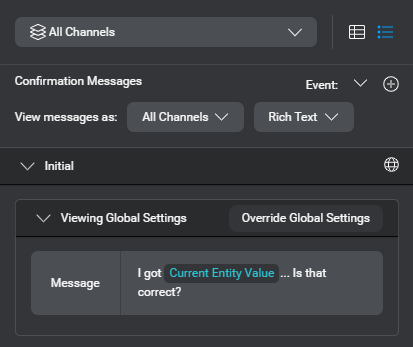
| Initial | To prompt the user for a confirmation—for example, I understood X is that correct? where X is the entity being collected |
| No Match 1, No Match 2, No Match 3 | To prompt the user again in case of a nomatch event—for example Sorry, I didn't get that. Was it yes or no? (with appropriate variations for the second and third nomatch events) |
| No Input 1, No Input 2, No Input 3 | To prompt the user again in case of a noinput event (with appropriate variations for the second and third noinput events) |
| Yes to confirm | To acknowledge a yes answer to the confirmation question—for example, Awesome, got it! |
| No to confirm | To apologize following a no answer to the confirmation question—for example, Sorry, my mistake… |
Configure global commands
Global command settings example
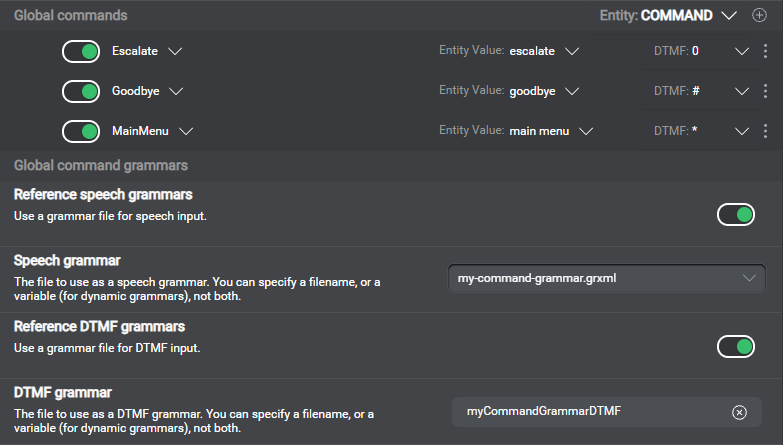
For your application to support global commands, you must reserve an entity to hold the recognized command values you want your application to support. Three predefined events—Escalate, MainMenu, and Goodbye—are available, which you can map to specific values of your global command entity. To support additional commands, you must add both a custom event and the command entity value meant to trigger the event.
Once you have enabled global commands, you can add handlers for any events those commands are meant to trigger, in the Start node of your dialog design, or in the Enter node of a component, for component-level handling. If you want some commands to be handled locally, at a specific question and answer node, configure command overrides. Commands that are only meant to be handled locally do not require a companion event. In a question and answer node, such commands are handled through system actions, just like intents and entity values.
Enable global commands
- Add a list entity—for example, COMMAND.
- Add literals for your entity—for example: Literal “goodbye” for value goodbye; “agent” and “operator” for agent; “main menu” for main_menu.
- In Mix.nlu, add at least ”goodbye” as a sample under the NO_INTENT intent, and annotate it with the COMMAND entity.
Note: This is a workaround to prevent “goodbye” from being recognized as a value for a global entity that Mix.dialog does not yet support. - In Mix.dialog, open the Project Settings panel, expand All channels, and click Global commands.
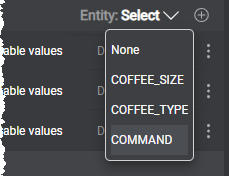
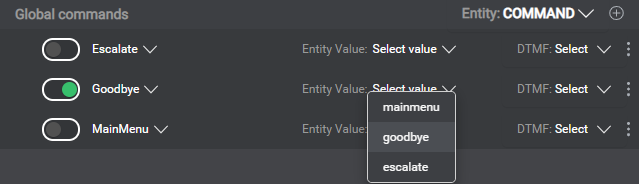
- Expand the Entity list and choose the entity you defined at step 1.
Note: This entity becomes a reserved entity. You cannot assign its value to a variable or use it in dynamic messages. - Enable a command (for example, Goodbye), and choose the entity value (goodbye) that represents this command.
- If the project has channels that support DTMF interaction, choose a DTMF key for this command, if desired.
Note: Don’t set DTMF mappings for your global command entity values, if you will be using an external DTMF grammar (see Specify grammars for commands). - Proceed in the same fashion for the other commands you want to enable.
Add a global command mapping
- Click the Add icon next to the Entity selector.

A new row appears.

- Choose the event for the command you want to enable.
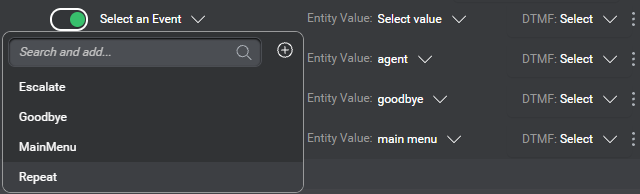
Tip: Use the search field to narrow down the list if needed. If your project does not yet have the desired event, you can create it on the fly. - Choose the corresponding entity value, and a DTMF key if your project supports DTMF interaction.
Your new global command is enabled by default.
Note: Don’t set DTMF mappings for your global command entity values, if you will be using an external DTMF grammar (see Specify grammars for commands).
Remove a global command mapping
Click the More icon ![]() for the global command mapping you want to delete and choose Delete.
for the global command mapping you want to delete and choose Delete.
Specify grammars for commands
In a project meant to support a VoiceXML application, specify any required speech or DTMF grammar references for your global commands. An external DTMF grammar is required if you want your VoiceXML application to support sequences of digits, or dynamic DTMF options.
- In the Project Settings panel, expand All channels, and click Global commands.
- Scroll down to the Grammars section.
- Turn on the desired option: Reference speech grammar, or Reference DTMF grammar.
A new field appears. - Expand the field, and:
- Enter the name of the desired grammar file, including the extension (for example, my-command-grammar.grxml).
- Choose the variable that is meant to hold a dynamic grammar reference at runtime.
Tip: Use the search field to narrow down the list if needed. If the variable you want to use is missing, you can create it on the fly, and then use it immediately.
- (Optional) Export the grammar specification document, to be used by the VoiceXML application, if desired.
Create a grammar reference variable on the fly
When setting a dynamic reference for a global command grammar, a confirmation grammar, or an entity grammar, you can create the required variable directly from the search field at the top of the variables list.
- Click the search field.
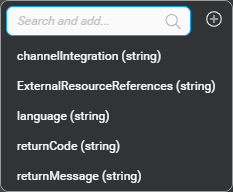
- Enter a name for the new variable.
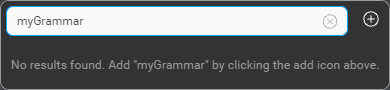
Note: Variable names are limited to letters (A-Z, a-z), digits (0-9), the dollar sign ($) and the underscore (_). They must not start with a digit. The name must be unique across all intents, entities, and variables in your project. - Click the Add icon .
The new variable appears in the list, with an indication that its type is string.
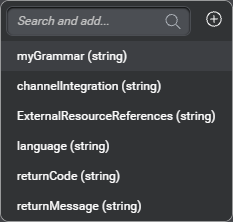
- Choose the new variable.
Specify grammars for confirmation
Speech confirmation GrXML grammar example
<?xml version="1.0" encoding="UTF-8"?>
<grammar version="1.0" xml:lang="en_us" xmlns="http://www.w3.org/2001/06/grammar" tag-format="swi-semantics/1.0" root="_ROOT_">
<meta name="swirec_compile_parser_with_weights" content="1"/>
<meta name="swirec_normalize_to_probabilities" content="1"/>
   <rule id="_ROOT_" scope="public">
      <one-of>
         <item>
           <ruleref uri="#vocab"/>
           <tag>
              SWI_meaning=vocab.V;
              nuance_BOOLEAN=vocab.V;
           </tag>
         </item>
      </one-of>
   </rule>
   <rule id="vocab">
        <one-of>
            <item> yes <tag> V='true' </tag> </item>
            <item> no <tag> V='false' </tag> </item>
        </one-of>
    </rule>
</grammar>
DTMF confirmation GrXML grammar example
<?xml version="1.0" encoding="UTF-8"?>
<grammar version="1.0" xml:lang="en_us" mode="dtmf" xmlns="http://www.w3.org/2001/06/grammar" tag-format="swi-semantics/1.0" root="_ROOT_">
<meta name="swirec_compile_parser_with_weights" content="1"/>
<meta name="swirec_normalize_to_probabilities" content="1"/>
   <rule id="_ROOT_" scope="public">
      <one-of>
         <item>
           <ruleref uri="#vocab"/>
           <tag>
              SWI_meaning=vocab.V;
              nuance_BOOLEAN=vocab.V;
           </tag>
         </item>
      </one-of>
   </rule>
   <rule id="vocab">
        <one-of>
            <item> 1 <tag> V='true' </tag> </item>
            <item> 2 <tag> V='false' </tag> </item>
        </one-of>
    </rule>
</grammar>
For projects meant to support a VoiceXML application, Mix lets you specify GrXML grammars, for speech and DTMF confirmation interactions. An external DTMF grammar is required if you want your VoiceXML application to support sequences of digits, or dynamic DTMF options. Confirmation grammars must return either nuance_BOOLEAN='true' (for an affirmative user response), or nuance_BOOLEAN='false' (for a negative user response).
- In the Project Settings panel, expand All channels, and click Confirmation settings.
- Scroll down to the Grammars section.
- Turn on the desired options: Reference speech grammar, or Reference DTMF grammar.
- If the VoiceXML application will support DTMF confirmation, choose the desired DTMF keys for Yes and for No.
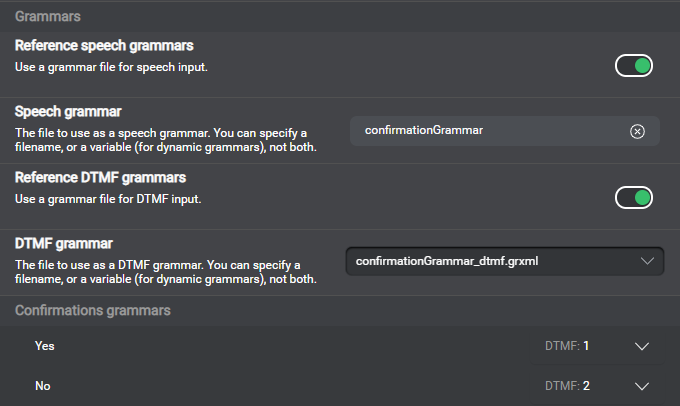
Alternatively, use the the grammar filename field to either specify a filename or choose a variable, as needed:- Enter the name of the desired grammar file, including the extension (for example, my-confirmation-grammar.grxml).
- Choose the variable that is meant to hold a dynamic grammar reference at runtime.
Tip: Use the search field to narrow down the list if needed. If the variable you want to use is missing, you can create it on the fly, and then use it immediately.
Design a dialog flow
In Mix.dialog, the component called Main handles the main dialog flow for your application. If your application involves NLU intents, use intent components to handle the intent-specific dialog flows. In addition to making your design more readable and easier to maintain, using separate components makes it possible for multiple designers to work concurrently on a dialog project.
In Main, the Start node is where the application starts. In other components, the dialog flow proceeds from the Enter node until it returns back to Main.
When designing a multichannel application you can define channel-specific messages or channel-specific branches in the dialog flow.
Dialog design elements
A dialog design comprises nodes that perform operations such as prompting the user, evaluating a response, retrieving information from a backend system, or transferring the user to a live agent for assistance.
Mix.dialog provides several types of nodes that each perform a specific kind of operation. The node types are identified by distinctive icons.
| Icon | Node type | Description |
|---|---|---|
 |
Start | Starts the conversation |
 |
Question & Answer | Listens for and recognizes user responses |
 |
Message | Performs non-recognition actions, such as playing a prompt, assigning a variable, or defining the next node in the dialog flow |
 |
Decision | Determines the next node in the dialog flow |
 |
Data Access | Exchanges information with a backend system |
 |
Question Router | Specifies multiple pieces of information to be collected, and determines the next node in the dialog flow, based on the information collected so far |
 |
Intent Mapper | Handles data for NLU/call routing menus |
 |
SMS | Not yet available |
 |
Not yet available | |
 |
Component call | Temporarily passes control to another component |
 |
Enter | Enters the part of the dialog flow in the current component |
 |
External Actions | Supports actions to be performed when ending a conversation, transferring to another system, or escalating to a live agent, and allows exchanging information with an external system via a client application |
 |
Transfer | Deprecated—In legacy projects, please replace any transfer nodes with external actions nodes |
 |
End | Deprecated—In legacy projects, please replace any end nodes with external actions nodes |
Set up the Start node or an enter node
Start node properties example
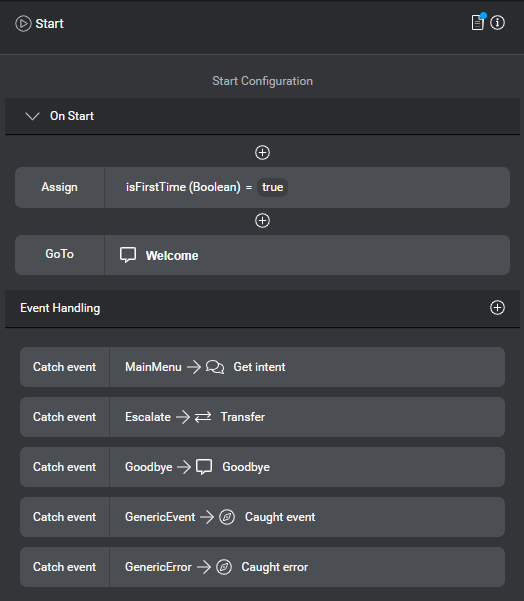
The Start node is where your application starts. Similarly, an Enter node is where a specialized component of your application starts. Neither support interaction with the user but you can use them to perform variable assignments. Remember that variables in Mix.dialog have a global scope. You cannot rename the Start and Enter nodes.
The Start node is also where you set default behaviors for handling events and errors that might occur at any question and answer nodes in your project. Event handlers you define in the Node properties pane for your project’s Start node have a global scope; that is, they can catch events associated with global commands, recognition events, collection events, custom events, and so on. Event handlers you define in the Enter node for a component are limited to catching events that occur in the context of the specific component. Component-level event handlers have precedence over global event handlers in your project. You can configure local overrides for these behaviors at the node level for specific question and answer nodes.
Mix.dialog automatically connects the first node you drag onto the canvas to the Start node (in Main) or to the Enter node (in any other component). If you later want to connect the Start node (or an Enter node) to another node, drop the new node directly onto the canvas, if it is not there already, and change the GoTo transition of the Start (or Enter) node.
Click the Start node (in Main) or the Enter node (in any other component), to see its properties in the Node properties pane.
- Add any required variable assignments.
- Set a GoTo transition to the next node, if it is not already connected.
- Set default event handling and error recovery behaviors.
Add an event handler
Click the Add Event Handler icon
.

An event handler placeholder appears.
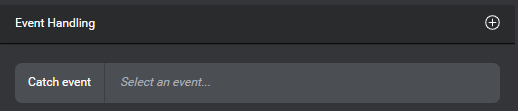
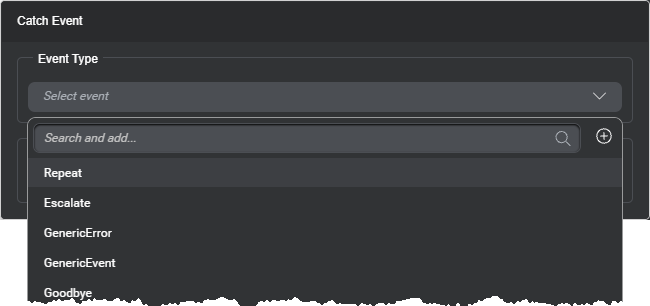
Click the placeholder. The Catch Event editor appears.
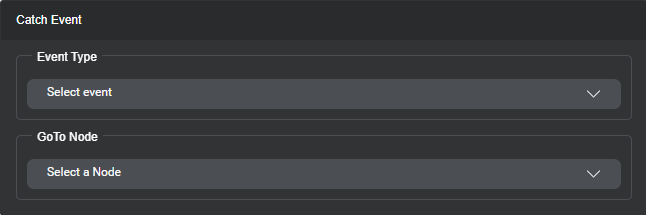
Choose the event to handle—for example, Escalate.
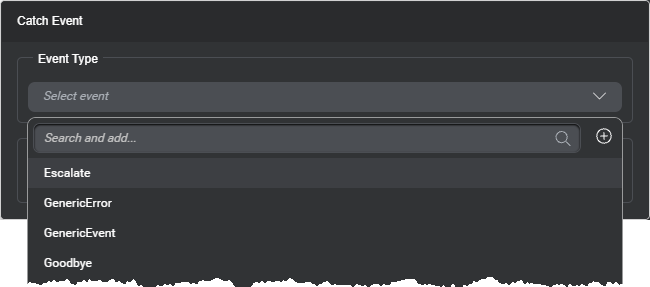 Tips: Use the search field to narrow down the list of events, if needed. If your project does not yet have the event you want to handle, you can create it on the fly.
Expand GoTo Node to specify the node (or component) that will catch the event.
For example, the event thrown by the Escalate command could be handled in a separate component named Escalation, in which case you would point the GoTo transition to a component call node for the Escalation component.
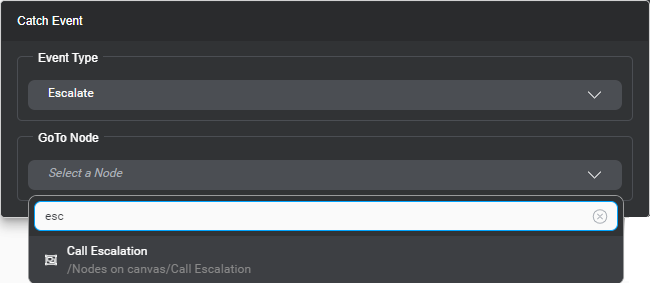
Tip: Use the search field to narrow down the list of nodes, if needed.Click outside the editor to close it.
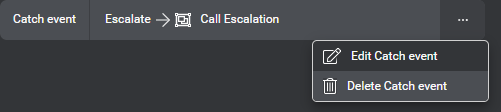
The Node properties pane shows the compact event handler.

Remove an event handler
- Bring your pointer to the right-hand side of the compact event handler you want to remove.
- Click the More options icon
 that appears and choose Delete Catch event.
Create a custom event on the fly
When setting up the Start node or an Enter node, you can create a custom event directly from the Catch Event editor. It is also possible to create a custom event directly from the event selector for a global command, and from the event selector when setting a throw event action.
- Click the search field.
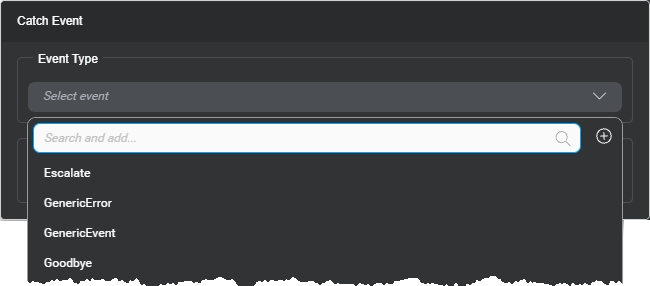
- Enter a name for the new custom event.
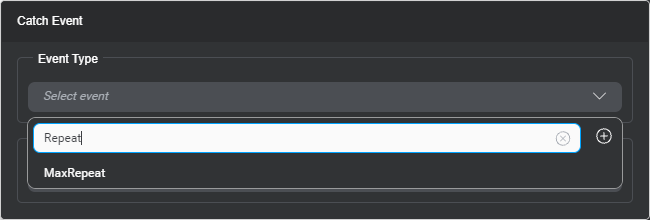
- Click the Add icon .
The new event becomes available.
- Choose the new event.
Set up a question and answer node
A question and answer node prompts the user for information, and then recognizes the user response. Click a question and answer node on the design canvas, to see its properties in the Node properties pane. The properties for a question and answer node are organized across these categories:
| Category | Description |
|---|---|
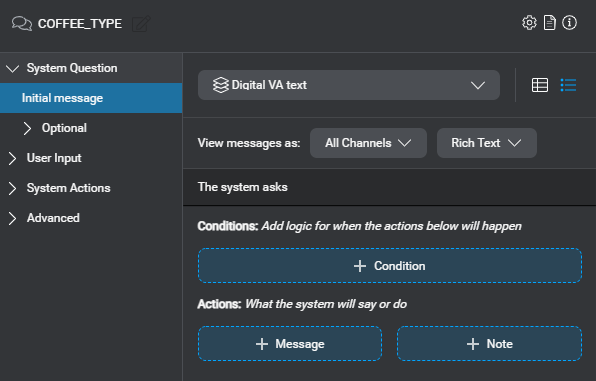
| System Question | The systems invites the user to say something—for example, How can I help you today? or Where are you flying from? You can set separate, channel-specific or conditional messages. For example, you might want a different wording for the system question, depending on the channel. If the dialog flow can come back to this node, you might use a reentry message. Add messages to handle confirmation, and recognition events (such as nomatch, maxnomatch) locally, if desired. Recovery messages and confirmation messages set at the node level override any corresponding collection default messages or confirmation default messages from your project settings. |
| User Input | Choose the type of information to collect: either an NLU intent, or an entity. For an entity, determine whether value-specific actions are required. In projects meant to support a VoiceXML application, if a question and answer node is meant to collect an entity whose values are determined by a speech grammar (as opposed to being subject to NLU), you can specify the required speech grammar for the appropriate channels. The ability to reference speech grammar files in question and answer nodes must be enabled in your project settings, for the appropriate channels. For channels that support DTMF interaction, you can map DTMF keys to entity values, or specify DTMF grammars. (The ability to reference DTMF grammar files in question and answer nodes is enabled by default, for channels that support DTMF. You can turn it off in your project settings.) You can configure interactive elements for values of a yes/no, Boolean, or custom entity. Only available in projects with channels that have interactivity enabled. Allow a question and answer node to recognize more values than those available for the intent or entity it is meant to collect, by defining command overrides, which extend the global command entity for your project. Command overrides also let you configure local node-specific handling for any values of the global command entity. |
| System Actions | Set where to go next, or throw an event. You can add messages, assign variables and define conditions to determine which actions and which transition are to be performed. A simple question and answer node meant to collect an entity typically returns to the question router node that handles the entities for an intent. |
| Advanced | Configure local event handlers for events that should be caught at this specific node, if any. Node-level event handlers take precedence over the global event handlers set in your project’s Start node, and any component-level overrides set in the Enter node for the component of this question and answer node. Specify a question router node to handle any captured entity or intent that is not the entity in focus for this question and answer node. Specify data to send to the client application. Configure node-level settings, if needed, to override global settings and default behaviors. Node-level settings include the Data privacy setting category, which allows marking a question and answer node as sensitive. |
System question properties
Add the system question
- Expand System Question and click Initial Message.
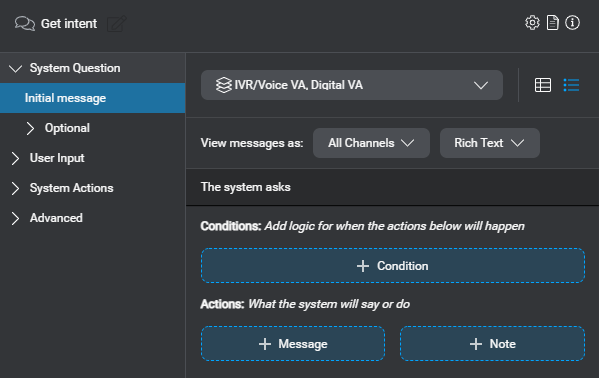
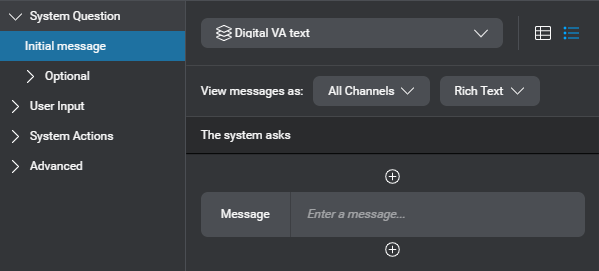
- Click + Message.
A message placeholder appears.

- Click the message placeholder.
The message editor appears.
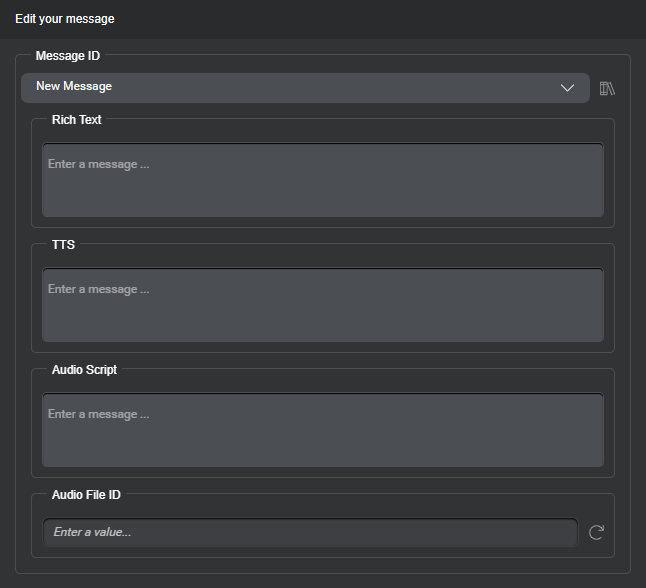
- Type the desired question—for example, How can I help you today?—, and any required variations for the modalities you want to support (Rich Text, TTS, Audio Script).
Tip: In the message editor, you can click the Library icon to open the Messages resource panel and add variations to your latency message, for other channels and modalities. - Click outside the editor to close it.
The compact message shows the text for the current channel and modality selections.
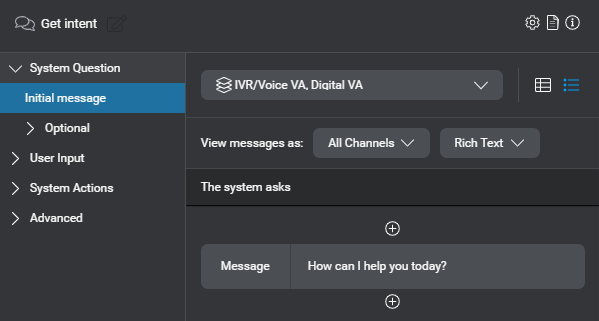
The message also appears on the question and answer node on the canvas.
- (Optional) Use the View messages as selectors to review any message variations, by channel and modality, directly on the compact message.
Note: Once you have selected a modality, your selection persists as long as the current channel supports it. If you switch to a context where the applicable channel doesn’t support the selected modality, the modality selector falls back to the first modality available for the current channel.
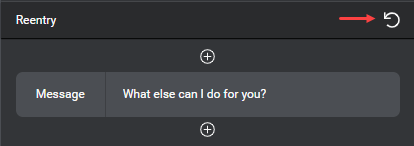
Add a reentry message
- Expand System Question, then expand Optional, and click Reentry Message.
By default, messages specified in the Initial Message section apply to reentry situations as well.
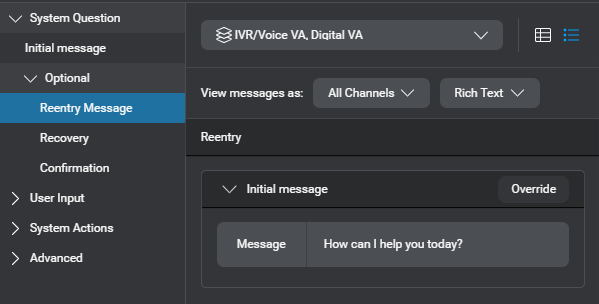
- Click Override.
A message placeholder appears.
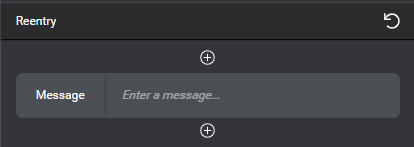
- Click the message placeholder.
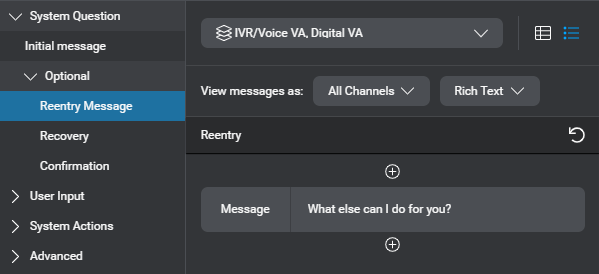
The message editor appears. - Enter the desired message—for example, What else can I do for you?
The second time your application reaches this node, and every time after that during a session, it will use this question instead of the initial message. - Click outside the editor to close it.
- (Optional) Use the View messages as selectors to review any message variations, by channel and modality, directly on the compact message.
Note: Once you have selected a modality, your selection persists as long as the current channel supports it. If you switch to a context where the applicable channel doesn’t support the selected modality, the modality selector falls back to the first modality available for the current channel.
Remove the reentry message
Click the Reset icon ![]() in the upper-right corner of the Reentry area.
in the upper-right corner of the Reentry area.
This node reverts to the default reentry behavior, that is, every time your application reaches this node, it will use the messages specified in the Initial Message section.
Define local recovery behaviors
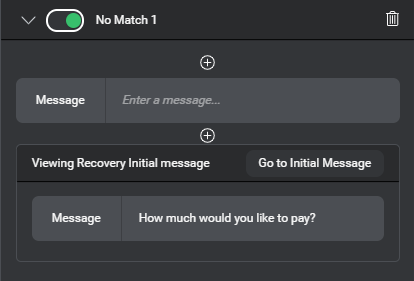
You can define messages to be used when recognition events occur at this node, to supplement any collection default messages defined for your project or for specific channels. When a recognition event happens at the collection phase for a question and answer node, recovery messages are issued in this order:
- Global pre-message (all channels), or a channel-specific override, if any
- Local message, if any
- The current node’s initial message, if enabled (for nomatch and noinput events only)
For example, when the first nomatch event happens at a question and answer node that collects a payment date, an application would issue: the global No Match 1 pre-message (for example, “Sorry.”), followed by the local No Match 1 message (“Say the date you'd like to post this payment, like October 5th. Or say Today.”), and finally repeat the node's initial message (“When would you like to make the payment?”).
- Expand System Question, then expand Optional, and click Recovery.
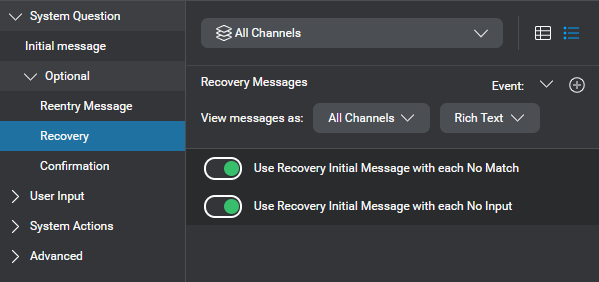
By default, dialog applications use the initial message set for a node, after any applicable global or channel-specific recovery messages. If you haven’t modified your project settings, both related switches are turned on, in this node’s properties. - If the local recovery behavior must be limited to a specific channel, choose the desired channel.
- If you do not want to use the initial message after the message set for a nomatch event, at this specific node, turn off Use Recovery Initial Message with each No Match.
- If you do not want to use the initial message after the message set for a noinput event, at this specific node, turn off Use Recovery Initial Message with each No Input.
- Add local recovery messages for recognition events, if desired.
Note: The number of recovery messages the application will be allowed to use at runtime for nomatch or noinput events is limited to three, but ultimately depends on the collection settings for your project. - (Optional) Use the View messages as selectors to review any message variations, by channel and modality, directly on the compact message.
Note: Once you have selected a modality, your selection persists as long as the current channel supports it. If you switch to a context where the applicable channel doesn’t support the selected modality, the modality selector falls back to the first modality available for the current channel.
Define local confirmation behaviors
You can define messages to be used at the confirmation step for this node, to supplement any confirmation default messages defined for your project or for specific channels.
- Expand System Question, then expand Optional, and click Confirmation.
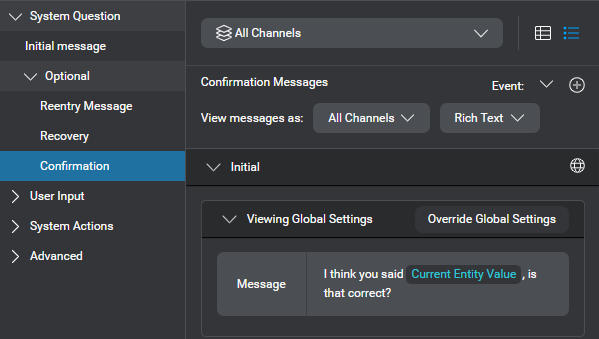
- If the local confirmation behavior must be limited to a specific channel, choose the desired channel.
- Add local confirmation messages—that is, the confirmation question, messages for recognition events at the confirmation step, and messages for acknowledging the answer (yes or no) to the confirmation question—, if desired.
- (Optional) Use the View messages as selectors to review any message variations, by channel and modality, directly on the compact message.
Note: Once you have selected a modality, your selection persists as long as the current channel supports it. If you switch to a context where the applicable channel doesn’t support the selected modality, the modality selector falls back to the first modality available for the current channel.
Add messages for local behaviors
You can add local recovery messages for recognition events that happen at a question and answer node during collection or confirmation. For the confirmation step, you can also define an initial message—that is, the confirmation question—and messages for acknowledging the answer (yes or no) to the confirmation question. See Configure collection default messages, and Configure confirmation default messages, for more information about the possible recovery and confirmation messages.
The Recovery section and the Confirmation section of the properties for a question and answer nodes show applicable global messages and local overrides, if any.
- To view a global message in the Project Settings panel, click the globe icon
 .
.
- To override a global message, click Override Global Settings, and then click Message.
- To disable the global message at the node level, turn off the switch.
- To remove a local override and revert to the corresponding global message, click the Reset icon
 .
.
To add a new local message:
- Choose the event for which you want to add a local message.
For example, let’s say you want to add a local collection recovery message for No Match 1.

- Click the Add icon .
If you're adding a collection recovery message for a nomatch or noinput event, and Use Initial Message… is enabled, the initial message for this node appears, for reference.
- Click + Message.
A message placeholder appears.
- Click the message placeholder.
The message editor appears.
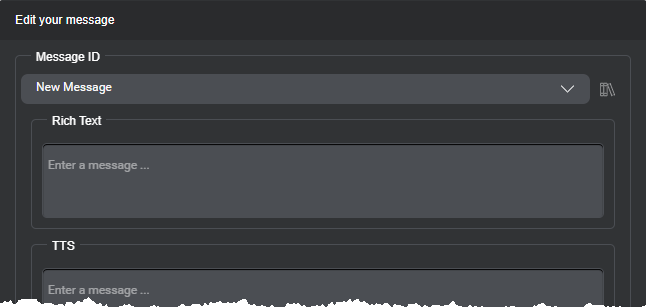
- Enter the desired message.
Alternatively, expand New Message, and choose an existing message from the list. - Click outside the editor to close it.
The first time your application fails to recognize the user response at this node, it will use this special message before repeating the initial message.
User Input properties
Choose the type of information to collect
Question and answer nodes support collecting intents and entities defined in your Mix project. The primary focus of a specific question and answer node is either collecting intents, or collecting a specific entity.
Collect intents
A question and answer node meant to collect the user intent usually works with a companion intent mapper node, which is responsible for directing the dialog flow to the intent component or generic component meant to handle the intent.
- Expand User Input and click Collect.
- Expand the selector, point to Collect Intent, and choose NLU for your project.
- Click Add Intent Mapper node.
This automatically connects the question and answer node to an intent mapper node.
Notice the intent mapper node, on the canvas, indicates the number of intents that have a global mapping from the NLU resource panel. - If you are ready to set up the intent mapper node, click its name next to Connected to.
Collect an entity
A question and answer node meant to collect an entity can work with a companion question router node, which is responsible for handling the collection of all entities required to fulfill a specific intent and also for switching the dialog flow to another intent component or generic component when required.
- Expand User Input and click Collect.
- Expand the selector, point to Collect Entity, and choose the entity to collect.
Tip: If your project does not yet have the entity you want to collect, you can create it on the fly.
The selected entity is now the primary focus of this question and answer node.
- Expand Advanced settings.
- If the current collection method is not List, turn on Edit collection method.
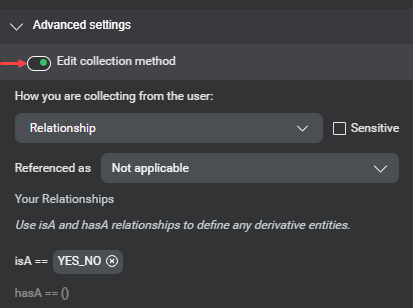
- If desired, you can use the list under How you are collecting from the user to change the collection method for this entity.
- If this node is meant to collect a list entity whose values are all meant to be handled the same way, turn off all Show in Actions switches.
- Otherwise, if the list entity to collect requires value-specific behaviors, turn on the Show in Actions switches for the desired values.
- If this node is meant to collect a list entity for which the set of values can only be fully determined at runtime, click the Dynamic check box if it isn’t already selected (see Dynamic list entities for more information).
- If this node is meant to collect an entity that will hold sensitive information that must be masked in application logs, click the Sensitive check box if it isn’t already selected.
- If this is an entity for which you want to be able to recognize anaphoras, choose the appropriate anaphora type from the list next to Referenced as.
- Optionally, if this node is in an intent component (or in a generic component meant to fulfill an intent) but wasn’t created directly from the question router node, choose a question router node to handle any captured entity or intent that is not the entity in focus at this point in the dialog flow.
Create an entity on the fly
When setting up a question and answer node, you can create an entity directly from the entity selector. This scenario shows how to add a Yes/No entity with its default isA relationship to the dialog predefined entity YES_NO. See Manage entities for more information.
- In the search field, type a name for the new entity (see Naming guidelines)—for example, myYES_NO.
- Click the Add icon .
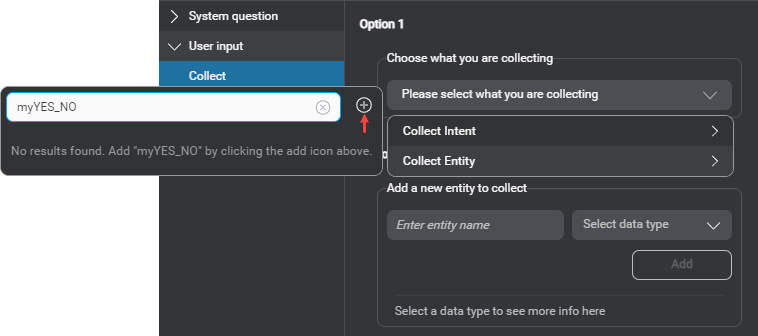
- Select the desired data type for this entity (in this case, Yes/No), from the list that appears in the upper-right area of the Node properties pane.
- Click Add.
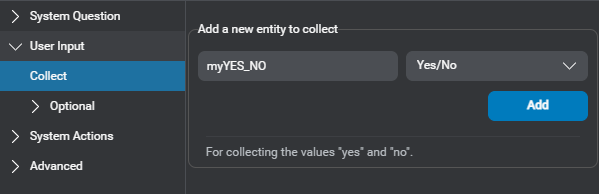
The new entity is now the primary focus of this question and answer node.
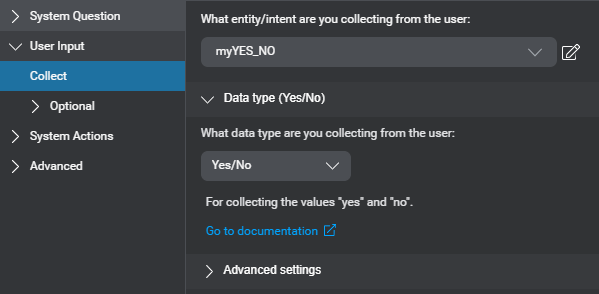
Specify grammars
Example of grammar settings, at a question and answer node—dynamic grammar reference (via a variable), for speech input; static grammar reference (filename) for DTMF input, the global command grammar reference for speech command overrides, and a node-specific grammar reference for DTMF command overrides
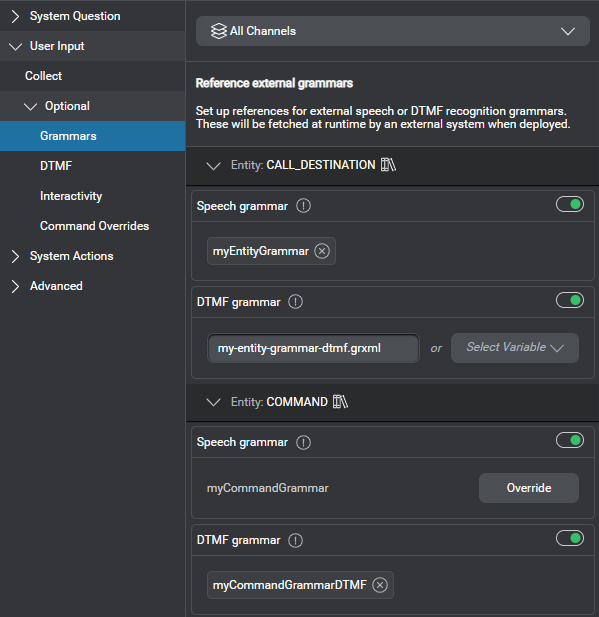
Mix supports external GrXML grammars. The options available for a specific channel depend on the modalities it supports. Grammar files must be placed in specific directories, relative to the client application, that is basePath/language/grammars/channel/, where basePath is the path to where the client application expects to find all required language-specific material (audio files and grammars), language is a directory named after the appropriate language code (for example, en-US, fr-CA), and channel is the name of the channel using the grammar files (or “default” for grammar files that apply to all channels).
Grammar references set in Project Settings for your global command entity apply to all question and answer nodes.
External DTMF grammars are required if you want your VoiceXML application to support sequences of digits, or dynamic DTMF options.
At a specific question and answer node, you can:
- Specify local speech and DTMF grammar references for all channels, which take precedence over any corresponding global grammar references
- Specify channel-specific grammar references, which take precedence over any local grammar reference
- Disable a global grammar reference locally for all channels
- Disable a grammar reference locally for a specific channel
- Reset a local grammar reference
Add a local grammar reference
- Expand User Input, then expand Optional, and click Grammars.
If you added command overrides at this node, a separate section appears for your global command entity, and it shows the global command grammar references from your project settings, if any.
Note: If you prefer to use a single grammar to support both the entity in focus and the command overrides, you can disable the global command grammar.
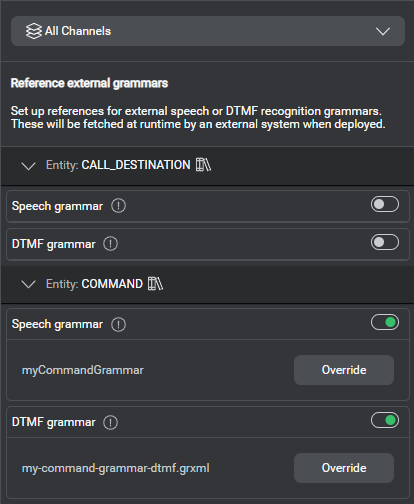
- If the grammar is for a specific channel, choose the desired channel.
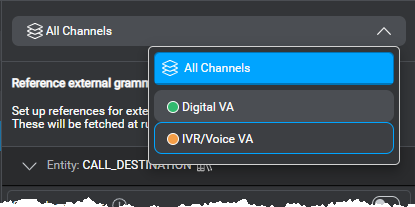
- Turn on the switch for the grammar reference you want to specify, if it is not on already.
- Click Override, if a grammar reference was already specified globally (or locally for all channels, and you are now setting a reference for a specific channel).
- Use the appropriate field to either:
- Enter the name of the desired grammar file, including the extension (for example, my-entity-grammar.grxml).
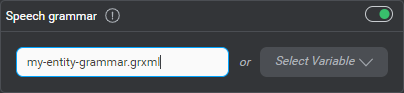
- Expand the variable selector, and choose the variable that is meant to hold a dynamic grammar reference at runtime.
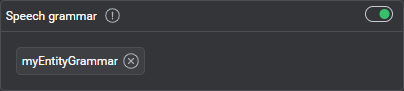
Tip: Use the search field to narrow down the list if needed. If the variable you want to use is missing, you can create it on the fly, and then use it immediately. (To remove a dynamic reference, click the Remove icon next to the variable's name.)
- Enter the name of the desired grammar file, including the extension (for example, my-entity-grammar.grxml).
Disable a grammar reference
- Choose the channel for which you want to disable the grammar, if it is not already selected.
- Turn off the switch for the grammar reference you want to disable.
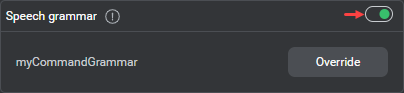
Reset a local grammar reference
Click the Reset icon ![]() .
.
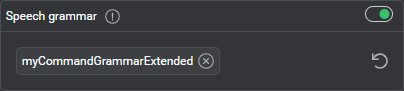
This restores the applicable grammar reference, if any, that was set at the nearest higher level.

Set DTMF mappings
Example of DTMF mappings at a question and answer node, including one for a command override
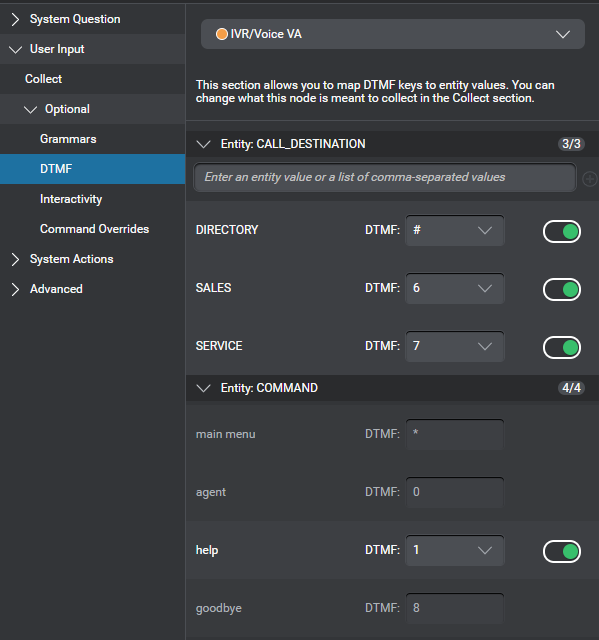
Setting DTMF mappings for entity values to be collected at question and answer nodes allows you to generate DTMF grammar specifications, to be used by a VoiceXML application. Use the Grammars tab of the NLU resource panel to export the DTMF grammar specification for your project.
To specify DTMF mappings:
- Expand User Input, then expand Optional, and click DTMF.
- If the entity for which you want to specify DTMF mappings has not yet been selected for collection at this node, use the list to select it.
If the entity does not yet exist, you can create it on the fly. - Choose the channel to which the DTMF mappings will apply, if it is not already selected.
Only channels that support DTMF are available for selection. - If this node is collecting a list entity, you can quickly add entity values on the fly, directly in the DTMF tab, as needed.
- Turn on the switch next to a value you want to map to a DTMF key.

- Choose the desired DTMF key for this entity value.
- Proceed in the same fashion until you have completed the mappings for all applicable channels.
- (Optional) Export the grammar specification document, to be used by a VoiceXML application, if desired.
Create an entity on the fly in the DTMF tab
When setting up a question and answer node, you can create the entity to collect directly in the DTMF tab.
- Expand the list, under What entity/intent are you collecting from the user.
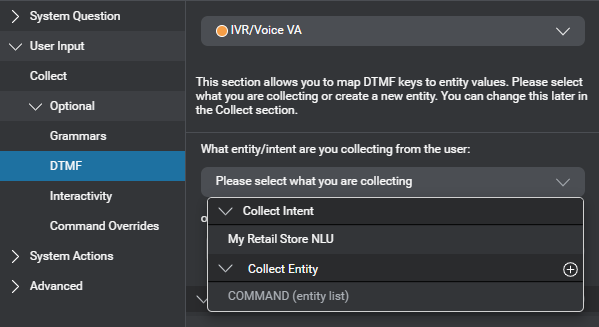
- Click the Add icon next to Collect Entity.
- Type a name for the new entity (see Naming guidelines)—for example, CALL_DESTINATION—and press Enter.
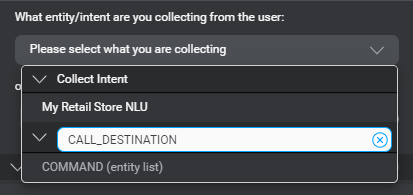
The new entity is now selected for collection at this node.
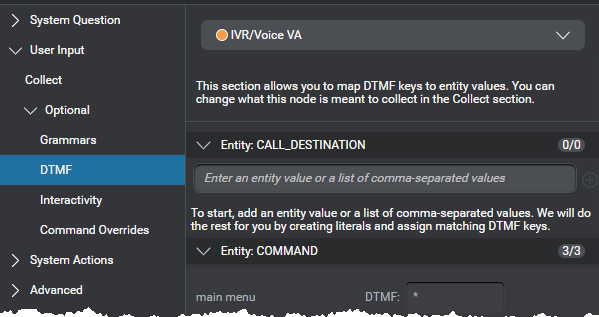
- If this node is meant to collect a Boolean, or a yes/no entity, navigate to the Collect section to set the required data type.
Add entity values on the fly in the DTMF tab
- Type one or more comma-separated values, in the field under the entity name, and press Enter.
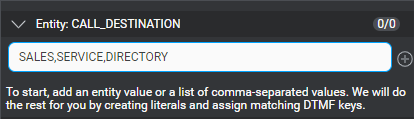
This creates the new values, and automatically maps them to DTMF keys.
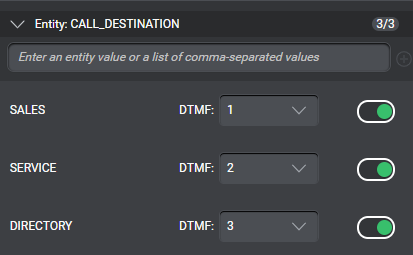
- Turn off any mappings you wish to disable.
Define interactive elements
Question and answer node interactivity properties example
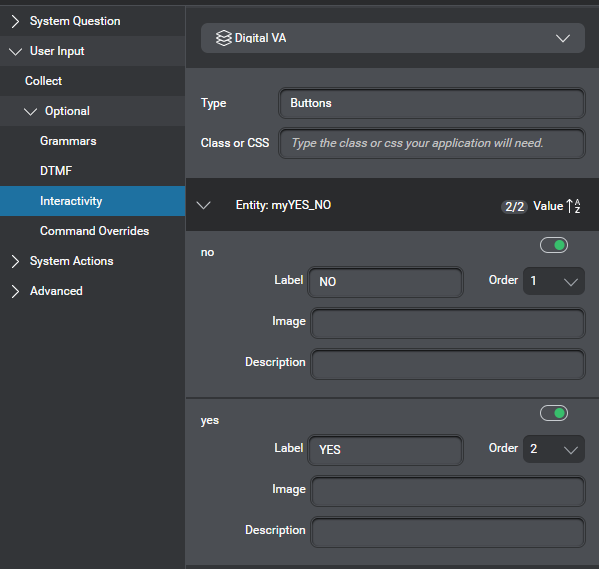
In a project with channels that support interactivity, you can configure interactive elements such as buttons, for question and answer nodes meant to collect Boolean, yes/no, or custom entities.
- Expand User Input, then expand Optional, and click Interactivity.
- In a multichannel project, if interactive elements must be limited to a specific channel, undock the desired channel (if it isn’t already undocked) and select it.
- (Optional) In the upper fields, enter the type of your interactive elements, such as Buttons, List, or Carousel, and the name of a class or inline CSS code to format them, if desired.
Your dialog application will pass this information on to the client application. - Turn on the switches for the values for which you want to create interactive elements.
- For each interactive element, enter:
- A label, such as the text to show on a button—optional if a link is specified
- A link (URL or relative path) for the image to use on a button—optional if a label is specified
- A description—optional
- (Optional) Change the order of the elements, if needed.
- If your project supports multiple languages, use the menu near the name of the project to switch to another language, and proceed in the same fashion until you have configured every interactive element required for your application.
Configure command overrides
If you want a question and answer node to be able to recognize more values than those available for the intent or entity it is meant to collect, or to handle specific commands locally, configure command overrides. This allows you to set up specific actions (including interactive elements and DTMF mappings, as required) for values of your project's global command entity. In projects meant to support a VoiceXML application, this also allows you to specify local GrXML grammar references for your command entity to support speech and DTMF interaction at this question and answer node.
For example, at a node collecting a yes/no answer, you might want to allow users to respond: I don't know, which the predefined YES_NO entity does not directly support. Another example: at a node collecting a library card number (digits), you could allow users to say I don’t have it, and let the application fall back to asking for a phone number.
Add a command override
To override the global handling for an existing command, support a new command locally, or supplement the intent or entity in focus at this node:
- Expand User Input, then expand Optional, and click Command Overrides.
- If the value you want to use does not yet exist, you can add it directly in the field above the table.
You can enter multiple values at once, if desired.
Remember to add literals for the new values, and train your NLU model to support the new values.
Note: In a multilingual project, you must add each desired value separately, for each language, with the exact same spelling.
Tip: Click the Library icon, next to the name of your command entity to open the Entity tab of the NLU resource panel.
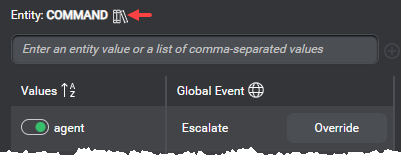
- Click the Override button, next to each value you want to handle locally, at this node.
- Define interactive elements for the specified command entity values, if desired.
- Set DTMF mappings for the specified command entity values, if desired.
- If your dialog design is meant to support a VoiceXML application, specify local speech and DTMF grammar references for your command entity, as needed.
Remove a command override
- Click the Reset icon next to the override you want to remove.
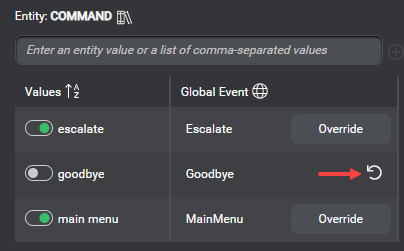
- Click Yes to dismiss the message that prompts you to confirm your intention.
This deletes all system actions, any interactive element, and any DTMF mapping defined in this node for this entity value. Removing the last command override at this node removes any local grammar references specified for the command entity as well.
If there is a global command configured for this entity value, removing the override restores the global handling for the command at this node; otherwise, if the value is not configured as command, this node will no longer recognize it.
Disable a globally-enabled command at this node
Turn off the switch for the value associated with the command.
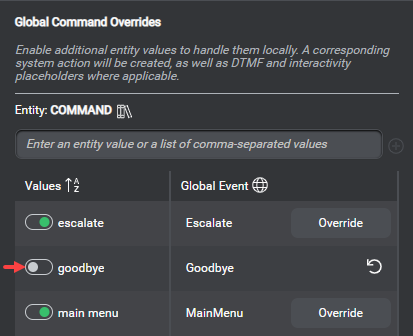
Enable a globally-disabled command at this node
Turn on the switch for the value associated with the command (or click Override).
System Actions properties
System Actions properties example in a question and answer node collecting a list entity
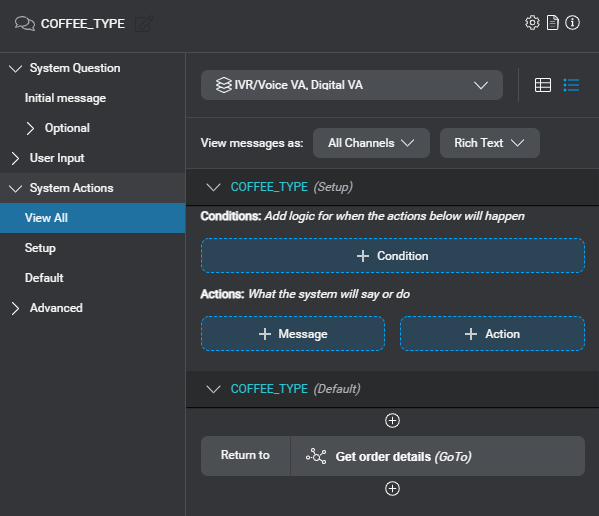
If this node is meant to collect an entity handled by a question router node, you must eventually set a Return to transition back to the question router node that handles the entity in focus for this node. You can do it directly from the question and answer node, or from another node further downstream.
If this node is meant to collect a Boolean entity, a yes/no entity, or a list entity that requires value-specific actions, the System Actions tab allows you to set messages and actions, separately, for each entity value. If desired, you can:
- Use the Setup section to set common messages and assign actions, to be performed regardless of the captured value.
- Use the Default section to set messages and actions to be performed if the captured value does not have its own section (that is, either it doesn’t require specific actions or it’s a new value and maybe you have yet to set up specific actions for it).
If this node is meant to collect a list entity that doesn’t require any value-specific behavior, use the Default section to set the desired messages and actions. (You can ignore the Setup section.)
Advanced properties
Set local event handlers
- Expand Advanced and click Event Handling.
- Add event handlers, as needed.
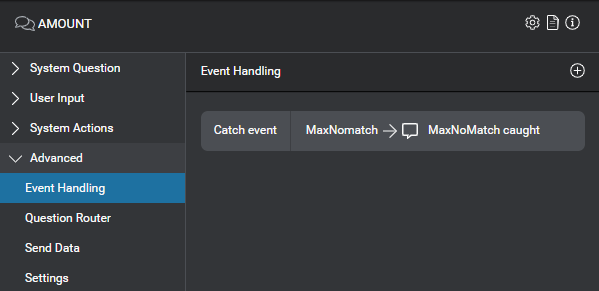
On the canvas, the names of any events for which you added local handlers appear below the main transition for the question and answer node.

Set a question router reference
The question router reference field identifies the question router node that is to handle any captured entity or intent that is not the entity in focus for this question and answer node.
When you create a node directly from the question routing table of a question router node, or by dropping it from the design palette onto the corresponding area of the question router node on the canvas, the question router reference field automatically points to the originating question router node.
However, in some cases, you must set the question router reference manually:
- If you first dropped the question and answer node directly onto the canvas
- If you added another node (for example, a decision node or a data access node) between the question router node and the question and answer node
- If this question and answer node was previously linked to a different question router node
A missing (or stale) reference will prevent intent switching.
Incidentally, in an intent component that includes question and answer nodes collecting entities that are not handled by the question router node, you can use the question router reference to allow intent switching at these nodes as well. For example, a question and answer node that prompts the user to confirm they really want to stop fulfilling the active intent and switch to another one does not automatically support intent switching itself. Setting the Question Router Reference field will allow the dialog flow to jump to the specified question router node whenever the captured value is not the yes/no answer expected at this question and answer node. The question router node will then handle the intent switching, assuming it is configured accordingly.
To set the reference:
- Expand Advanced and click Question Router.
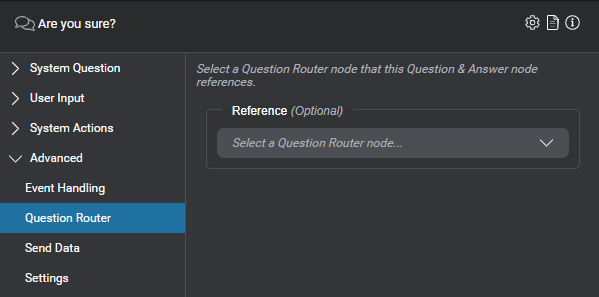
- Expand Reference, and choose the desired question router node.
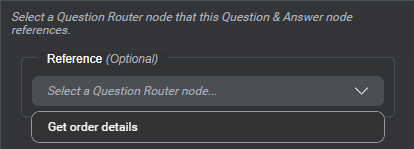
Send data to the client application
- Expand Advanced and click Send Data.
- Click + Variable/Entity.
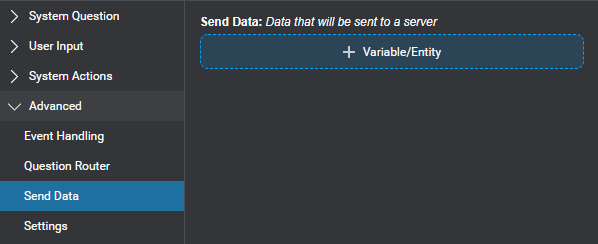
A compact Send placeholder appears.
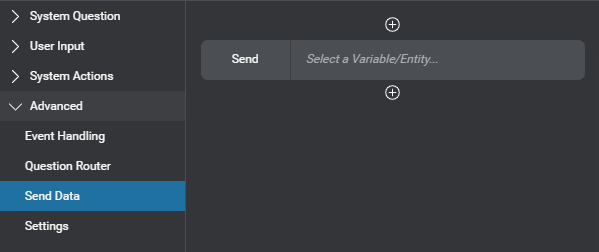
- Click the placeholder.
An editor appears. - Use the selector to choose an element you want to send to the client application.
You can send a variable, an entity, the active intent’s value, confidence score, and literal, or the interpretation results from the last collection and confirmation steps (see Predefined variables).
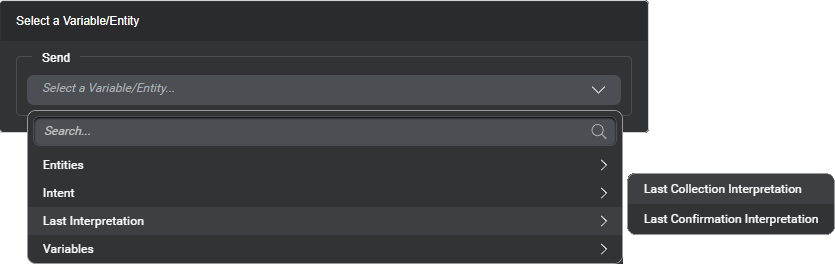
Tip: Use the search fields to narrow down the lists if needed. If a variable you want to send is missing, you can create it on the fly, and then use it immediately. - Click outside the editor to close it.
The Node properties pane shows the compact Send parameter.
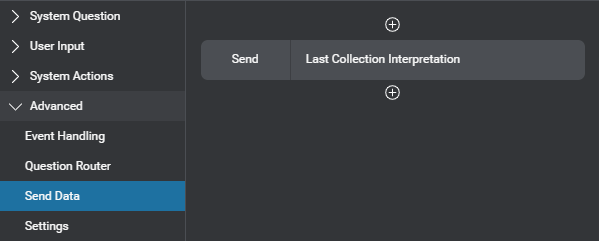
- If you want to send another element, click the Add icon , below or above a Send parameter, and then click Variable/Entity.
A compact Send placeholder appears. Click the placeholder and use the selector in the editor that appears, as described above. - Proceed in the same fashion until you have added all the variables, entities, or other elements you want to send to the client application.
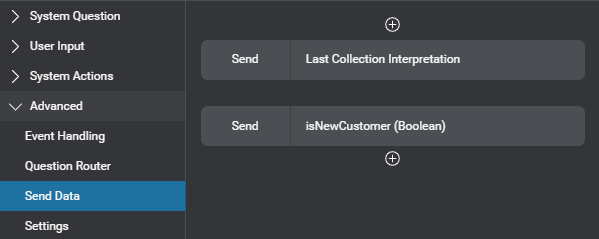
You can reorder and remove Send parameters, if desired.
Configure node-level settings
Self-hosted environments: In the Speech settings category, setting the ASR domain language model weight requires version 1.3 of the Dialog service.
- Expand Advanced and click Settings.
- If your project supports multiple languages, and the setting you want to configure is language-specific (for example, the ASR domain language model weight), use the menu near the name of the project, to choose the appropriate language.
- If the setting must be limited to a specific channel, choose the desired channel.
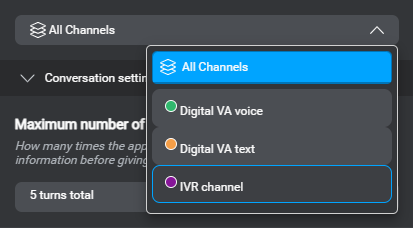
By default, node-level settings apply to all channels. - Expand the category for the setting you want to configure.
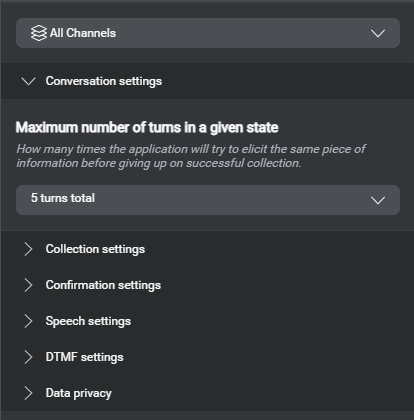
- Change the setting as required.
Notice the description changed from italics to roman text, and the Reset icon appears.
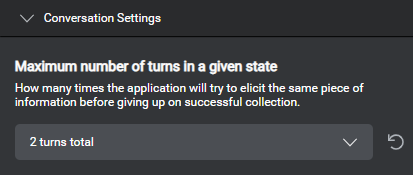
These changes indicate an override to the default behavior inherited from the channel or project settings.
Note: In the Data privacy setting category, which is only available at the node level, since Sensitive data can only be either on or off, the Reset icon is not required and therefore doesn’t appear when you turn on this option. - Proceed in a similar fashion until you have configured all the required node-level settings.
Detailed information appears in the Node properties pane, to help you understand the available settings.
Tip: Click the Reset icon ![]() to remove an override.
to remove an override.
Set up a message node
Message node properties example
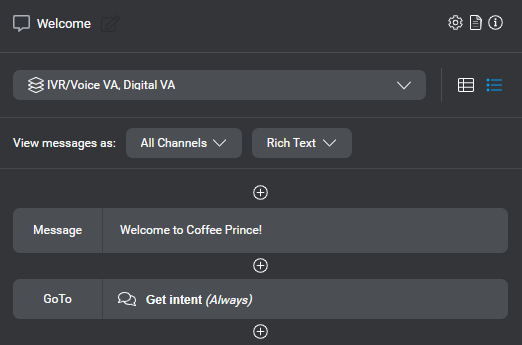
Use a message node to play or show a message, and perform actions that don’t require input from the user.
Click a message node on the design canvas, to see its properties in the Node properties pane.
- Use conditions to determine the desired message or action, if needed
- Set one or more messages
- Use the View messages as selectors to review any message variations, by channel and modality, directly on the compact message, if desired
Note: Once you have selected a modality, your selection persists as long as the current channel supports it. If you switch to a context where the applicable channel doesn’t support the selected modality, the modality selector falls back to the first modality available for the current channel. - Set assignments, if desired
- Set the GoTo transition to the next node, or throw an event
- Disable barge-in at this message node, if required:
- If you want to disable barge-in for a specific channel, undock the desired channel, and select it.
By default, node-level settings apply to all channels. - Click the Node Settings icon and turn on Disable Barge-in.
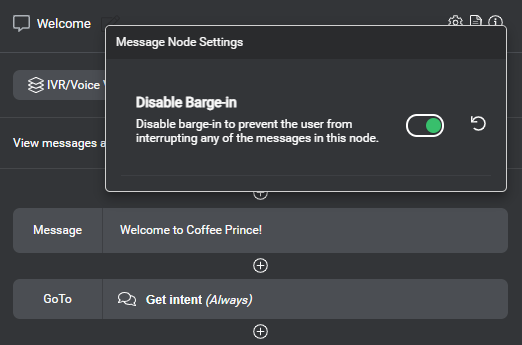
This will prevent users from interrupting any message issued at this node (in the context of the applicable channels).
- If you want to disable barge-in for a specific channel, undock the desired channel, and select it.
Set up a decision node
Decision node properties example
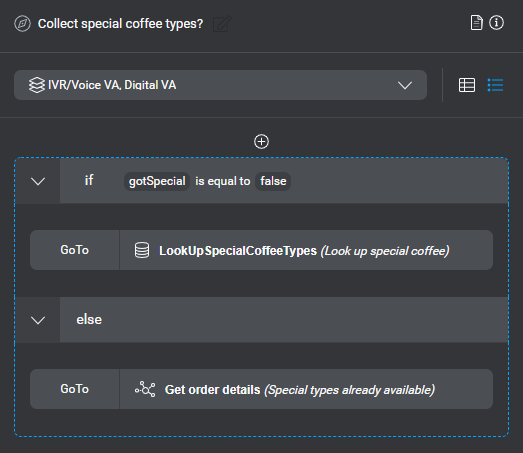
Use a decision node to perform actions that don’t involve messages and don’t require input from the user. For example, you can use a decision node in the intent component that handles dynamic list entities, to check whether you already have the required dynamic entity data for the current session and therefore don’t need to look it up again. You might also use a decision node after a data access node, to check whether information was actually returned (that is, not null) and whether some entities collected so far for the active intent need to be cleared and collected again—for example if you look up a product and the data access node returns a Boolean variable indicating this product is momentarily unavailable at the specified location, your design might allow the user to choose a different location, in which case you would clear the entity that represents the location and collect it again.
Click a decision node on the design canvas, to see its properties in the Node properties pane.
- Set conditions to determine the desired actions, if needed
- Assign values, if desired
- Set the GoTo transition to the next node, or throw an event
Set up a data access node
Data access node properties example
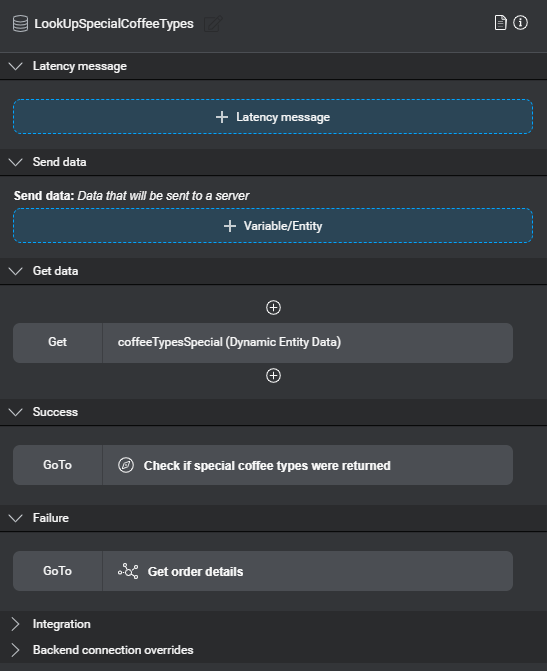
Use data access nodes to exchange information with a backend system. For example:
- In a coffee shop application, look up the price for the specified coffee type and size
- In a coffee shop application, look up special coffee types that might only be available on specific occasions, to complement the regular menu
- In a banking application, look up all payees registered for the specified user
- In a pharmacy application that allows users to refill their medication, check whether the specified medication is valid for the current user and whether it’s available at their preferred location
- In an IoT application, trigger an action such as turning on the water heater, for the user
- Send a message into a messaging bus system
Remember that the client application or a dedicated backend are often better suited than the dialog model to perform conditional logic, such as iterating through lists to verify, for example, whether a medication is listed in the user’s file and that the maximum number of refills hasn’t yet been reached.
Click a data access node on the design canvas, to see its properties in the Node properties pane.
To set up a data access node:
- Specify a latency message if desired.
- Specify data to send to the backend, if any.
- Specify data to get from the backend, if any.
- Specify where to go with the returned data.
- Configure backend connection details, if required.
Specify a latency message
Latency message properties example
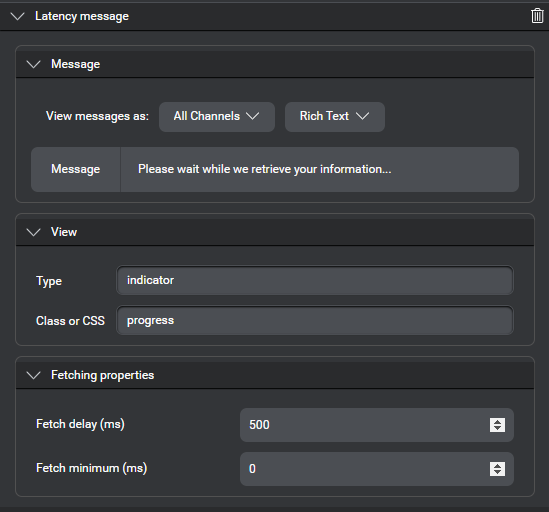
- Click + Latency message.
The fields that appears let you set a message, formatting parameters (for text output), and properties to determine when to show or play the message, and for how long (for audio output). - If the latency message must be limited to a specific channel, choose the desired channel.
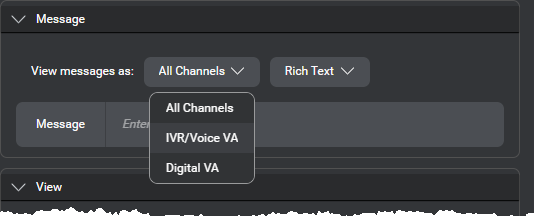
- Click the message placeholder.
This opens the message editor. - Use the message editor to create your message.
Tip: In the message editor, you can click the Library icon to open the Messages resource panel and add variations to your latency message, for other channels and modalities. - (Optional) Use the View messages as selectors to review any message variations, by channel and modality, directly on the compact message.
Note: Once you have selected a modality, your selection persists as long as the current channel supports it. If you switch to a context where the applicable channel doesn’t support the selected modality, the modality selector falls back to the first modality available for the current channel. - (Optional) If the latency message is meant to appear in a text form, in the View area, specify formatting information to pass to the client application.
Type and Class or CSS are freeform parameters—the client application is responsible for interpreting them.
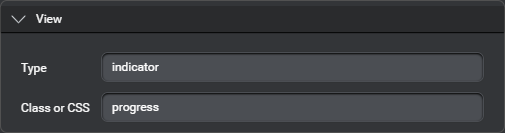
- (Optional) If you wish to override the global fetching properties for you project, set the desired Fetch delay and Fetch minimum values.
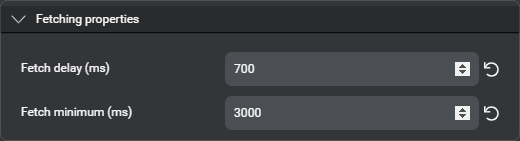
Remove the latency message
Click the Delete icon ![]() in the upper-right corner of the Latency message section.
in the upper-right corner of the Latency message section.
Specify data to send to the backend
- Under Send data, click + Variable/Entity.
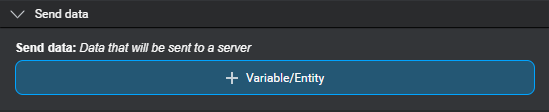
A compact Send placeholder appears.
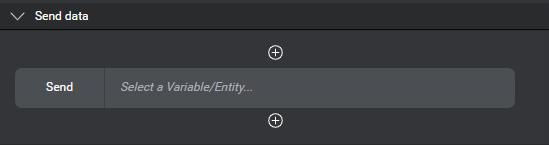
- Click the placeholder.
An editor appears. - Use the selector to choose an element you want to send to the backend system.
You can send a variable, an entity, the active intent’s value, confidence score, and literal, or the interpretation results from the last collection and confirmation steps (see Predefined variables).
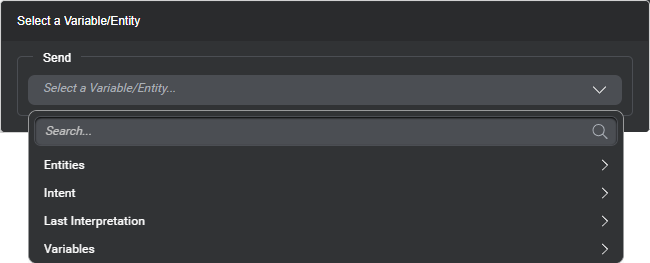
Tip: Use the search fields to narrow down the lists if needed. If a variable you want to send is missing, you can create it on the fly, and then use it immediately. - Click outside the editor to close it.
The Node properties pane shows the compact Send parameter.
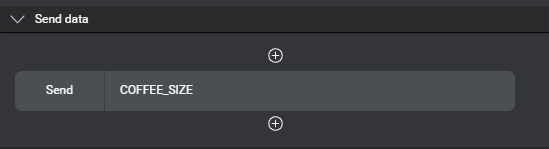
- If you want to send more elements:
- Click the Add icon , below or above a Send parameter, and then click Variable/Entity.
A compact Send placeholder appears. - Click the placeholder and use the selector in the editor that appears, as described above.
- Proceed in the same fashion until you have added all the variables, entities, or other elements you want to send to the backend system.
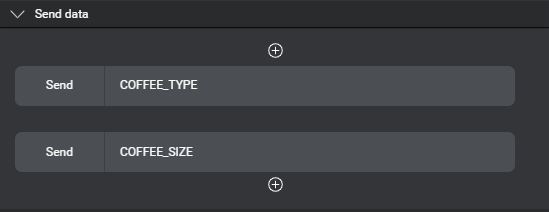
- Click the Add icon
You can reorder and remove Send parameters, if desired.
Specify data to get from the backend
Under Get data specify the variables you want the backend system to return, if any. The Dialog service expects backend systems to always set these two predefined variables: returnCode, and returnMessage. You do not need to specify them in the Get data section of your data access nodes. However, if you want to validate your data access node’s failure path in preview, add returnCode to the Get data section, momentarily. This will allow you to enter a non-zero value when the data access node prompts for stub values, in the chat pane.
| Variable | Description |
|---|---|
| returnCode | “0” if the dialog was able to communicate with the backend. This does not mean that the expected data was returned—use conditions to verify that the returned data is not NULL. Any value other than “0” means that communication with the backend failed. |
| returnMessage | Describes the meaning of the return code. |
To add Get data parameters:
- Under Get data, click + Variable.
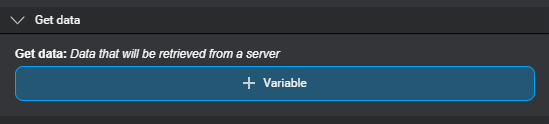
A compact Get placeholder appears.
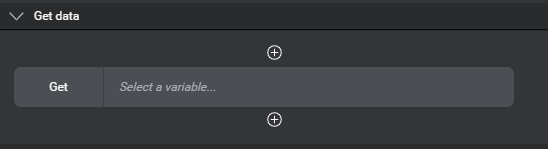
- Click the placeholder.
An editor appears. - Use the selector to choose a variable you want to get from the backend system.
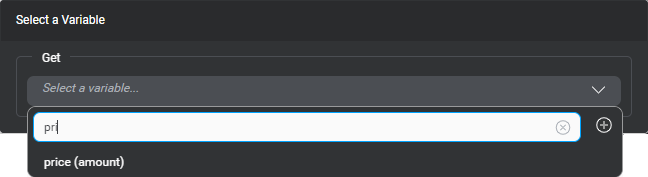
Tip: Use the search field to narrow down the list if needed. If a variable you want to get is missing, you can create it on the fly, and then use it immediately. - Click outside the editor to close it.
The Node properties pane shows the compact Get parameter.
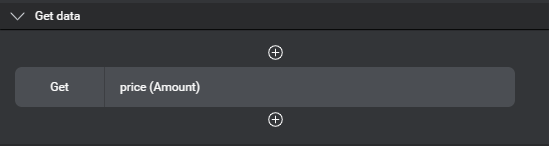
- If you want to get more variables:
- Click the Add icon , below or above a Get parameter, and then click Variable.
A compact Get placeholder appears. - Click the placeholder and use the selector in the editor that appears, as described above.
- Proceed in the same fashion until you have added all the variables you want to get from the backend system.
- Click the Add icon
You can reorder and remove Get parameters, if desired.
Remove a Send or Get parameter
- Bring your pointer to the right-hand side of the parameter you want to remove.
- Click the More options icon that appears and choose Remove Variable/Entity (for a Send parameter), or Remove Variable (for a Get parameter).
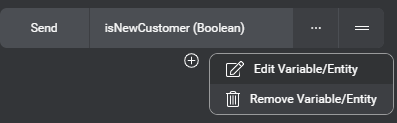
Move a Send or Get parameter
- Bring your pointer to the right-hand side of the parameter you want to move.
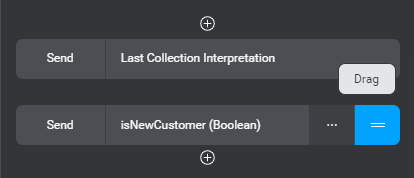
- Use the handle that appears, to drag the selected element up or down.
- Drop the selected element at the desired position.
Create an input variable on the fly
“Search and add” field for input variables
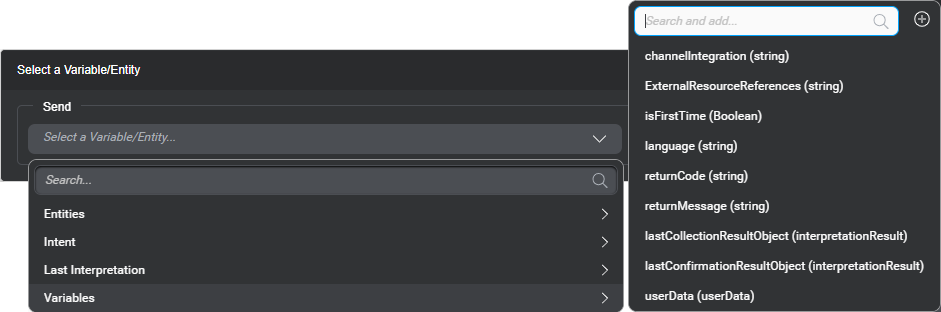
In the Send data section of data access nodes and external actions nodes, you can create input variables directly from the search field at the top of the Variables list. This feature is also available from the Send Data section of question and answer nodes.
- Navigate to the Variables list, and click the search field.
- Enter a name for the new variable.
Note: Variable names are limited to letters (A-Z, a-z), digits (0-9), the dollar sign ($) and the underscore (_). They must not start with a digit. The name must be unique across all intents, entities, and variables in your project. - Click the Add icon .
The new variable appears in the list, with an indication that its type is string.
You can now choose the new variable. Unless the variable is meant to be of type string (default), remember to use the Variables resource panel to complete its definition. See Manage variables.
Create a return variable on the fly
In the Get data section of data access nodes and external actions nodes, you can create return variables directly from the search field at the top of the variables list.
- Click the search field.
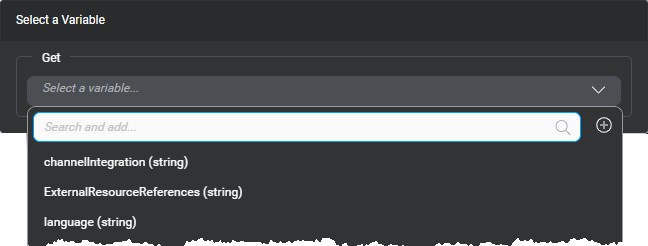
- Enter a name for the new variable.
Note: Variable names are limited to letters (A-Z, a-z), digits (0-9), the dollar sign ($) and the underscore (_). They must not start with a digit. The name must be unique across all intents, entities, and variables in your project. - Click the Add icon .
The new variable appears in the list, with an indication that its type is string.
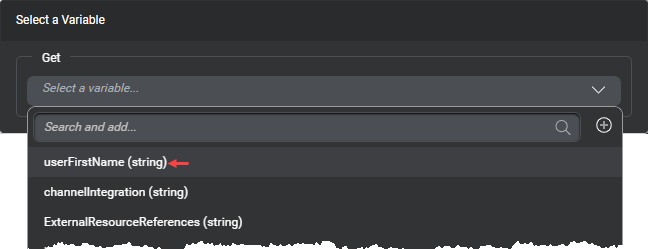
You can now choose the new variable. Unless the variable is meant to be of type string (default), remember to use the Variables resource panel to complete its definition. See Manage variables.
Specify where to go with the returned data
- Set the GoTo transition to perform when the external system returns a success code.
A success return code means that the dialog was able to communicate with the backend. It does not mean that the backend actually returned the desired data. - Set the GoTo transition to perform when the external system returns a failure code.
Set up backend connection details
By default data access nodes support client-side integration—that is, data is to be exchanged between the dialog runtime service and the client application. In such a case, the client application itself is set up to access any required backend system and no further configuration is required for your data access node.
Otherwise, if your data access node must communicate directly with an external data host, turn off Enable client-side fetching, under Integration, and use the fields that appear to configure server-side integration.
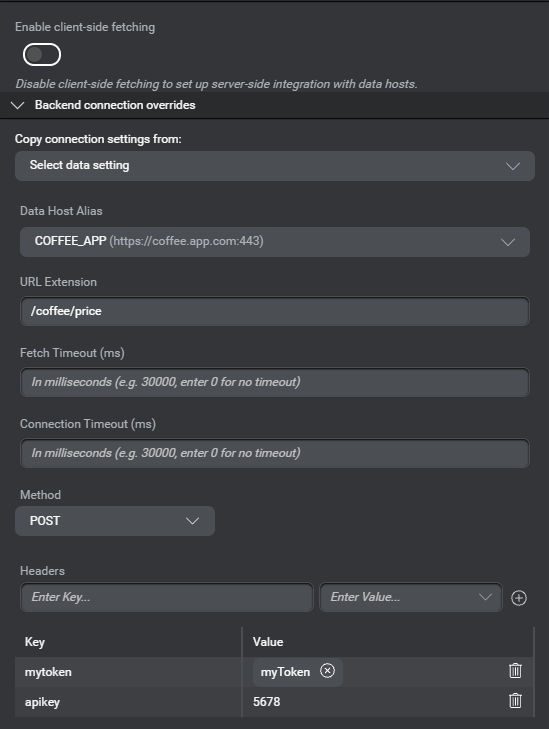
Refer to Exchange data with an external system for more information on setting up server-side integration (as opposed to client-side integration).
See also: Configure default connection settings for information on creating connection profiles you can apply to multiple data access nodes.
Set up a question router node
Question router node properties example
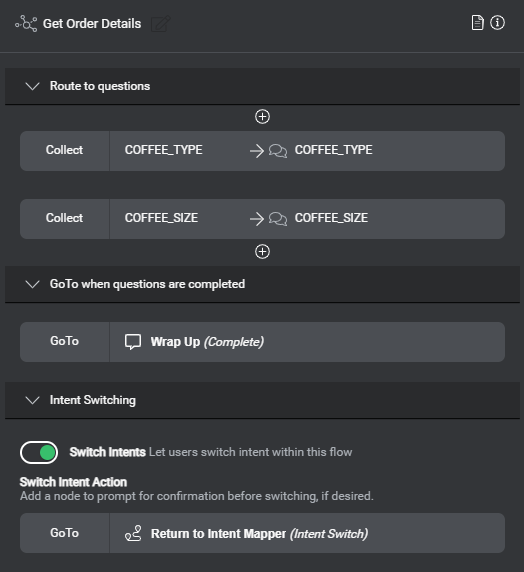
Use a question router node to manage all entities required to fulfill an intent. The question router node specifies multiple pieces of information to be collected, and determines the next node in the dialog flow, based on the information collected so far. Depending on what the user already provided, when the dialog flows reaches a question router node, some information might already be available. In such cases, the corresponding slots are considered filled, and the question router node directs the dialog flow to the question and answer node that is meant to collect information for the next slot that has yet to be filled. When the dialog flow returns from a question and answer node, more slots might have been filled. Once all slots are filled, the question router node uses the transition under GoTo when questions are completed.
Click a question router node on the design canvas, to see its properties in the Node properties pane. Setting up a question router node involves these tasks:
- Replace the default node name, Question Router, with a unique name representing the questions to be fired from this node—for example, Get Order Details.
- Build a question routing table for your intent by specifying every piece of information to collect—that is, entities you have defined with your NLU intents—, in the desired sequence.
For example, you might want your coffee app to prompt the user for the type of coffee they would like to order, before any other information—such as the coffee size—required to fulfill the ORDER_COFFEE intent. This allows you to design your application so that it won't unnecessarily prompt the user for the coffee size it the specified coffee type only comes in one size. - Set where to go with the answers once all the required slots have been filled.
- Configure intent switching, as needed.
List the questions
- Under Route to questions, click + Collect Entity.
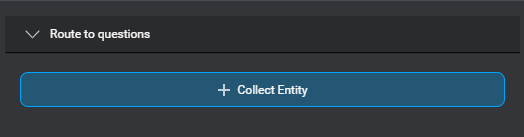
A Collect placeholder appears.
- Click the placeholder.
An editor appears.
- Expand the Entity list, and choose the first piece of information to be collected—for example, COFFEE_TYPE.
Tip: Use the search field to narrow down the list if needed.
- If this entity requires validation (for example, before accepting a payment amount, you want to verify whether the specified amount meets the minimum required), turn on Manual Complete.
In your validation logic, you will use assign actions to:- Set the .isCompleted attribute for this entity to
true, upon successful validation. - Clear the entity, if the specified value didn’t pass validation.
- Set the .isCompleted attribute for this entity to
- Expand GoTo Node, point to Add new, and choose Question & Answer.
This connects the question router node to a new question and answer node named after the entity to collect.
- If you want to skip collection for this entity under certain conditions:
- Turn on Skip Input.
Fields appear allowing you to define a condition.
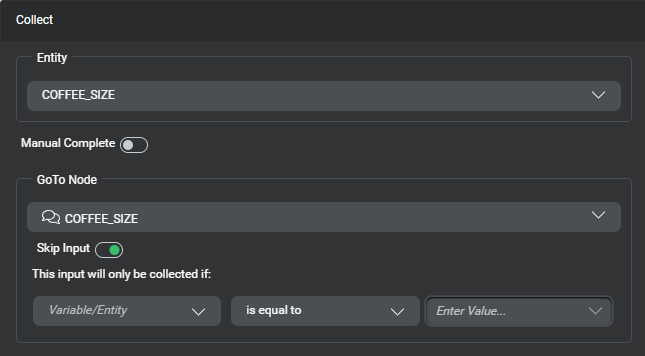
- Set the condition that determines when the optional entity must be collected.
For example, since ristretto only comes in one size, you don’t need to ask for the coffee size when the user orders a ristretto, which translates as collect COFFEE_SIZE only if the value of COFFEE_TYPE is not ristretto:
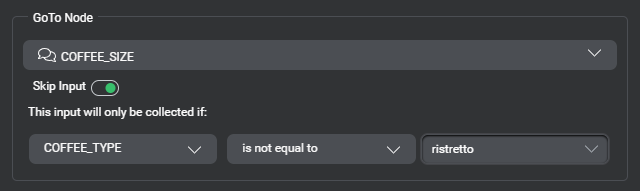
- Turn on Skip Input.
- Click outside the editor to close it.
- To specify more pieces of information to collect:
- In the Node properties pane, click the Add icon , below or above a Collect parameter.
A new Collect placeholder appears. - Click the placeholder, and use the selectors in the editor that appears, as described above, to add a question and answer node for the next piece of information to be collected.
- Proceed in the same fashion, until you have specified all the desired entities.
- In the Node properties pane, click the Add icon
You can reorder or remove questions, if desired.
Remove a question
- Bring your pointer to the right-hand side of the Collect parameter you want to remove.
- Click the More options icon that appears and choose Delete.
Change the order of the questions
- Bring your pointer to the right-hand side of the Collect parameter you want to move.
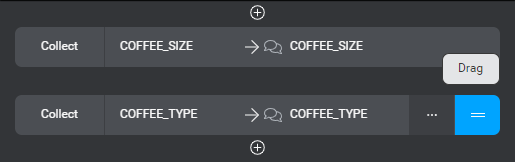
- Use the handle that appears, to drag the selected element up or down.
- Drop the selected element at the desired position.
Set where to go with the answers
Under GoTo when questions are completed, click the GoTo placeholder, and set the desired transition. In the context of an intent component, you might:
- Add a question and answer node to confirm the collected answers
- Add a message node with a message summarizing the entities collected to fulfill the intent
- Choose Return to return to the main dialog flow directly
Configure intent switching
In a component that has a question router node handling entity collection, you can choose to allow or prevent intent switching. For example, in a banking app, a user who wants to pay a bill and has started providing the required information might suddenly ask how much money they have in a specific account. By default intent switching is enabled, and when a user says something that is recognized as a different intent, at a question and answer node, the dialog flow uses the Intent Switching transition of the question router node that handles entity collection for the active intent, to eventually return to the upstream intent mapper. Any entities collected so far for the active intent persist, unless you add actions to clear them before switching.
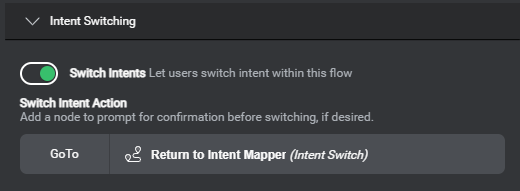
To prevent users from switching to another intent at this part of the dialog flow, turn off Switch Intents.
Depending on your purposes, additional actions might be required before letting the user switch to the other intent. For example:
- Prompt the user to confirm they really want to abandon the current task
- Clear all entities handled in this question router node
Under Switch Intent Action, click the GoTo placeholder, and set the desired transition:
- Choose Return to Intent Mapper to return to the upstream dialog flow without clearing the entities collected so far.
- Add a question and answer node to ask the user to confirm their intention, and then, from the question and answer node, return the dialog flow to the question router node if the user says no, or return to the intent mapper node if the user says yes.
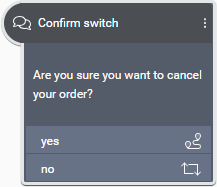
- Add a decision node (or a message node with a message showing the next intent), add actions to clear all entities associated with the active intent, if appropriate, and a transition set to Return to Intent Mapper.
Set up an intent mapper node
Intent mapper node properties example
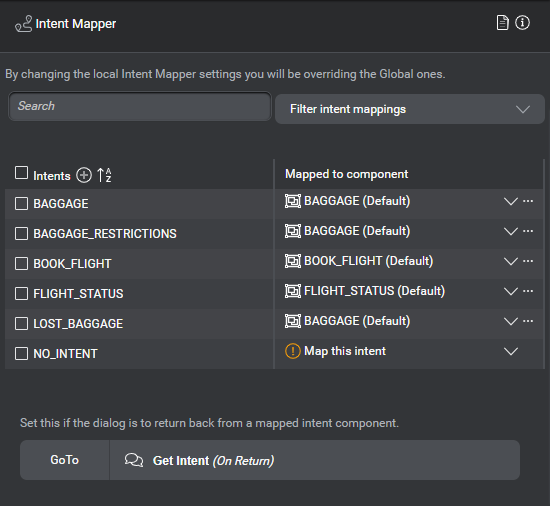
In a dialog flow, an intent mapper node generally follows a question and answer node set up to collect an NLU intent. Once the question and answer node has collected the user input and inferred an intent, the intent mapper node directs the dialog flow, based on the inferred intent, to a component or node that will handle the fulfilment of that intent. You can think of the intent mapper as a sort of intents switchboard or router.
Click an intent mapper node on the design canvas, to see its properties in the Node properties pane. The intent mapper node properties includes a table of mappings. For each intent, you can specify either a component or a node, to handle the intent. When you add an intent mapper node, it automatically inherits any global intent mappings from the NLU resource panel. The number of intents already mapped to a component (or node) appears on the intent mapper node on the canvas, and is dynamically updated when you add or remove mappings. If you need to, you can override global intent mappings, and set local mappings for a specific intent mapper node.
Override a default intent mapping
- Click Map this intent, next to the name of the intent you want to map locally, at this intent mapper node level. (Click the name of the current component, if the intent was already mapped.)
- Choose either the dedicated intent component or an existing generic component, as required.
Tip: If your project does not yet have the component or node you want to use, you can create it on the fly: for an intent component, click Create Intent Component; for a generic component, click the Add icon, next to Components, and enter the desired component name; for a node, expand Add new, and choose the desired node type.
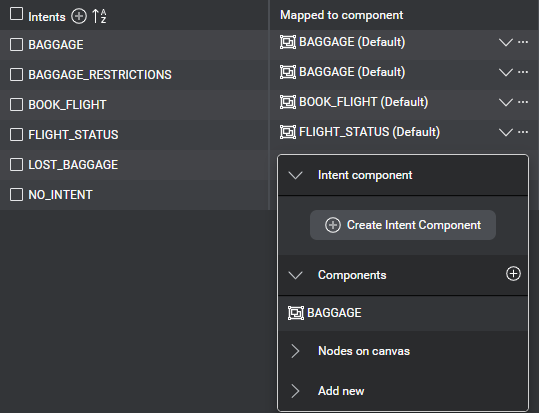
Override multiple intent mappings at once
- Use the check boxes beside the intent names to select the intents whose mapping you want to override locally, at this intent mapper node level.
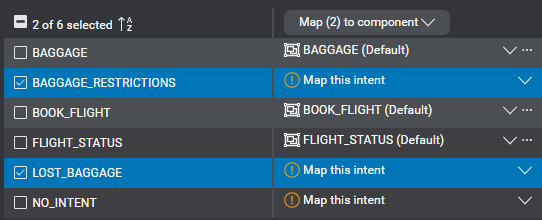
- Expand Map (n) to component, and choose an existing generic component or a node from the list.
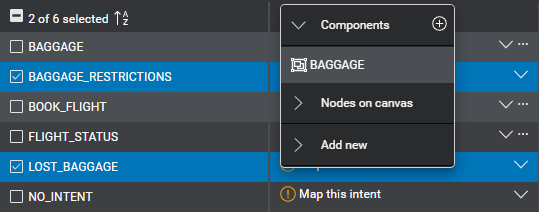
Tip: If your project does not yet have the generic component or node you want to use, you can create it on the fly. - Click Confirm to dismiss the message that prompts you to confirm your intention.
This maps all selected intents to the specified component.
Restore the global mapping for an intent
For an intent that has a global mapping set in the NLU resource panel:
Click the More icon ![]() for the intent and choose Reset to global mapping.
for the intent and choose Reset to global mapping.
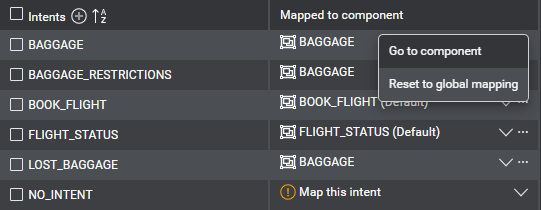
Remove the local mapping for an intent
For an intent that does not have a global mapping set in the NLU resource panel:
Click the More icon ![]() for the intent and choose Remove mapping.
for the intent and choose Remove mapping.
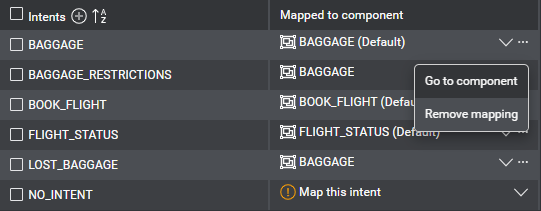
Navigate to the mapped component for an intent
If an intent has been mapped to a component, it is easy to navigate directly to that component to further design it.
Click the More icon ![]() for the intent and choose Go to component.
for the intent and choose Go to component.
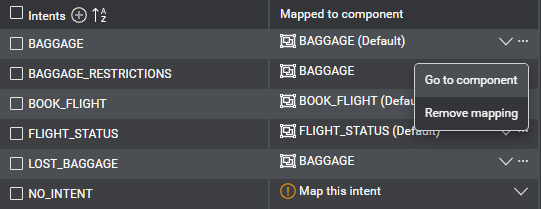
The desired component appears on the canvas.
Filter displayed mappings
If you have a project with a lot of intents, the table of mappings will get long. To make it easier to find the intent you are looking for, filtering capabilities are provided.
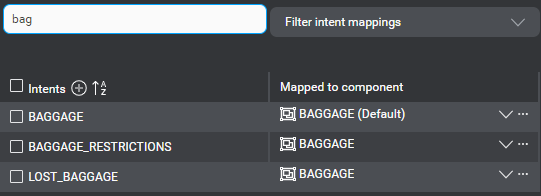
You can use the search field to do a keyword search. The intents list updates as you type, showing only the intents that match the search string.
You can also use Filter intent mappings, to alternate between:
- All intents
- Default (global) mappings
- Overridden (local) mappings
- Intents with mapping
- Intents with no mapping
Specify where to go upon return
Specify where to go next if the dialog returns to the intent mapper from a mapped component (or node) after handling an intent. For example, after completing the customer's request, you might want the dialog to go back to the previous question and answer node, triggering a reentry message asking the user what else they would like to do.
Click the GoTo placeholder, and set the desired transition.

Set up an external actions node
External actions node properties example
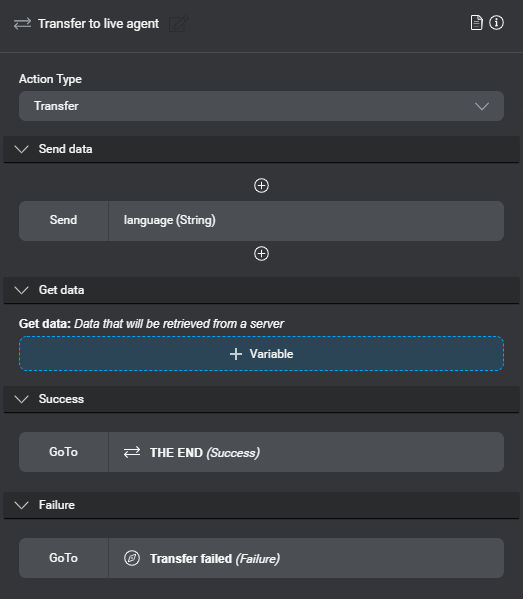
External action nodes support actions to be performed when ending a conversation, transferring to another system, or escalating to a live agent, and allow exchanging information with external systems via a client application. Unlike a data access node, which communicates directly with an external system, an external actions node does not require connection settings.
Click an external actions node on the design canvas, to see its properties in the Node properties pane.
Choose the desired action: End, or Transfer.
End actions
- Replace the default name, External Action, with a unique name—for example, End.
- Specify the data you want the client application to send to an external system, if needed.
Transfer actions
- Replace the default name, External Action, with a unique name—for example, Transfer.
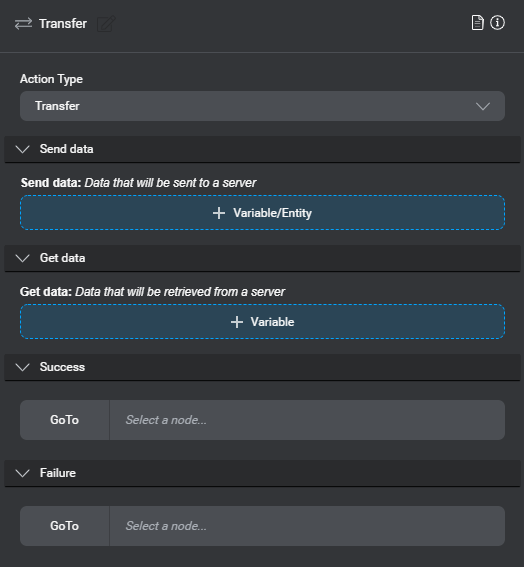
- If needed, specify information you want the client application to exchange with an external system:
- Set the GoTo transition to perform when the external system returns a success code.
A success return code means that the user was successfully transferred, in which the dialog typically ends after performing any required end-of-dialog business logic. - Set the GoTo transition to perform when the external system returns a failure code.
A failure return code means that the user could not be transferred, in which case you might need to ask them what they would like to do next—for example try again, or abandon what they were trying to do and end the dialog.
Set up a component call node
Component call node properties example
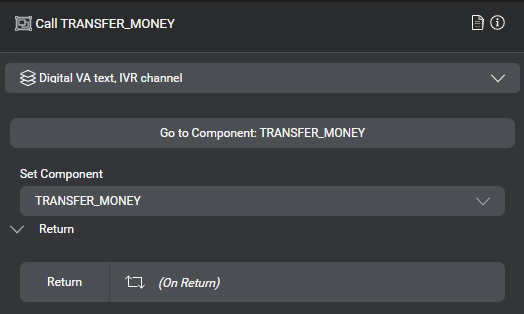
A component call node provides a means to allow the dialog flow to enter another component—for example, a component that performs authentication, disambiguation, or operations that are required after a user is transferred to a live agent.
The component call node transfers the dialog flow to the specified component. When the component is finished, the dialog returns to the component call node and proceeds from there.
Click a component call node on the design canvas, to see its properties in the Node properties pane.
Add a component call node
- Click Components on the design palette and drag the component you want this node to invoke, onto the canvas (or directly onto a transition area of a node).
Tip: Use the search field to narrow down the list of components, if needed.
By default the name of a new component call node has this format: the word Call, followed by the name of the destination component—for example, Call TRANSFER_MONEY. You can rename the node as desired. - If your design requires going to a different node when the dialog returns from the destination component, for specific channels, undock the desired channel, and select it.
- Click the GoTo placeholder, and set the desired transition.
This determines where the dialog will go after it returns from the destination component of this node. - Repeat the above two steps, if you need to set more channel-specific transitions.
Change the destination component
The destination of a component call node is automatically set upon adding the node. Choose a different destination from the Set Component list, if needed, in which case you might want to rename the component call node accordingly.
Go to the destination component
Click Go to Component.
This brings the destination component into focus.
Set messages and actions
Messages and actions (such as transitions, assignments, an so on) occur at nodes in a dialog, and they can be conditional. When you set messages or actions for a node, you can use existing resources or, in some cases, create new resources on the fly. For example, when you add a message to a message node, you can use an existing message or create a new one. Likewise, when you add an assign action, you can use an existing variable, or create a new one.
| Item | Description |
|---|---|
| Message | In Mix.dialog, message nodes use messages that do not require the user to respond, whereas question and answer nodes may use messages meant to engage the user by asking questions to collect required information, and data access nodes may have a latency message to display (or play) while data is being retrieved. While the Messages resource panel allows you to manage all messages for your project, you can create messages directly from the nodes at which they are meant to be used. You can also create default global messages from the Project Settings panel. |
| Assign | Question and answer nodes, message nodes, and decision nodes support assigning values to variables and entity attributes. You can also initialize variables in Start and Enter nodes. The variables, entities, operators and methods that are available on the right-hand side of an assign action depend on the type of the element on the left-hand side. |
| Transition | A transition identifies the next node to execute after completing an action. Choose the appropriate transition type based on where the target node is located and the purpose of the transition. |
| Throw event | Use throw event actions, in question and answer nodes, message nodes, or decision nodes, to throw custom events. It is also possible use a throw action to throw a global command event, if you want to handle a situation the same way as the corresponding global command—for example, if you want to transfer the user to a live agent to handle some error situations where a maximum threshold is reached, you can set a throw event action to throw the Escalate event. |
| Condition | Use conditions to determine the next message or action, based on logical expressions. |
| Note | Add notes, anywhere around messages, actions, and conditions, to supplement your design with useful information. |
Set messages
When configuring message nodes and question and answer nodes, you can add one or more messages, directly in the Node properties pane.
The Project Settings panel allows you to create default global messages that your application will use whenever a recognition event (such as a failure to collect or recognize what the user said) occurs. The question and answer nodes support recovery messages to override global behaviors locally, at the node level.
When you add a message, Mix.dialog automatically gives it a normalized name, based on the text of the message—for example, if you enter How may I help you? the name of the message is automatically set to how_may_i_help_you_. Messages created from the Project Settings panel have names starting with global_ (for example, global_sorry_i_didn't_get_that_). You can rename messages, if desired.
To support language-specific messages, choose the desired language from the menu near the name of the project.
You can define separate channel-specific message variations. You can also add message variations in up to three different formats (also called modalities)—Rich Text, TTS, Audio Script—depending on the channel. Messages defined for the default channel apply to all channels unless a channel-specific variation exists. Messages defined for a specific channel—and their format-specific variations—are only used in that channel.
In most contexts where messages appear in the Node properties pane, a pair of View messages as selectors allow you to view message variations, by channel and modality, directly on the compact messages—for example, to review the TTS version of the messages for the Digital VA voice channel. Once you have selected a modality, your selection persists as long as the current channel supports it. If you switch to a context where the applicable channel doesn’t support the selected modality, the modality selector falls back to the first modality available for the current channel. For example, if you’re viewing default Audio Script messages, and then switch to the Digital VA voice channel, the modality selector will fall back to TTS, because this channel doesn’t support Audio Script. Navigating to another node always resets the View messages as channel selector to All channels.
You can use HTML code in Rich Text messages, and SSML tags in TTS and Audio Script messages.
Dynamic messages
You can create a dynamic message by adding annotations that represent variables, entities, or the active intent’s value, literal or confidence score, to be inserted in the message at runtime.
Annotations that represent variables or entities of certain types (date, time, temperature, and so on) support output formatting.
In dialog designs that support the Audio Script modality, messages can also include dynamic audio file references.
Runtime behavior for dynamic messages
In message nodes, dynamic messages are evaluated before assignments. If you want to set a variable (or entity) and use the new value in a message, make the assignment in a separate node (for example a decision node), upstream to the message node where you want to use the variable or entity value.
For dynamic messages, building your dialog application generates separate parts, that are concatenated at runtime. Depending on when the Mix project was created, and on the type of environment (Nuance-hosted, or self-hosted) where it was created, the runtime concatenation behavior may or may not involve the automatic injection of spaces around the dynamic parts in Rich Text messages.
Default concatenation behavior
Self-hosted environments: This behavior requires engine pack 2.1 (or later) for Speech Suite deployments; engine pack 3.9 (or later) for self-hosted Mix deployments.
Nuance-hosted environments: This behavior applies to Mix projects created after April 13, 2022.
By default, if there are spaces before or after an annotation, in the original message resource, the same number of spaces will be present in the corresponding static part generated from the message. Conversely, if there aren’t any spaces before or after an annotation, the Dialog service will not automatically adds spaces at runtime between the message parts.
It is possible to migrate existing dialog projects, to take advantage of this change: see Disable the legacy concatenation behavior.
Legacy concatenation behavior
With the legacy behavior, the dialog service automatically adds spaces between the message parts, except where an annotation appears before a basic punctuation sign (., ?, !, ,, ;, :).
This behavior may introduce unwanted spaces—for example, if you want to include a dynamically generated URL in a message. In such cases, a workaround is to first use a variable assignment to concatenate the elements between which a space must not appear, and then use this variable for the annotation in your message. (Remember that the execution order of messages and assignments is different, between question and answer nodes and message nodes.)
The legacy behavior applies to projects created in Nuance-hosted environments before April 14, 2022, and projects created in self-hosted environments for an engine pack earlier than 2.1 for Speech Suite deployments; or 3.9 for self-hosted Mix deployments.
Annotation colors and naming conventions
Message annotations have distinctive (text or background) colors:
| Color | Annotation type |
|---|---|
| Blue | Variable |
| Sea blue | Entity value |
| Sea blue with quotes | Entity literal |
| Green | Active intent value or confidence score |
| Green with quotes | Active intent literal |
Output formatting options
The formatting options available for variables and entities used in dynamic messages depend on the data type, message format, and current language:
- Text output formatting options, for annotations in Rich Text messages
- TTS playback options, for annotations in TTS message and in Audio Script messages
- Dynamic concatenated audio playback options, for annotations in Audio Script messages (certain languages only)
Annotations that represent variables or entities of these types support output formatting:
| Variable data type | Entity data type | Entity types (collection methods) | Formatting options |
|---|---|---|---|
| Alphanumeric | Alphanumeric | — | Text, TTS, recorded audio |
| Amount | Amount | nuance_AMOUNT | Text, TTS, recorded audio |
| Date | Date | DATE | Text, TTS, recorded audio |
| Decimal | — | nuance_DOUBLE (in existing project with entity data type not set, or in environments that have version 1.2 or earlier of the Dialog service) | Text, TTS, recorded audio |
| Digits | Digits | — | Text, TTS, recorded audio |
| Distance | Distance | nuance_DISTANCE | Text, TTS |
| Integer | Number | nuance_CARDINAL_NUMBER, nuance_DOUBLE, nuance_NUMBER | Text, recorded audio |
| String | Generic | List, Regex, Rule-based, nuance_EXPIRY_DATE | TTS |
| Temperature | Temperature | nuance_TEMPERATURE | Text, TTS |
| Time | Time | TIME | Text, TTS, recorded audio |
For these data types, when you add an annotation, among various supported methods (or entity attributes), you can choose Formatted value. It is possible to customize the formatting for annotations that represent a formatted value, or to add formatting for an annotation that represents an unformatted value (see Configure output formatting for an annotation).
Text output formatting
Output formatting options example for alphanumeric display
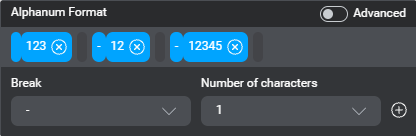
Alphanumeric display
Set a pattern to show groups of characters of specified length with delimiters. The default format is 123-12-12345, that is: 3 characters, hyphen, 2 characters, hyphen, 5 characters.
Turn on Advanced, to use the advanced format editor, if desired.
Output formatting options example for amount display
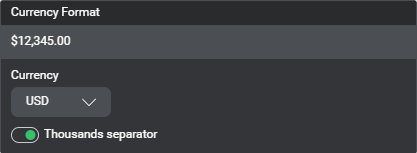
Amount display
| Parameter | Description |
|---|---|
| Currency | For display purposes only: choose any currency to show on the annotation. At runtime (and in preview) the currency is part of the value. |
| Thousands separator | Turn on (default) to show the value with the applicable thousands separator; turn off to show the value without thousands separator. |
Output formatting options example for date display
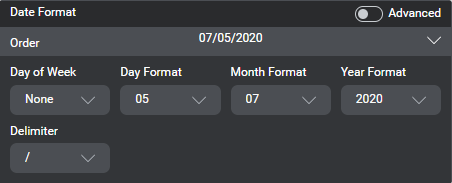
Date display
| Parameter | Description |
|---|---|
| Order | Choose between Month/Day/Year (default), Day/Month/Year, or Year/Month/Day. |
| Day of Week | Choose between the long form (Monday), the short form (Mon), or choose None (default) to omit the day of the week. |
| Day Format | Choose between the long form with leading zero (default), the short form without leading zero, or choose None to omit the day. |
| Month Format | Choose between the long form with leading zero (default), the short form without leading zero, the long month name (July), the short month name (Jul), or choose None to omit the month. |
| Year Format | Choose between the long form with four digits (default), the short form with two digits, or choose None to omit the year. |
| Delimiter | Choose between -, / (default), ., a space, or no delimiter. |
Use the advanced date format editor, if desired. When you switch to the advanced editor, the pattern reflects the current format—for example, MM/dd/yyyy for the default format. The pattern string must comply with the SimpleDateFormat Java class. To go back to the basic date format editor, clear the pattern string, and then turn off Advanced.
Output formatting options example for decimal display
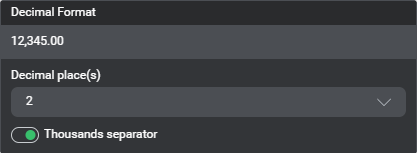
Decimal display
| Parameter | Description |
|---|---|
| Decimal places | Choose the number of decimal places to show (0–7). Default: 2. |
| Thousands separator | Turn on (default) to show the value with the applicable thousands separator; turn off to show the value without thousands separator. |
Digits display
Set a pattern to show groups of characters of specified length with delimiters. The default format is 123-12-12345, that is: 3 characters, hyphen, 2 characters, hyphen, 5 characters.
Turn on Advanced, to use the advanced format editor, if desired.
Output formatting options example for distance display
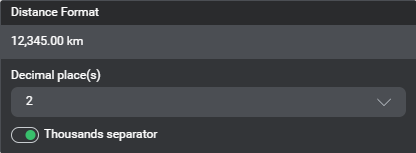
Distance display
| Parameter | Description |
|---|---|
| Decimal places | Choose the number of decimal places to show (0–7). Default: 2. |
| Thousands separator | Turn on (default) to show the value with the applicable thousands separator; turn off to show the value without thousands separator. |
Integer display
Choose whether to show the value with the applicable thousands separator (default), or to show the value without thousands separator.
Output formatting options example for temperature display
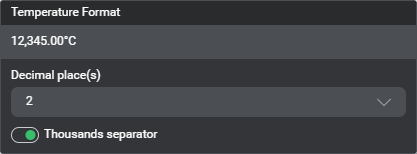
Temperature display
| Parameter | Description |
|---|---|
| Decimal places | Choose the number of decimal places to show (0–7). Default: 2. |
| Thousands separator | Turn on (default) to show the value with the applicable thousands separator; turn off to show the value without thousands separator. |
Output formatting options example for time display
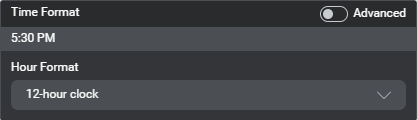
Time display
Choose the hour format: 12-hour clock (default), or 24-hour clock.
Use the advanced date format editor, if desired. When you switch to the advanced editor, the pattern reflects the current format—for example, h:mm a for the default format. The pattern string must comply with the SimpleDateFormat Java class. To go back to the basic time format editor, clear the pattern string, and then turn off Advanced.
TTS for playback
Alphanumeric TTS playback
Set a pattern to show groups of characters of specified length. The default format is 123 12 1234, that is: 3 characters, pause, 2 characters, pause, 4 characters.
Turn on Advanced, to use the advanced format editor, if desired.
Output formatting options example for amount TTS playback
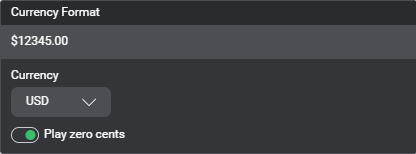
Amount TTS playback
| Parameter | Description |
|---|---|
| Currency | For display purposes only: choose any currency to show on the annotation. At runtime (and in preview) the currency is part of the value. |
| Play zero cents | Turn on (default) to play “zero cents” (in the session language), when the number of cents (or sub-unit for the specified currency) is zero. |
Output formatting options example for date TTS playback
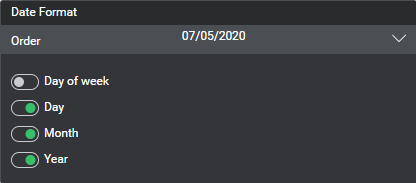
Date TTS playback
| Parameter | Description |
|---|---|
| Order | Choose between Month/Day/Year (default), Day/Month/Year, or Year/Month/Day. |
| Day of week | Turn on to play the day of the week (for example, “Sunday”); otherwise, turn off (default). |
| Day | Turn on to play the day of the month (default). |
| Month | Turn on to play the month (default). |
| Year | Turn on to play the year (default). |
Output formatting options example for decimal TTS playback
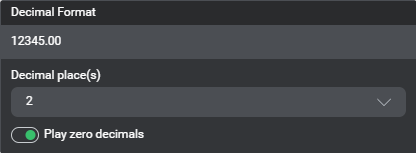
Decimal TTS playback
| Parameter | Description |
|---|---|
| Decimal places | Choose the number of decimal places to show (0–7). Default: 2. |
| Play zero decimals | Turn on (default) to play “point zero” (in the session language), when the value after the decimal point (or comma) is zero. |
Digits TTS playback
Set a pattern to show groups of characters of specified length. The default format is 123 12 1234, that is: 3 characters, pause, 2 characters, pause, 4 characters.
Turn on Advanced, to use the advanced format editor, if desired.
Output formatting options example for distance TTS playback
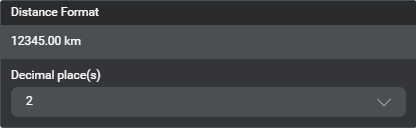
Distance TTS playback
Choose the number of decimal places to play (0–7). Default: 2.
Integer TTS playback
No TTS formatting options for integer values in TTS and Audio Script messages.
Output formatting options example for string TTS playback
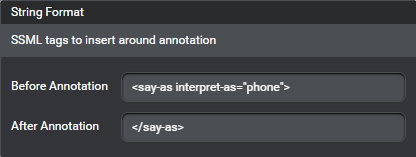
String TTS playback
| Parameter | Description |
|---|---|
| Before Annotation | Freeform SSML tag to insert before the annotation (for example, <say-as interpret-as="phone">). |
| After Annotation | Freeform SSML tag to insert after the annotation (for example, </say-as>). |
Temperature TTS playback
Choose the number of decimal places to play (0–7). Default: 2.
Time TTS playback
Choose the hour format: 12-hour clock (default), or 24-hour clock.
Dynamic concatenated audio for playback
VoiceXML applications can use concatenated static and dynamic audio files to play Audio Script messages, for certain languages. They can also use TTS playback. For languages without support for recorded audio playback, only TTS playback output formatting options are available. String values in Audio Script messages support TTS playback (see String TTS playback).
Output formatting options example for alphanumeric audio playback
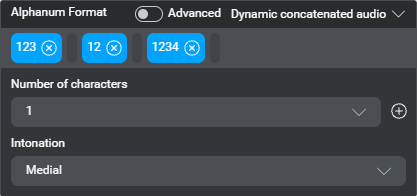
Alphanumeric concatenated audio playback
Set a pattern to play groups of characters of specified length. The default format is 123 12 1234, that is: 3 characters, pause, 2 characters, pause, 4 characters.
Choose the appropriate intonation, based on the position of the annotation in the message: Medial (default), or Final.
Turn on Advanced, to use the advanced format editor, if desired.
Output formatting options example for amount audio playback
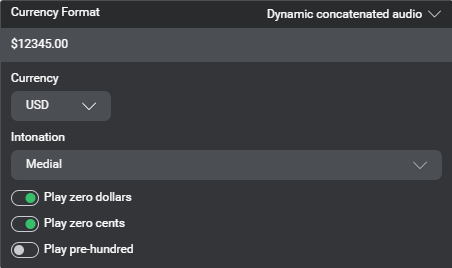
Amount concatenated audio playback
| Parameter | Description |
|---|---|
| Currency | For display purposes only: choose any currency to show on the annotation. At runtime (and in preview) the currency is part of the value. Note: Support is limited to one currency per language. The available currency for a language depends on the recorded audio package that was set up for that language in your Mix environment. At runtime, amounts in a currency that the package for the session language doesn’t support are played as dollars. |
| Intonation | Choose the appropriate intonation, based on the position of the annotation in the message: Medial (default), or Final. |
| Case | Available for German only: Choose the appropriate case, based on the grammatical function of the annotation in the message: Nominative (default), or Dative. |
| Play zero dollars | Turn on (default) to play “zero dollars” (in the session language), when the number of dollars (or selected currency) is zero. |
| Play zero cents | Turn on (default) to play “zero cents” (in the session language), when the number of cents (or sub-unit for the selected currency) is zero. |
| Play pre-hundred | Available for English (United States) only: Turn on to use different audio recordings for hundreds prior to millions/thousands, and for hundreds prior to tens; turn off (default) to use the same audio recording for hundreds regardless of their position in amounts. |
Output formatting options example for date audio playback
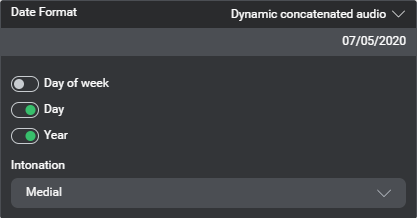
Date concatenated audio playback
| Parameter | Description |
|---|---|
| Day of week | Turn on to play the day of the week (for example, “Sunday”); otherwise, turn off (default). |
| Day | Turn on to play the day of the month (default). |
| Year | Turn on to play the year (default). |
| Intonation | Choose the appropriate intonation, based on the position of the annotation in the message: Medial (default), or Final. |
| Case | Available for German only: Choose the appropriate case, based on the grammatical function of the annotation in the message: Nominative (default), or Dative. |
Output formatting options example for decimal audio playback in German message
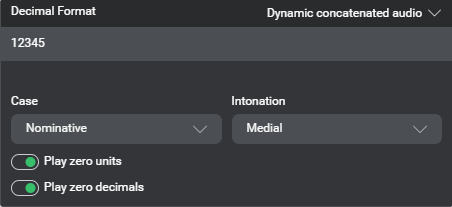
Decimal concatenated audio playback
| Parameter | Description |
|---|---|
| Intonation | Choose the appropriate intonation, based on the position of the annotation in the message: Medial (default), or Final. |
| Case | Available for German only: Choose the appropriate case, based on the grammatical function of the annotation in the message: Nominative (default), or Dative. |
| Play zero units | Turn on (default) to play “zero point” (in the session language), when the value before the decimal point (or comma) is zero. |
| Play zero decimals | Turn on (default) to play “point zero” (in the session language), when the value after the decimal point (or comma) is zero. |
Digits concatenated audio playback
Set a pattern to play groups of characters of specified length. The default format is 123 12 1234, that is: 3 characters, pause, 2 characters, pause, 4 characters.
Choose the appropriate intonation, based on the position of the annotation in the message: Medial (default), or Final.
Turn on Advanced, to use the advanced format editor, if desired.
Distance concatenated audio playback
No concatenated audio playback formatting options for distances in Audio Script messages.
Integer concatenated audio playback
Choose the appropriate intonation, based on the position of the annotation in the message: Medial (default), or Final.
Temperature concatenated audio playback
No concatenated audio playback formatting options for temperatures in Audio Script messages.
Output formatting options example for time audio playback
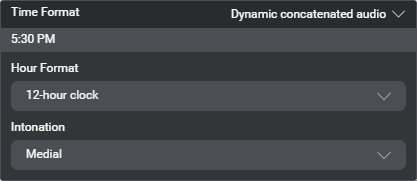
Time concatenated audio playback
| Parameter | Description |
|---|---|
| Hour Format | Choose between a 12-hour clock (default), or a 24-hour clock. |
| Intonation | Choose the appropriate intonation, based on the position of the annotation in the message: Medial (default), or Final. |
Add a message
When you create a message node, it already has one blank message placeholder from where to set a message.
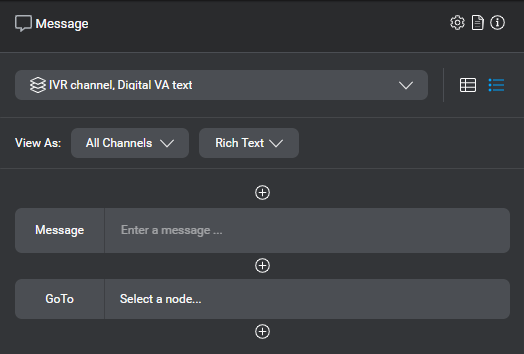
On the other hand, for a new question and answer node, you must explicitly add the initial placeholder for setting the system question.
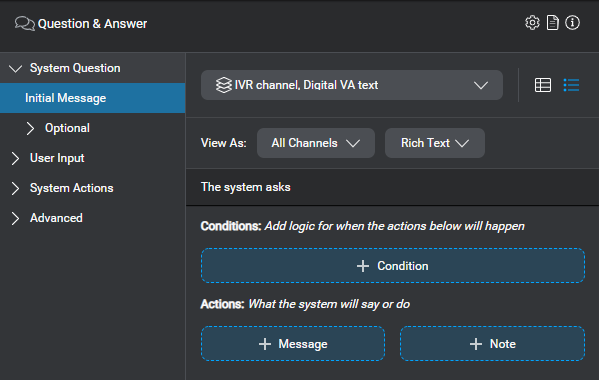
The steps for adding a message depend on where you want to add it:
- Add a message placeholder if there isn’t one already.
- Click the message placeholder.

This opens the message editor. - Use the message editor to create your message.
Once you have created a message, you can perform various operations directly from the compact message in the Node properties pane, including:
Add a message placeholder
- If there aren’t any placeholders yet, click + Message.

- If other messages, notes, actions, or conditions already exist, click the Add icon , where you want to insert the message, and choose Message.
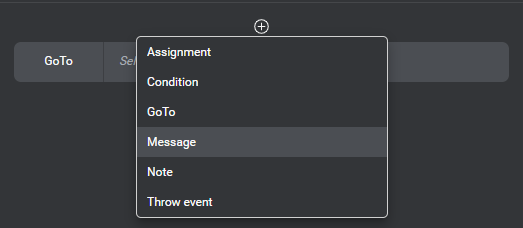
- To add the first placeholder under a condition, click the Add icon and choose Message.
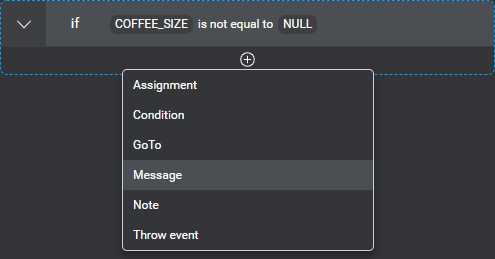
- To add a message under a condition where other messages, notes, actions, or conditions already exist, bring your pointer to the area where you want insert the message, click the Add icon that appears, and choose Message.
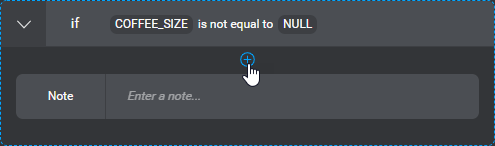
Use the message editor
By default, if the current node does not require any channel-specific messages and actions (all channels are docked), the message editor shows fields for all the modalities that are available across all channels in your project. These fields correspond to the fields under default in the Messages resource panel.
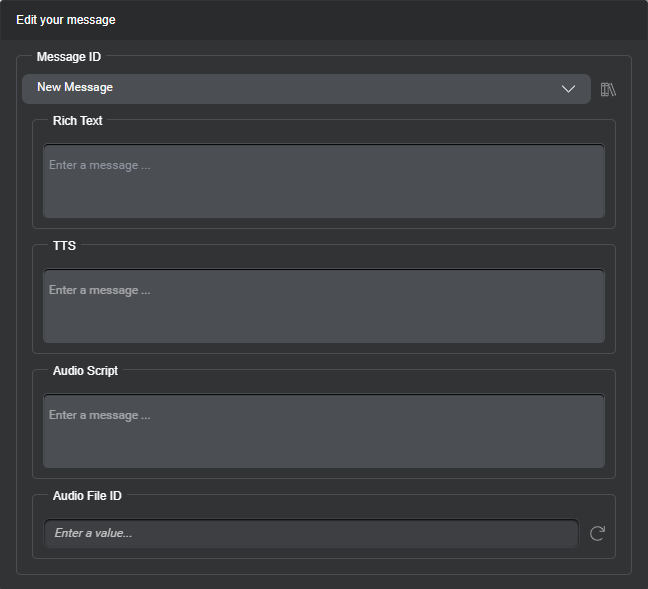
On the other hand, if there are undocked channels at this node, using the main channel selector (at the top of the Node properties pane) before editing a message, determines which fields appear in the message editor—that is, one field for each modality specified for the selected channel. These fields correspond to those under the same channel in the Messages resource panel.
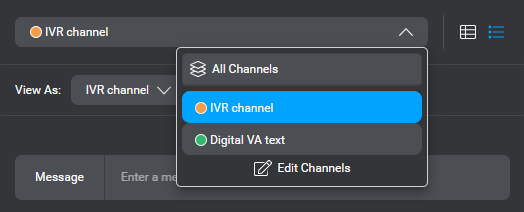
For example, if you select the undocked IVR channel from the main channel selector (at the top of the Node properties pane), the message editor might have only one field, for the Audio Script modality. This field corresponds to the one under IVR channel Override in the Messages resource panel.
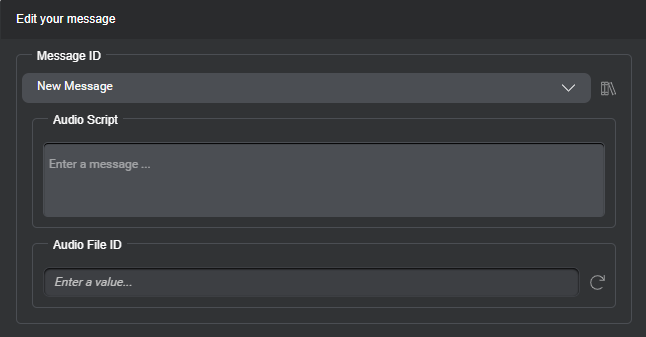
Use an existing message
- Click New Message (above a blank message field), or the message ID (if there is already a message in the field).
A list appears showing all messages in your project.
Tip: Use the Search field to narrow down the list, if desired. Only messages whose name contains the search string remain in the list.
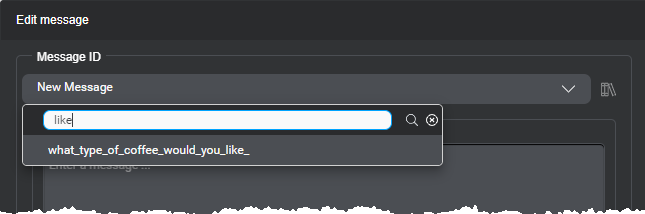
- Choose the desired message from the list.
The message appears in the field.
Modify an existing message
Make the desired changes to the default text or any channel-specific or modality-specific variations, in the corresponding fields. You can annotate parts of the message text to make them dynamic. You can also generate, specify, or modify the audio file ID, if needed (see Naming guidelines).
All other references to this message in your project automatically reflect your changes.
Create a new message
Enter the desired default text, annotations (if this message requires dynamic elements), and any modality-specific variations in the corresponding fields. You can also generate or specify the audio file ID, if needed (see Naming guidelines).
This creates a message resource that you can reuse anywhere in your project.
Duplicate a message
- Bring your pointer to the right-hand side of the compact message you want to duplicate.
- Click the More options icon that appears and choose Duplicate message.
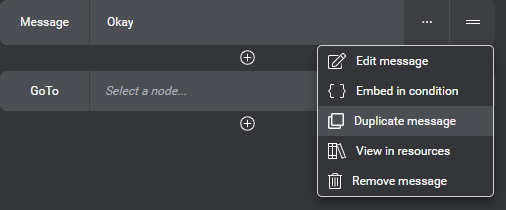
A copy of the message appears.

Note: This new message has a distinct message ID (a numeric suffix is appended to the original message ID), which you can see in the message editor (and in the Messages resource panel). - Now, depending on your purposes, you might want to:
- Click the new compact message to open the message editor, and make the desired changes.

Open the Messages resource panel from a message
- Bring your pointer to the right-hand side of the compact message you want to duplicate.
- Click the More options icon that appears and choose View in resources.
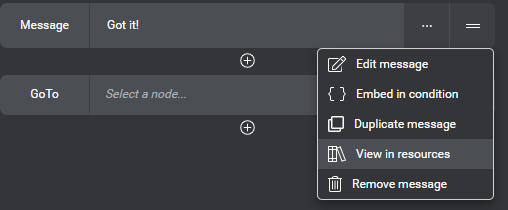
The Messages resource panel opens, and your message is in focus. See Manage messages, for more information.
Remove a message
- Bring your pointer to the right-hand side of the compact message you want to remove.
- Click the More options icon that appears and choose Remove message.
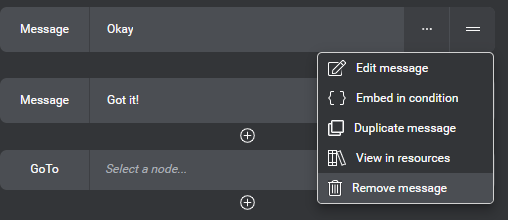
Create a condition from a message
- Bring your pointer to the right-hand side of the compact message for which you want to create a condition.
- Click the More options icon that appears and choose Embed in condition.
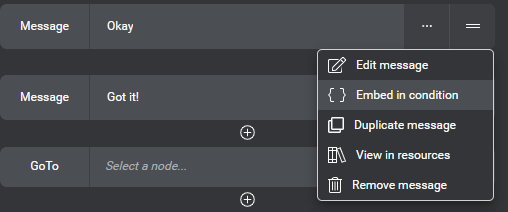
Your message now appears under a condition placeholder.
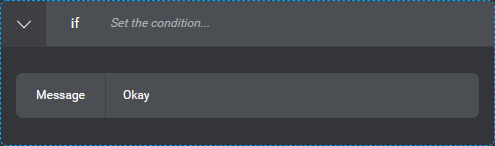
- Set the desired condition.
Add a dynamic message
As you type any message, you can specify placeholders (annotations) to be replaced at runtime according to what the user said or according to what happened during the interaction. Make sure your design includes actions to initialize the variables or to collect the entities or the intent you specified.
- Start typing your message.
- When you reach the point where you want to insert a placeholder for a variable or entity:
- Type a left square bracket (
[).
A menu appears.
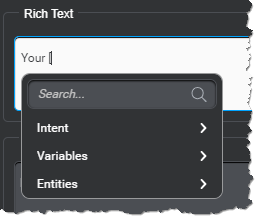
- Expand the appropriate category: Variables, if you want insert the placeholder for a variable; Entities, for an entity; or Intent, for the active intent.
Tip: Use the search field to quickly find the element you need. - Navigate to the element you want to use.
Depending on the type of element, you might have to choose between different attributes, such as the element’s value or literal, its length, and so on (see Supported methods). For variables and entities that support output formatting, you can choose Formatted value (and then customize the format, if desired). - The name of the dynamic element you chose appears as highlighted text in your message.
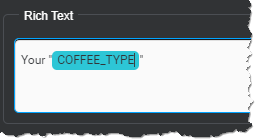
- Type a left square bracket (
- Complete your message.

Annotate a message
You can annotate an existing message to add dynamic placeholders for variables, entities, or attributes of the active intent.
- Highlight the part of your message you want to replace with a dynamic placeholder.
A menu appears. - Expand the appropriate category and navigate to the element you want to use.
Depending on the type of element, you might have to choose between different attributes, such as the element’s value or literal, its length, and so on (see Supported methods). For variables and entities that support output formatting, you can choose Formatted value (and then customize the format, if desired).

The highlighted text now represents the specified entity or variable. You can edit the display text, if desired.
Change the variable or entity for an annotation
This can be useful, for example, after you have duplicated a dynamic message and the copy should use a different variable.
- Click the annotation you want to modify, and choose Edit value.
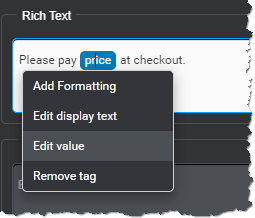
A menu appears. - Expand the appropriate category and navigate to the element you want to use.
Depending on the type of element, you might have to choose between different attributes, such as the element’s value or literal, its length, and so on (see Supported methods). For variables that support output formatting, you can choose Formatted value (and then customize the format, if desired).
The highlighted text now represents the specified entity or variable. You can edit the display text, if desired.
Edit the text of an annotation
This can be useful, for example, after you have renamed a variable or entity that was used in an existing dynamic message.
Click the annotation you want to modify, choose Edit display text, and modify the text as desired.
This only changes the text on the annotation, not the entity or variable that the annotation represents.
Remove an annotation in a message
Click the annotation you want to undo, and choose Remove tag.
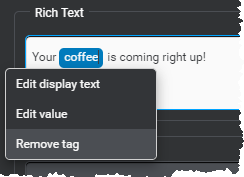
Only static text from the former annotation remains.
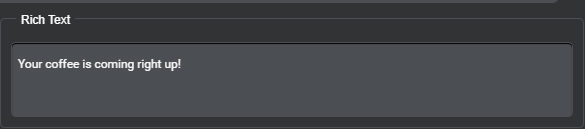
Configure output formatting for an annotation
- Click the annotation for which you want to specify output formatting.
- If the annotation already represents the formatted value of a variable or entity, choose Edit formatting; otherwise, choose Add formatting.
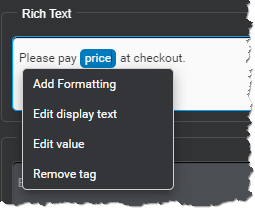
A format editor with applicable formatting options (for the data type, active language, and message format) appears. - If you are editing an Audio Script message, in a language that supports dynamic concatenated audio playback, choose the desired playback mode for this annotation: TTS or Dynamic concatenated audio.
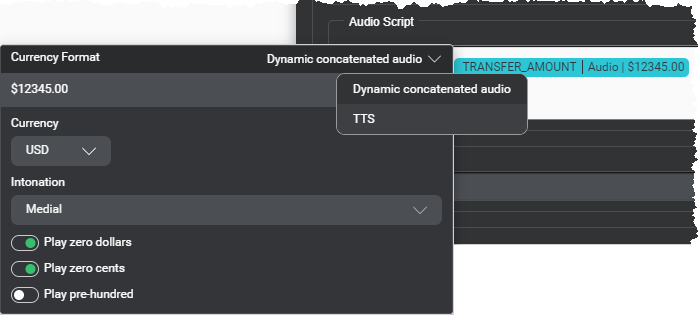
- Use the formatting options.
- When the sample value matches the desired format, click outside the editor to close it.
The formatted sample value text appears on the annotation, next to the display text.
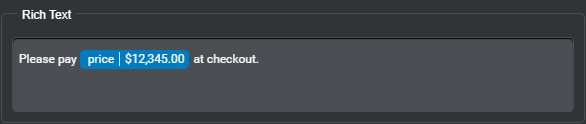
Remove output formatting for an annotation
Click the annotation for which you want to restore the unformatted output behavior, and choose Remove formatting.
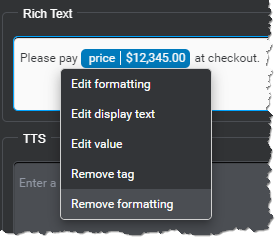
The annotation no longer shows a formatted value sample; only the display text remain.

Set a format pattern for alphanumeric values or digits
By default, the format editor for alphanumeric values or digits contains a default pattern, showing groups, such as 123-12-12345. Each group can have up to 9 characters. The Rich Text format supports a leading character and delimiters between groups. For TTS and dynamic concatenated audio playback, the space between groups represents a pause.
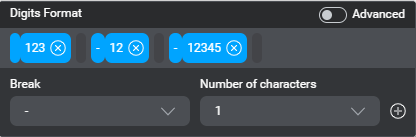
Remove a group
Click the Remove group icon ![]() of the group you want to remove.
of the group you want to remove.

Add the first group
- (Rich Text only) Choose the initial character.
- Choose the number of characters for the group.
- Click the Add icon .
Insert a group
- Click the blank area to the right of the group after which you want the new group to appear.
- (Rich Text only) Choose the desired delimiter from the Break list.
- Choose the number of characters you want to add.
- Click the Add icon .
Increase the length of a group (Rich Text only)
- Click the blank area to the right of the group you want to modify.
- Choose None from the Break list.
- Choose the number of characters you want to add.
- Click the Add icon .
Use the advanced format editor for alphanumeric values or digits
When you switch to the advanced editor, the pattern string reflects the current format—for example, ###-##-##### for Rich Text, or 3 2 4 for TTS and Audio Script.

For Rich Text, the pattern string can only include # to represent any letters or digits (only digits, for values of type Digits). The characters -, ., /, \, (, ), +, *, and space are the only supported delimiters.
For TTS and Audio Script, the pattern string can only include digits between 1 and 9, to represent groups of characters (and spaces between the digits, if desired). For example, 3 2 4 represents a group of three characters, pause, two characters, pause, four characters.
To go back to the basic format editor, clear the pattern string, and then turn off Advanced.
Disable the legacy concatenation behavior
This procedure applies to Mix projects that were created before April 2022, and its purpose is to take advantage of the new default runtime concatenation behavior for dynamic messages, which now prevents the dialog service from automatically adding spaces in dynamic messages at runtime.
To migrate a project:
- Export the JSON representation of your dialog design.
- Open the JSON file in a text editor, and look for the
globalSettingOverrideselement. - Inside this element, look for the object that contains
"settingName": "add-spaces-around-dynamic-prompt-parts"—for example:{ "id": "0708927c-7843-45ac-b660-d0d90b5bf0a0", "projectId": "3105", "settingName": "add-spaces-around-dynamic-prompt-parts", "settingType": "INTERNAL_SETTINGS", "channelId": "", "predefinedName": "PREDEFINE_NOT_SET", "value": "true", "language": "", "entityId": "" } - In this object, replace
"value": "true"with"value": "false". - Save the JSON file and import it back into the project.
- In Mix.dialog, open the Messages resource panel, and review your dynamic messages, to make sure the spacing is adequate around the annotations.
After you have disabled the legacy concatenation behavior a project, if you decide to enable it again, proceed in the same fashion, but replace "value": "false" with "value": "true", before importing the JSON file back into your project again.
Set assign actions
Use assign actions to set the value of variables or entity attributes—for example:
- Initialize a simple variable
- Set the .isRequired attribute of the ACCOUNT_NAME entity to
false, when the customer has only one account - Store the value from a database lookup in a variable
- Set Active intent value to initiate intent switching manually
- Clear an entity by using the .clear() method
- Clear a complex variable by setting it to
NULL - Preinitialize a complex variable
- Store the current date or time in a variable
- Increment a counter
- Set a variable to a random number
Add an assign action
The steps you must perform for adding an assign action depend on where you want to add it:
- Add an assignment placeholder if there isn’t one already.
- Click the assignment placeholder.

This opens the assignment editor. - Use the assignment editor to create your assign action.
Once you have created an assign action, you can perform various operations directly from the compact assignment in the Node properties pane, including:
Add an assignment placeholder
- If there aren’t any placeholders yet, click + Action and choose Assignment.
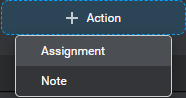
- If other messages, notes, actions, or conditions already exist, click the Add icon , where you want to insert the assign action, and choose Assignment.
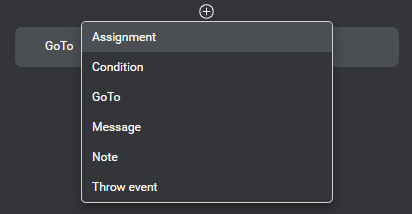
- To add the first placeholder under a condition, click the Add icon and choose Assignment.
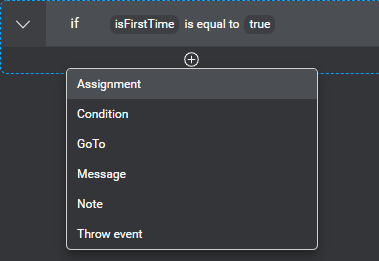
- To add an assign action under a condition where other messages, notes, actions, or conditions already exist, bring your pointer to the area where you want insert the message, click the Add icon that appears, and choose Assignment.
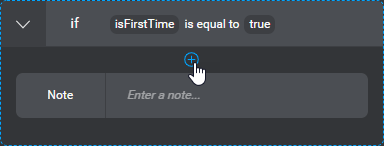
Use the assignment editor
- Expand the Set list, point the appropriate category (Entities, Intent, or Variables) and choose the element whose value you want to set .
Tip: Use the search fields to narrow down the list if needed. If the variable you want to set is missing, you can create it on the fly.
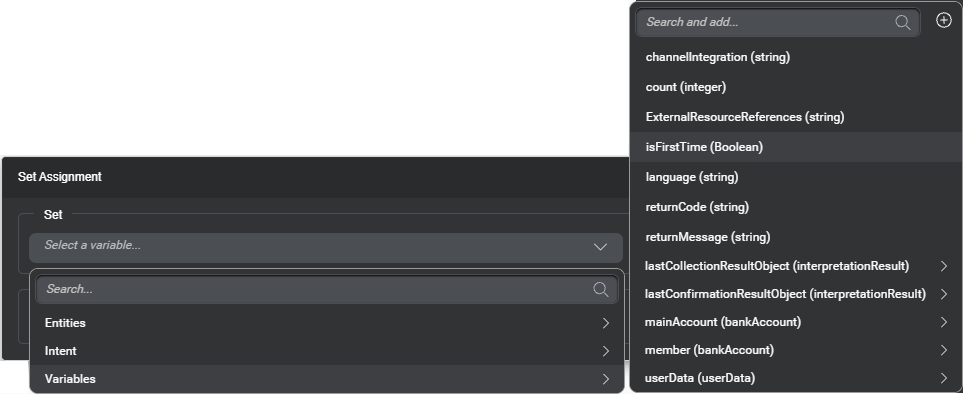
- Pointing a complex variable reveals its fields.
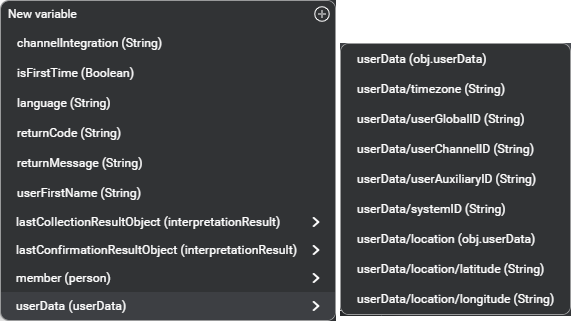
- Pointing an entity reveals its attributes.
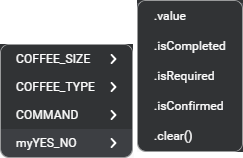
- Pointing a complex variable reveals its fields.
- In the second field (To), enter a value, an expression, or choose another element.
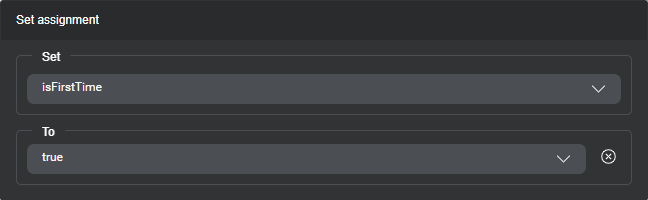
This field (To) supports values that are compatible with the type of element you chose for the first field (Set). - Click outside the editor to close it.
The compact assignment shows the element being set and the value you specified.

Clear an entity
Clearing an entity allows you to use it again during the same dialog session. For example, your dialog might include multiple question and answer nodes that collect a yes/no entity, or might allow the user to stop providing information to fulfill the active intent and start over afresh. Clearing an entity sets its .value and .literal attributes to NULL, .isRequired to true, .isConfirmed and .isCompleted to false.
- Navigate to the entity you want to clear.
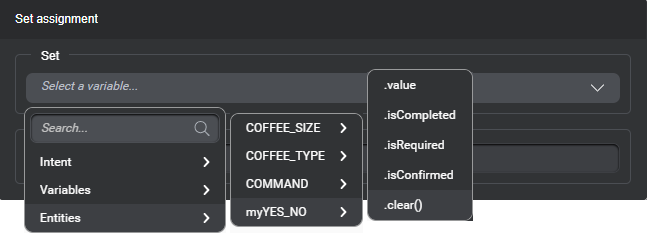
- Choose .clear().
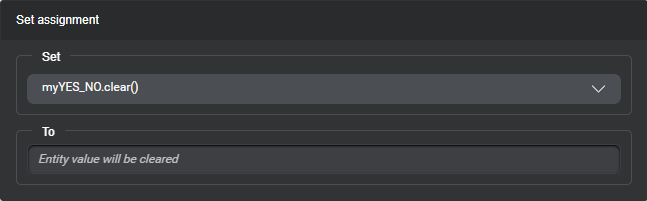
- Click outside the editor to close it.
The compact assignment shows the element being set and the value you specified.

Clear a complex variable
Assign NULL to a variable when you don't need its current value anymore. For example, your dialog might use a complex variable to hold a customer’s first name, last name, and a list of bank accounts, for a fund transfer intent. Once the fund transfer is completed, setting the complex variable to NULL allows you to use it again for another transaction during the same dialog session. This is similar to clearing an entity.
- Choose the complex variable you want to clear (use the top-level object).
Tip: Use the search fields to narrow down the list if needed.
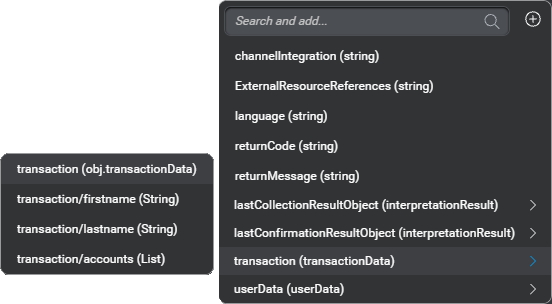
The complex variable object appears in the Set field.
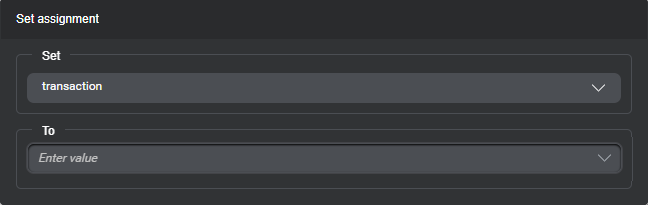
- Click the arrow icon
 at the end of the To field, point to Values, and choose NULL.
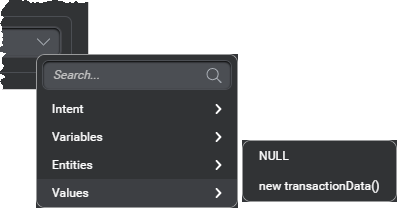
- Click outside the editor to close it.
The compact assignment shows the element being set and the value you specified.

Preinitialize a complex variable
You must preinitialize any complex variables you want to use in assign actions within your dialog design, or send to an external system that does not support NULL inputs.
- Choose the complex variable you want to preinitialize.
Tip: Use the search fields to narrow down the list if needed.
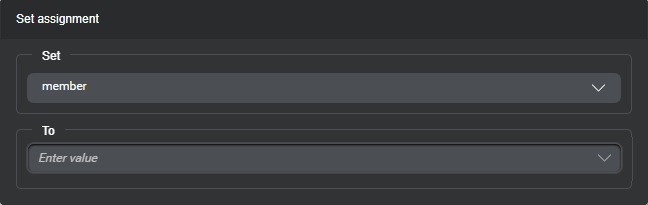
- Click the arrow icon at the end of the To field, point to Values, and choose new var(), where var is the name of the schema for the complex variable.
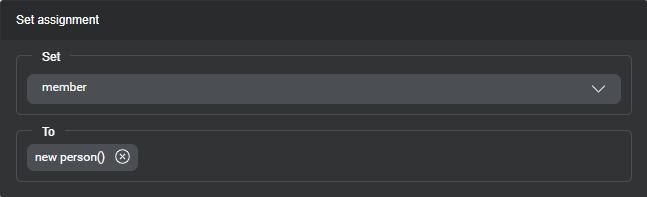
- Click outside the editor to close it.
The compact assignment shows the element being set and the value you specified.

- If this complex variable has fields that are also of a complex variable type, add assign actions, one for each complex field, and preinitialize them in the same fashion.
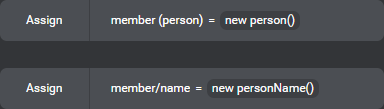
Use the current date and time
A variable of type time can be set to the current time for the specified time zone. Likewise, a variable of type date can be set to the current date for the specified time zone.
- Choose the variable you want to set—for example, myTime, a variable of type time, or myDate, a variable of type date.
Tip: Use the search fields to narrow down the list if needed.
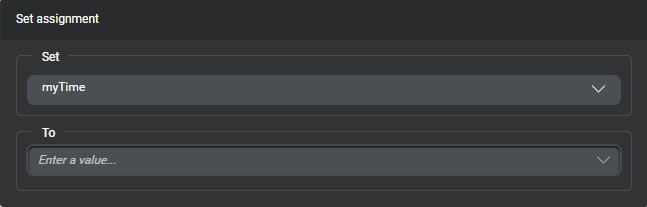
- Click the arrow icon at the end of the bottom (To) field, point to Functions, and choose Time.currentTime(time zone) or Date.currentDate(time zone), as desired.
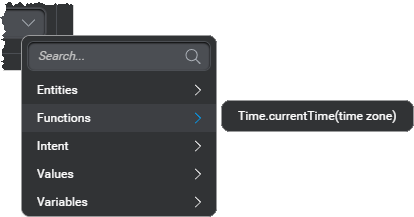
- Use the bottom field to specify the desired time zone.
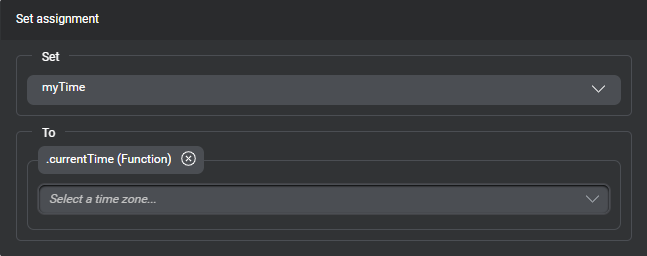
Tip: Use the search field to narrow down the list of time zones, variables, and entities. - Click outside the editor to close it.
The compact assignment shows the variable being set and the value you specified.

Use a mathematical expression
A variable of type integer can be set to the value of an arithmetic operation (addition, subtraction, multiplication, division, or percentage). Mix.dialog supports simple mathematical expressions involving:
- One operator
- A variable of type integer, before the operator
- A constant, or another variable of type integer, after the operator
This example shows how to increment a variable to use it as a counter. (It assumes your design includes actions to initialize this variable, and reset it if needed.)
- Choose the variable you want to set—for example, count, an integer.
Tip: Use the search fields to narrow down the list if needed.
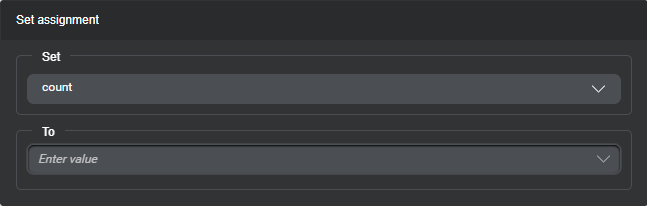
- Click the arrow icon at the end of the To field, and choose the same variable.
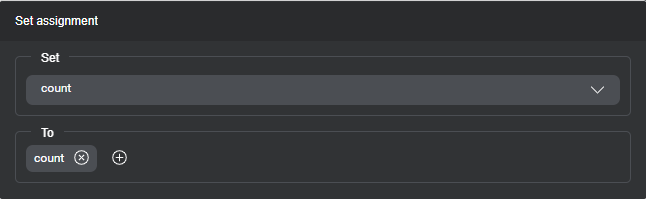
- Click the Add icon , and choose the desired operator—in this case, the + sign.
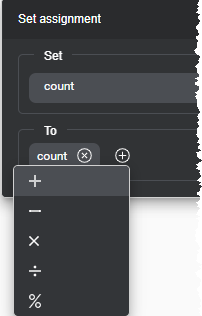
- Enter the number by which you want to increment the counter.
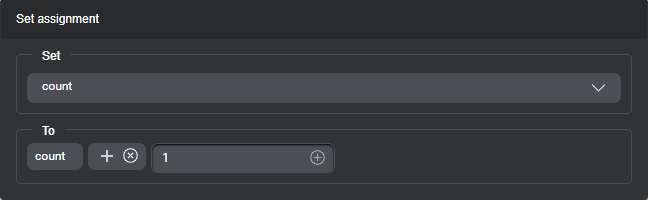
- Click outside the editor to close it.
The compact assignment shows the variable being set and the expression you specified.

Use a random number
A variable of type integer can be set to a random value between 1 and a number you specify. In this example, a variable is assigned a random integer value between 1 and 6. Once you have set a variable to a random value you can use it in conditions, for example to play a random greeting message when your application starts, or to perform a random transition.
- Choose the variable you want to set—for example, lotto, an integer.
Tip: Use the search fields to narrow down the list if needed.
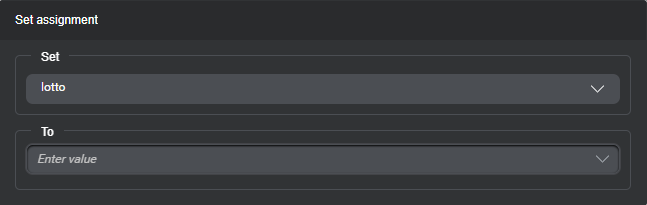
- Click the arrow icon at the end of the bottom (To) field, point to Functions, and choose Integer.random(…).

- Enter the desired number in the bottom field.
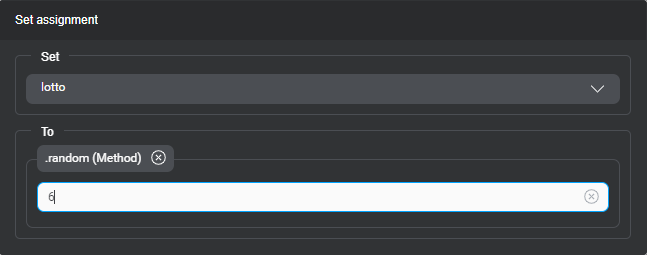
- Click outside the editor to close it.
The compact assignment shows the variable being set and the value you specified.

Switch intent manually
To initiate intent switching programmatically, you can use an assign action to modify the predefined variable Active Intent Value.
Intent switching requires Active Intent Value to be set before the dialog flow reaches the intent mapper node that will perform the switch.
If you set Active Intent Value downstream from the intent mapper node, the type of transition to apply depends on whether the intent mapper node is in the same component as the assign action, or in another component; and on whether a question router node is present in the component where the assign action takes place:
- With a question router node to support intent switching
If the dialog flow will be reaching a question router node with intent switching enabled, from the node at which you set this variable, make sure to set a Return To transition—not Return to Intent Mapper or Return—to return to the question router node.
This will allow the question router node to use its Switch Intent transition to return to the intent mapper node from which it was invoked, and the intent mapper node will automatically switch to the new assigned intent. - Without any question router node to support intent switching
If there isn't a question router node configured to allow intent switching in the component where you set Active Intent Value:- If the intent mapper node is in this same component, use a GoTo transition to loop back to the intent mapper node.
- If the intent mapper node is in another component, use a Return transition (if the current component is invoked from the intent mapper node), or a Return to Intent Mapper transition. This will allow the dialog to return to the appropriate intent mapper node, which will use its On Return transition, instead of switching intent automatically. Consider adding logic down the On Return transition—for example, add a decision node to check the value of a Boolean variable (such as if isIntentSet is equal to true), to loop back to the intent mapper node, which will then switch the dialog to the new assigned intent.
Alternatively, consider throwing a custom event to force the dialog to be picked up at a specific intent mapper node (or another node with the appropriate logic).
To set Active Intent Value:
- Expand the Set list, point to Intent, and choose Active Intent Value.
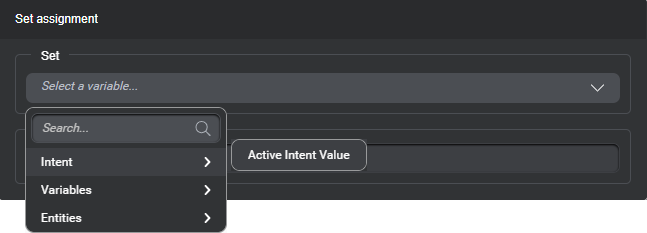
- Expand the To field.
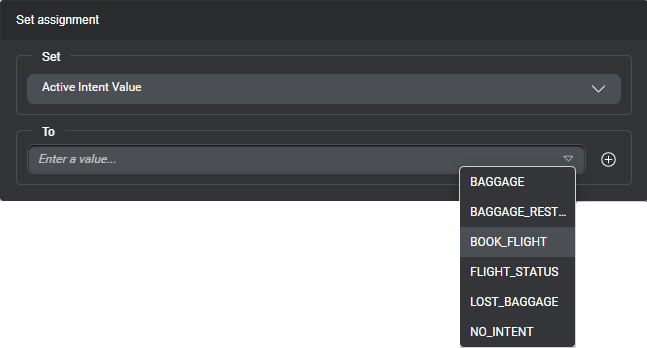
- Choose the desired intent.
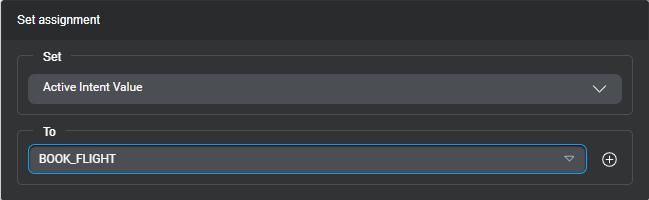
Alternatively, use the Add icon and choose the desired variable.

- Click outside the editor to close it.
The compact assignment shows Active Intent Value being set and the intent (or variable) you specified.

Create a variable on the fly
When adding an assignment for a variable, or when setting an expression for a condition, you can create the variable directly from the search field at the top of the variable selector.
- Click the search field.
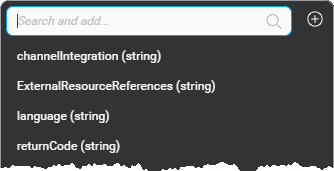
- Enter a name for the new variable.
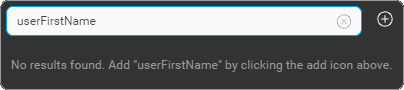
Note: Variable names are limited to letters (A-Z, a-z), digits (0-9), the dollar sign ($) and the underscore (_). They must not start with a digit. The name must be unique across all intents, entities, and variables in your project. - Click the Add icon .
The new variable appears in the list, with an indication that its type is undefined.
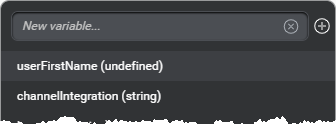
- Choose the new variable.
- Remember to use the Variables resource panel to complete its definition.
Depending on the data type, this is likely to be required before you can choose a value, use a method, or complete the desired expression for a condition. See Manage variables.
Delete an assign action
- Bring your pointer to the right-hand side of the assignment you want to delete.
- Click the More options icon that appears and choose Delete assignment.
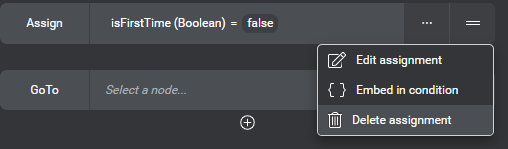
Create a condition from an assign action
- Bring your pointer to the right-hand side of the assignment for which you want to create a condition.
- Click the More options icon that appears and choose Embed in condition.
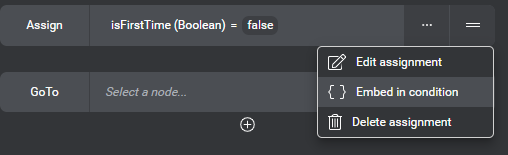
Your assignment now appears under a condition placeholder.
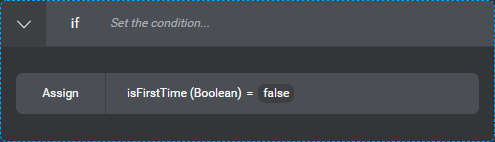
- Set the desired condition.
Set transitions
A transition identifies the next node to execute after completing an action. Distinctive elements represent transitions between nodes on the canvas. Mix.dialog supports these transition types:
| Transition type | Appearance | Description |
|---|---|---|
| GoTo | Arrow between two nodes on the canvas. Color-coded by channel. Gray (default) represents a transition that applies to all channels. Other colors represent channel-specific transitions. | Transitions to another node within the same dialog component. |
| Return To | Returns any collected entity information back to a question router node that handles a set of entities. | |
| Return | Returns to the intent mapper node or component call node that called the current component from another component. Not available in the component called Main. | |
| Return to Intent Mapper | Returns to the upstream intent mapper node when a user says something that is recognized as an intent, while entities are being collected to fulfill a different intent. Requires intent switching to be enabled, in the question router node that handles the entities for the active intent. |
Setting up a question router node determines transitions to other nodes from which the dialog flow should eventually return—via a Return To transition—after having collected information for entities handled by the question router node.
Setting up an intent mapper node determines transitions to other nodes or to other components that handle intents in your project. When a separate component handles an intent, the dialog flow must eventually return to the intent mapper node that called the current component via a Return transition.
Similarly, if your design uses component call nodes to transition to separate components that handle specific parts of the dialog flow, such a component should eventually use a Return transition to go back to the node from where it was called.
Data access nodes only support GoTo transitions. If your dialog design requires a different type of transition for the Success path or the Failure path of a data access node, add a decision node (for example), and set the desired transition from that node.
Protection against infinite loops
Self-hosted environments: This behavior requires version 1.3 of the Dialog service.
As a protection against infinite loops, the maximum number of times a dialog flow is allowed looping through a node before reaching a question and answer node is 100. (In self-hosted environments with a version of the Dialog service earlier than 1.3, this limit is 20.)
At runtime, exceeding this limit will generate an error response (400, FAILED_PRECONDITION), from the Dialog service to the client application.
If your design is likely to involve loops with more than 100 iterations, consider delegating this logic to your client application or a dedicated backend. Remember that the client application or a dedicated backend are often better suited than the dialog model to perform conditional logic, such as iterating through lists to verify, for example, whether a medication is listed in the user’s file and that the maximum number of refills hasn’t yet been reached.
Add a transition
The steps you must perform for adding a transition depend on where you want to add it:
- Add a GoTo placeholder if there isn’t one already.
- Click the GoTo placeholder.

This opens the GoTo editor. - Use the GoTo editor to create your transition.
Once you have created a transition, you can perform various operations directly from the compact GoTo in the Node properties pane, including:
Add a GoTo placeholder
- If there aren’t any placeholders yet, click + Action and choose GoTo.

- If other messages, notes, actions, or conditions already exist, click the Add icon , where you want to insert the transition, and choose GoTo.
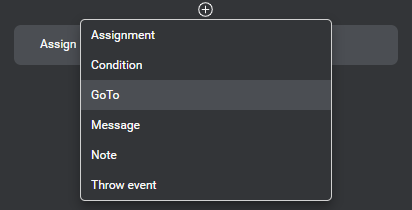
- To add the first placeholder under a condition, click the Add icon and choose GoTo.
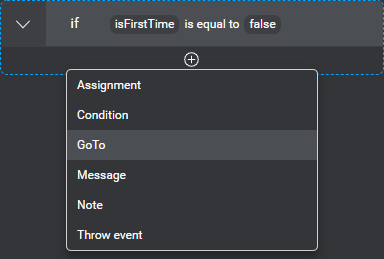
- To add a transition under a condition where other messages, notes, actions, or conditions already exist, bring your pointer to the area where you want insert the transition, click the Add icon that appears, and choose GoTo.
Use the GoTo editor
- Expand the GoTo Node list and choose the appropriate node or transition type:
- In a question and answer node that collects an entity to fulfill an intent, or in any node from which to return collected entity information back to a question router node, point to Return to, and choose the question router node that handles all entities for this intent.
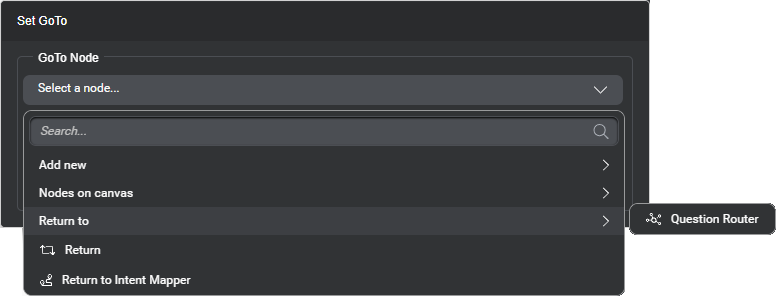
On the canvas, the current node has a distinctive icon to identify this transition (instead of an arrow between the current node and the question router node).
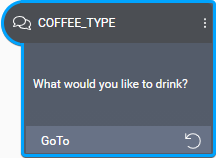
- To simply direct the dialog flow from the current node to another, point to Nodes on canvas and choose the next node from the list.
- If the destination node has not yet been created, point to Add new, and choose the desired node type.
This automatically connects the current node to a new node of the type you specified. - If the current transition is meant to support intent switching from the current node, and the dialog flow is designed to enter the current component from an intent mapper node, choose Return to Intent Mapper.
- To return the dialog flow to the intent mapper node or component call node that called the current component from another component, choose Return.
- If a transition has already been set but you would like to clear it momentarily, choose Remove connection.
- In a question and answer node that collects an entity to fulfill an intent, or in any node from which to return collected entity information back to a question router node, point to Return to, and choose the question router node that handles all entities for this intent.
- (Optional) If the transition you’re setting allows it, replace the default label if desired.
Start and Enter nodes do not have transition labels. You cannot change the Success and Failure transition labels of data access nodes, or the Switch Intent transition label of question router nodes. - Click outside the editor to close it.
The compact GoTo shows the transition type you specified, the destination, and the label (if any).

Delete a transition
- Bring your pointer to the right-hand side of the transition you want to delete.
- Click the More options icon that appears and choose Delete GoTo.
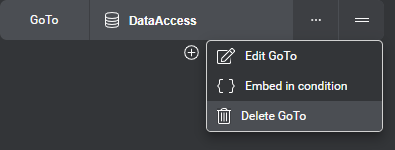
Create a condition from a transition
- Bring your pointer to the right-hand side of the transition for which you want to create a condition.
- Click the More options icon that appears and choose Embed in condition.
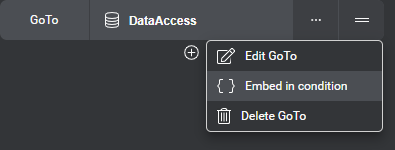
Your transition now appears under a condition placeholder.
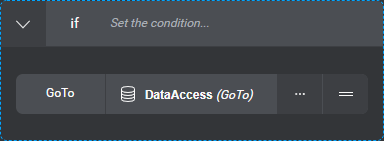
- Set the desired condition.
Set throw event actions
Use throw event actions, in question and answer nodes, message nodes, or decision nodes, to throw custom events.
Add a throw event action
The steps you must perform for adding a throw event action depend on where you want to add it:
- Add a throw event placeholder if there isn’t one already.
- Click the throw event placeholder.

This opens the throw event editor. - Use the throw event editor to create your throw event action.
Once you have created a throw event action, you can perform various operations directly from the compact throw event action in the Node properties pane, including:
Add a throw event placeholder
- If there aren’t any placeholders yet, click + Action and choose Throw event.
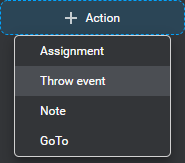
- If other messages, notes, actions, or conditions already exist, click the Add icon , where you want to insert the throw event action, and choose Throw event.
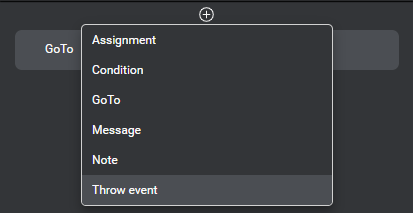
- To add the first placeholder under a condition, click the Add icon and choose Throw event.
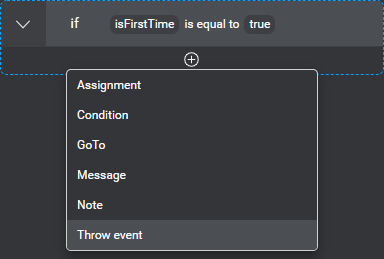
- To add a throw event action under a condition where other messages, notes, actions, or conditions already exist, bring your pointer to the area where you want insert the throw event action, click the Add icon that appears, and choose Throw event.
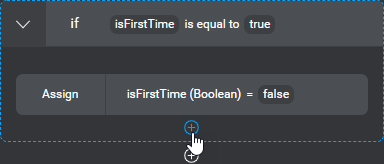
Use the throw event editor
- Expand the Event list and choose the event you want to throw.
Tip: Use the search field to narrow down the list if needed. If your project does not yet have the event you want to throw, you can create it on the fly.

- (Optional) Type a description or text to be logged when the event is thrown.
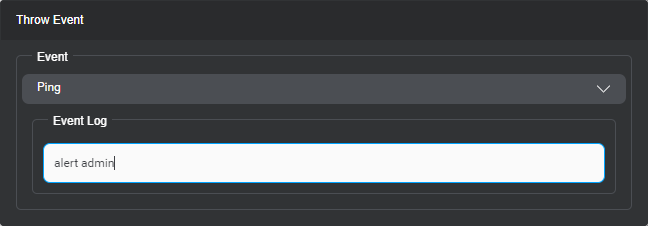
- Click outside the editor to close it.
The compact throw event action shows the event, and the text you specified, if any.

Delete a throw event action
- Bring your pointer to the right-hand side of the throw event action you want to delete.
- Click the More options icon that appears and choose Delete Throw event.
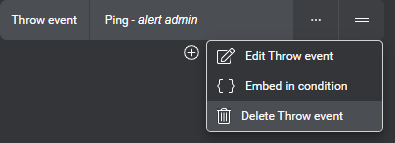
Create a condition from a throw event action
- Bring your pointer to the right-hand side of the throw event action for which you want to create a condition.
- Click the More options icon that appears and choose Embed in condition.

Your throw event action now appears under a condition placeholder.
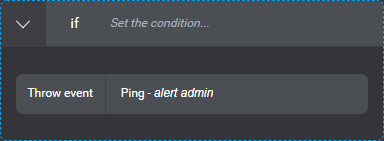
- Set the desired condition.
Set conditions
Use conditions to determine the next action based on logical expressions. For example:
- If the user wants to order a ristretto, do not ask for the size (there’s only one size).
- If the user only has one bank account, do not ask for the name of the account.
- If the user is a new customer, go to the part of the dialog where they can set up their profile;
else skip that part. - If a random number is equal to 1, play a specific message;
else if that random number is equal to 2, play another message;
else play yet another message.
You can define conditions in these contexts:
- In a message node, to set variables, to determine which messages to play, or where to go next.
- In a question and answer node, to determine which question to ask.
- In a question and answer node, to determine the actions to perform following the user’s response (for example, set variables, play messages, go to another node).
- In a decision node, to set variables, or to determine where to go next.
- In a question router node, to determine when the dialog should skip collection for an optional entity.
Note: The question router node only supports simple expressions, for skip input conditions. You cannot use complex expressions with logical operators (and, or), in this context. - In a node downstream from the success transition of a data access node, to verify if the expected data has actually been returned—that is, verify that a variable or a complex variable is not equal to
NULL.
Add a condition
The steps you must perform for adding a condition depend on where you want to add it:
- Add a condition placeholder if there isn’t one already.
- Click the condition placeholder.

This opens the condition editor. - Use the condition editor to create your condition.
- Set actions to perform under this condition (for example, assign variables, play a message, throw an event, transition to another node), and add notes to explain your logic, if desired.
Note: What you can add under a condition depends on the node type and context. For example, in the System Question section of a question and answer node, you can only add messages, notes, and conditions.
Tip: In a node with a complex condition structure, clicking the Table icon ![]() expands the Node properties pane giving you a wider area to work with all messages, notes, actions and conditions you need to set. Click the List icon
expands the Node properties pane giving you a wider area to work with all messages, notes, actions and conditions you need to set. Click the List icon ![]() to restore the Node properties pane down to its default width.
to restore the Node properties pane down to its default width.
Once you have created a condition, you can perform various operations directly from the compact condition in the Node properties pane, including:
- Add an else statement
- Add else if statements
- Delete the else statement
- Delete an else if statement
- Delete a condition
- Create a condition around this condition
- Collapse or expand a condition
Add a condition placeholder
- If there aren’t any placeholders yet, click + Condition.

- If other messages, notes, actions, or conditions already exist, click the Add icon , where you want to insert the condition, and choose Condition.
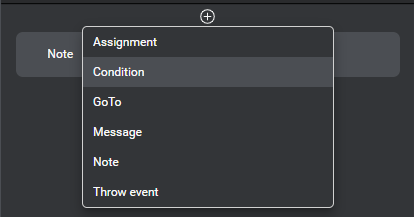
- To add the first placeholder under an existing condition, click the Add icon and choose Condition.
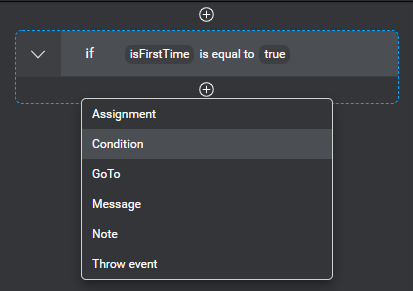
- To add a condition under a condition where other messages, notes, actions, or conditions already exist, bring your pointer to the area where you want insert the condition, click the Add icon that appears, and choose Condition.
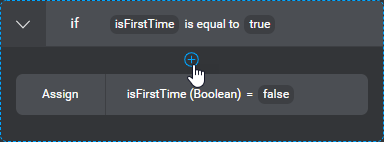
Use the condition editor
- Set the desired expression for your condition.
- Click outside the editor to close it.
The compact condition shows the expression you specified.

Set an expression
- Choose the desired left operand (such as a variable or entity).
Tip: Use the search fields to narrow down the list if needed. If a variable you want to use is missing, you can create it on the fly. - (Optional) Replace the default comparison operator (is equal to) with another one (such as is not equal to, is less than, and so on), if needed.
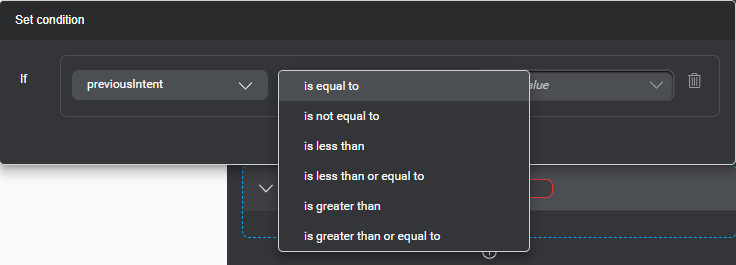
- Set the desired right operand (for example, choose a variable, an entity, or
NULL, or enter a static value).
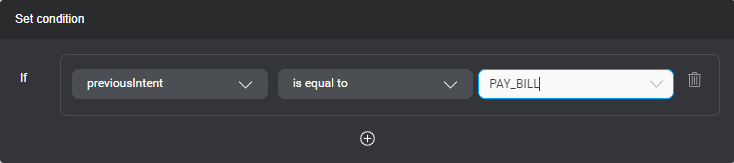
- (Optional) To expand your expression with a logical operation, click the Add icon .
A new row appears, with a logical operator (and) and fields to set another comparison.
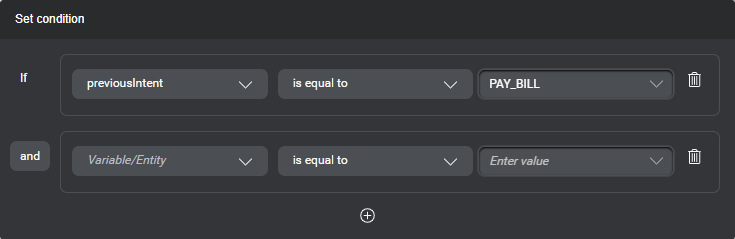
- (Optional) Click the default logical operator, and choose or, if needed.
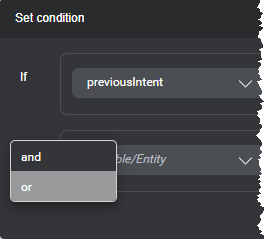
- Repeat the above until your expression is complete.
Tip: If you need to delete a row, click the Delete icon ![]() at the end of the row.
at the end of the row.
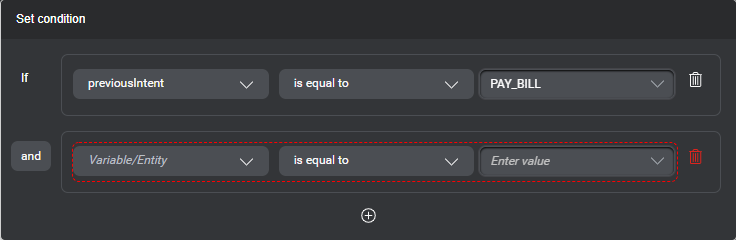
Add an else statement
- Bring your pointer to the right-hand side of the condition for which you want to add an else statement.
- Click the More options icon that appears and choose Else statement.
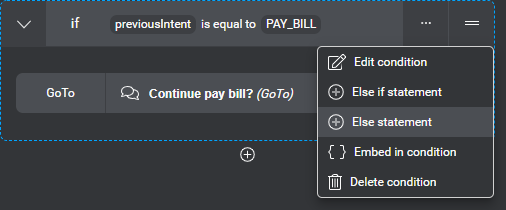
The else statement appears.
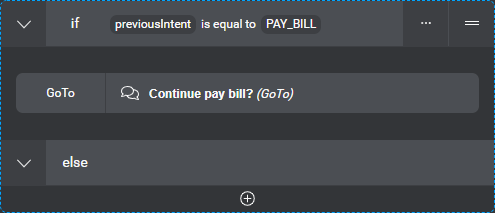
- Set actions to perform under the else statement, and add notes to explain your logic, if desired.
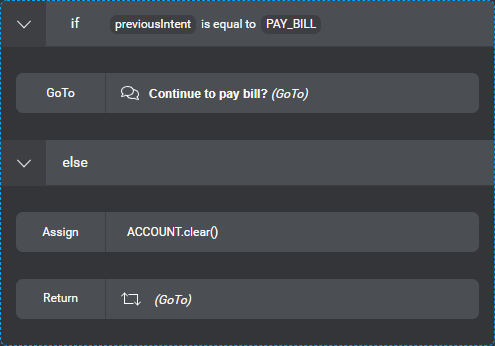
Add an else if statement
- Bring your pointer to the right-hand side of the condition for which you want to add an else if statement.
- Click the More options icon that appears and choose Else if statement.
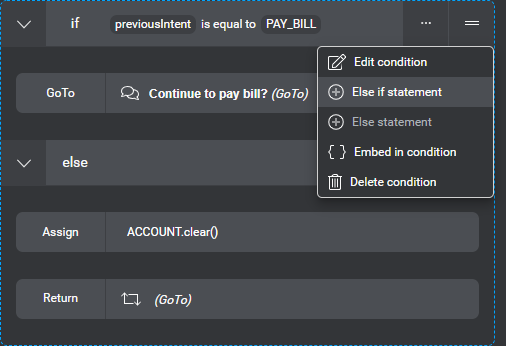
A placeholder for the else if statement appears.
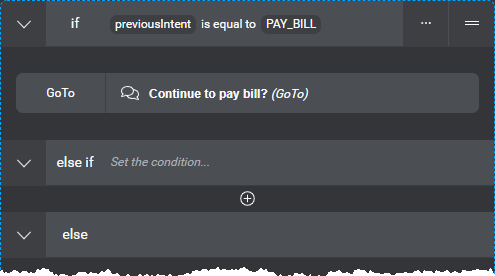
- Click the else if placeholder.
This opens the condition editor.
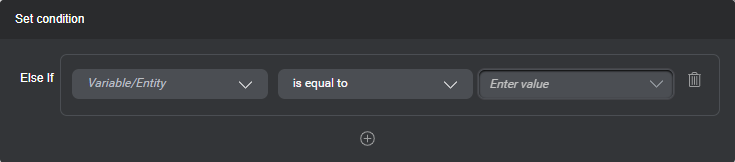
- Set the desired expression for your else if statement.
- Click outside the editor to close it.
The compact condition shows the expression you specified. - Set actions to perform under the else if statement, and add notes to explain your logic, if desired.
Delete an else if statement
- Bring your pointer to the right-hand side of the else if statement you want to delete.
- Click the More options icon that appears and choose Delete else if statement.

A message appears prompting you to confirm your intention. - Click Confirm.
This deletes the else if statement and all messages, notes, actions, and conditions under it, inside the current condition.
Delete the else statement
- Bring your pointer to the right-hand side of the else statement you want to delete.
- Click the More options icon that appears and choose Delete else statement.
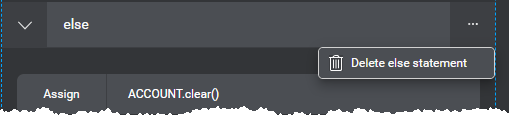
A message appears prompting you to confirm your intention. - Click Confirm.
This deletes the else statement and all messages, notes, actions, and conditions under it, inside the current condition.
Delete a condition
- Bring your pointer to the right-hand side of the condition you want to delete.
- Click the More options icon that appears and choose Delete condition.
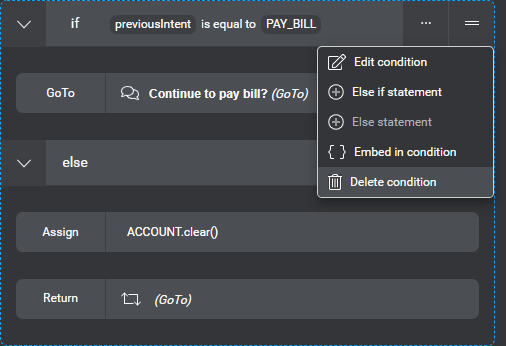
A message appears prompting you to confirm your intention. - Click Confirm.
This deletes the whole condition, including any messages, notes, actions, and conditions under the if, else if, and else statements.
Create a condition around a condition
- Bring your pointer to the right-hand side of the condition you want to embed into another.
- Click the More options icon that appears and choose Embed in condition.
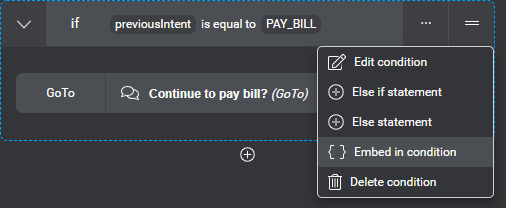
Your condition now appears under a condition placeholder.
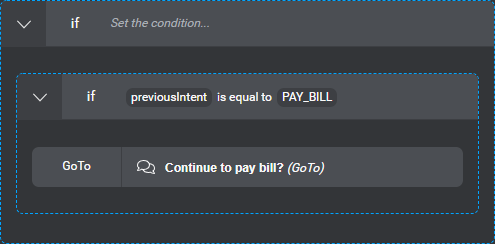
- Set the desired condition.
Collapse or expand a condition
Click the arrow icon ![]() next to the statement you want to collapse in a condition.
next to the statement you want to collapse in a condition.
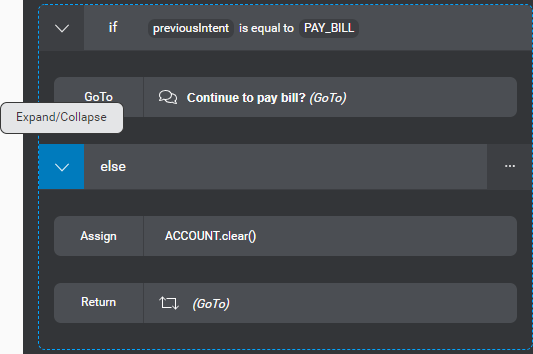
Click the arrow icon ![]() to expand a collapsed statement in a condition.
to expand a collapsed statement in a condition.
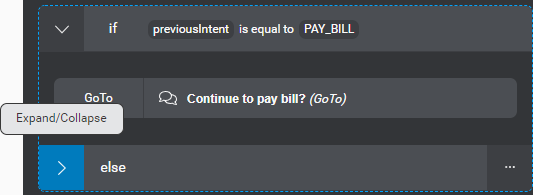
Set notes
Add notes, anywhere around messages, actions, and conditions, to supplement your design with useful information.
Add a note
The steps you must perform for adding a note depend on where you want to add it:
- Add a note placeholder if there isn’t one already.
- Click the note placeholder.

This opens the note editor. - Use the note editor to create your note.
Once you have created a note, you can perform various operations directly from the compact note in the Node properties pane, including:
Add a note placeholder
- If there aren’t any placeholders yet, depending on the context:
- Click + Note.

- Click + Action and choose Note.
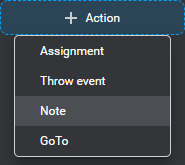
- Click + Note.
- If other messages, notes, actions, or conditions already exist, click the Add icon , where you want to insert the note, and choose Note.
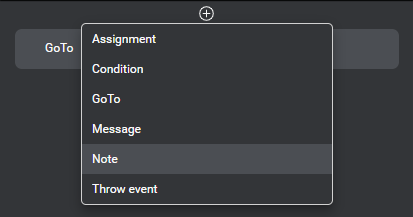
- To add the first placeholder under a condition, click the Add icon and choose Note.
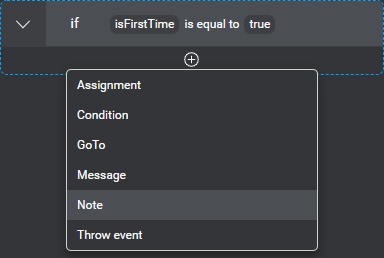
- To add a note under a condition where other messages, notes, actions, or conditions already exist, bring your pointer to the area where you want insert the note, click the Add icon that appears, and choose Note.
Use the note editor
- Enter the desired text (maximum 4000 characters).
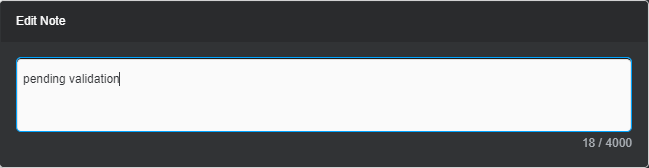
Tip: To force a new line in your note text, use Shift+Enter (or Shift+Return). - Click outside the editor to close it.
The compact note shows the text you specified.

Delete a note
- Bring your pointer to the right-hand side of the note you want to delete.
- Click the More options icon that appears and choose Delete note.
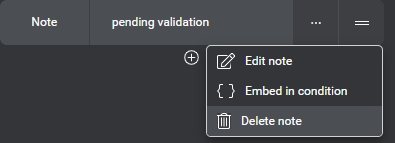
Create a condition from a note
- Bring your pointer to the right-hand side of the note for which you want to create a condition.
- Click the More options icon that appears and choose Embed in condition.
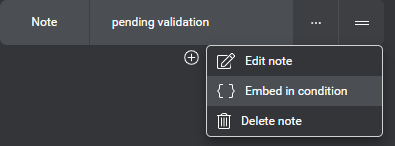
Your note now appears under a condition placeholder.
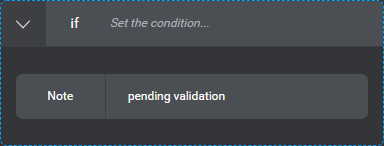
- Set the desired condition.
Manage resources
All resources in a dialog project have a global scope, which means you can use them anywhere in your dialog design. A dialog flow involves these resource types:
| Resource | Description |
|---|---|
| Intent | An intent is what a user is trying to accomplish—for example, booking a flight, or checking the current status of a flight. |
| Entity | Entities are details the user might need to provide to fulfill an intent. For example, in the scenario where a user wants to book a flight, the origin, the destination, the departure time, and the arrival time are entities. |
| Grammar | If your Mix project is meant to support a VoiceXML application, you can export a grammar specification document to help design and manage grammars that will be referenced by the application. |
| Variable | Variables are named objects that store values to be used in the applications you build from your dialog project. |
| Message | Messages allow your application to respond to what a user says, in the most specific and relevant way to help them accomplish what they want to do. In Mix.dialog, a message can have format-specific and channel-specific variants. The available message formats—Rich Text (default), TTS, or Audio Script—depend on the modalities that the active channel supports. Channels and the modalities they support are determined when you create a project. |
| Event | An event interrupts the current call flow, and passes flow control to an event handler. Events are available for throw actions you can set in most node types, and for event handlers you can set at the project level, at a component level, or in a question and answer node. Configure global event handlers in the Start node for your project, component-level event handlers in the Enter node of a component, node-level handler in the Event Handling section of a question and answer node. |
Manage intents
NLU resource panel, Intents tab example
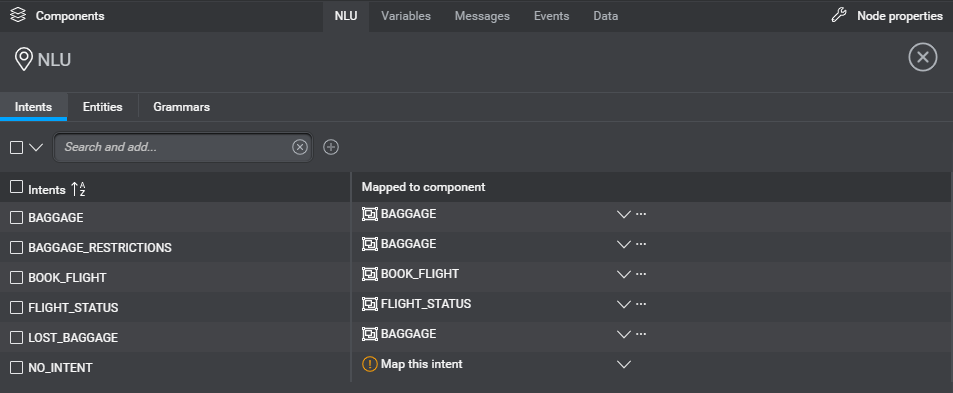
In Mix.dialog you can use the NLU resource panel to manage intents, intent components, and entities. Any changes you make to intents or entities in Mix.dialog become available in Mix.nlu, and vice versa. Use Mix.nlu to link entities to intents, by adding samples and annotating them. Associating each intent with a variety of representative utterances allows your application to be able to recognize what the user said in their own words. Refer to the Mix.nlu documentation for more information.
An intent component is a special type of component meant to handle one specific intent. Intent components are always named after the intent they handle. You can create an intent component from the Components pane, or add it on the fly when mapping intents.
An intent mapping represents the destination of an intent—that is, when the intent is recognized, the dialog goes to the specified intent component, generic component, or node.
When you create an intent component for an intent, this not only maps the intent to its intent component but also creates an implicit link, which is what allows the intent component to follow the corresponding intent’s name. Deleting an intent that was mapped to an intent component leaves a broken link in the intent component. In such an event, you have the ability to relink the intent component to another intent, or to convert it into a generic component, if it was not meant handle a specific intent after all. If you chose the wrong intent by mistake, you can unlink the intent component.
Open the NLU resource panel
Click NLU, on the Mix.dialog toolbar, to open the NLU resource panel.
(Click NLU again to close the panel.)
Add an intent
- In the search field, type a unique name for the intent (see Naming guidelines)—for example, BOOK_FLIGHT.
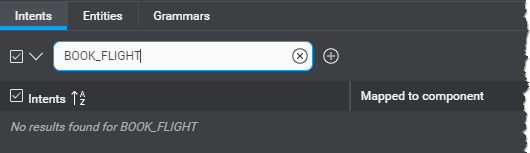
- Click the Add Intent icon .
Add an intent component for an intent
- Click Map this intent, next to the intent name.
Tip: Use the search field to narrow down the list if needed. - Click Create Intent Component.
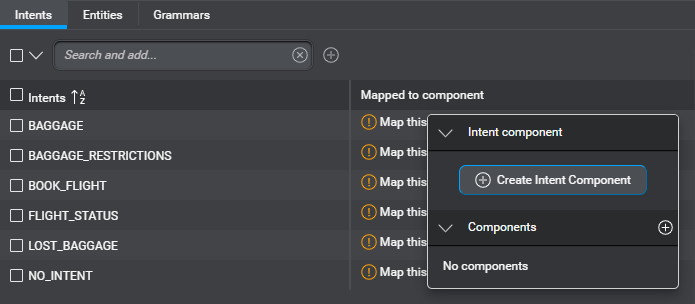
Find an intent
Use the search field to filter the global intent mappings displayed in the NLU resource panel.
The panel updates as you type, to show only the mappings where the intents, intent components, or generic components match the search string.
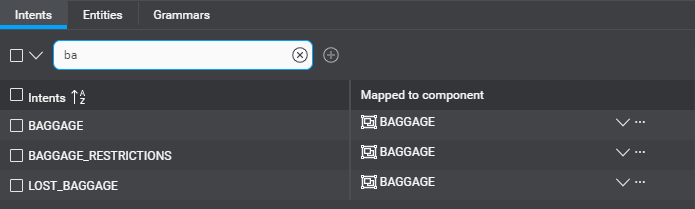
If the intent you are looking for doesn’t exist, you can click the Add Intent icon ![]() to create it, if desired.
to create it, if desired.
To stop filtering, click the Clear search icon ![]() .
.
Rename an intent
- In the Intents list, bring your pointer to the intent you want to rename.
Tip: Use the search field to narrow down the list if needed. - Click the Edit icon
 .
. - Enter the desired name (see Naming guidelines).
If the intent is mapped to an intent component, this renames the intent component accordingly.
Delete an intent
- In the Intents list, click the checkbox next to the intent you want to delete.
A toolbar appears above the intents table.
Tip: Use the search field to narrow down the list if needed. - Click Delete Intent.
A message appears prompting you to confirm your intention. - Click Delete Intent(s).
Set global mappings for intents
Intents can be mapped to components, to route the dialog based on the intent. When an intent is detected by the NLU model, the flow of the dialog can transfer to that component.
For most intents, you will probably want to have the intent handled consistently by the same component wherever the intent is detected in the dialog. In the Intents tab of the NLU resource panel, you can set global default mappings for intents.
Default mappings set in the NLU resource panel are inherited by intent mapper nodes but can be overridden if needed within the intent mapper node.
One-to-one vs many-to-one mappings
Mappings from intent to component can be of two types:
- many-to-one—multiple intents mapped to the same (generic) component
- one-to-one—only one intent mapped to a component
The types of mappings possible depend on the type of component. Only generic components support many-to-one mapping. Both intent components and generic components support one-to-one mapping. Intent components support one-to-one mapping only.
Set a many-to-one mapping
- Use the check boxes beside the intent names to select the intents you want to map.
Tip: Use the search field to narrow down the list if needed.
A toolbar appears above the intents table.
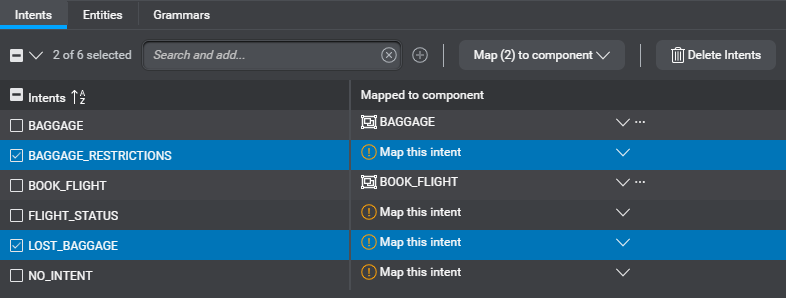
- Click Map (n) to component, and choose an existing component from the list.
Tip: If your project does not yet have the generic component you want to use, you can create it on the fly.
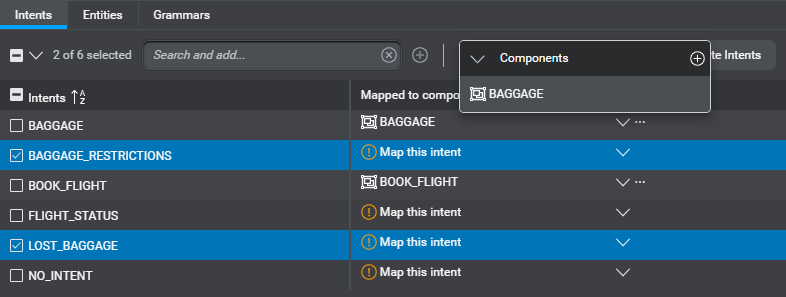
- Click Confirm to dismiss the message that prompts you to confirm your intention.
This maps all selected intents to the specified component.
Set a one-to-one mapping
- Click Map this intent, next to the name of the intent you want to map.
(Click the name of the current component, if the intent is already mapped.)
Tip: Use the search field to narrow down the list if needed. - Choose either the dedicated intent component, or an existing generic component, as required.
Tip: If your project does not yet have the generic component you want to use, you can create it on the fly.
Add a generic component on the fly
- Click Map this intent, next to the name of the intent you want to map to a new reusable component
(Click the name of the current component, if the intent is already mapped to an intent component.)
Tip: Use the search field to narrow down the list if needed. - Click the Add icon , next to Components.
- Enter a name for the new component.
The new generic component becomes available for mapping. It also appears in the Components section of the Components pane.
Remove the global mapping for an intent
Click the More actions icon ![]() for the mapping you want to remove, and choose Remove mapping.
for the mapping you want to remove, and choose Remove mapping.
Remove a broken mapping for an intent
After you deleted a component, if an intent was mapped to this component, this results in a broken mapping. In the mapping table, broken mappings are indicated by a warning: Mapped resource missing.
Click the More actions icon ![]() for the mapping you want to remove, and choose Remove mapping.
for the mapping you want to remove, and choose Remove mapping.
Navigate to a mapped component
Once an intent has been mapped to a component in the NLU resource panel, it is easy to navigate directly to that component to further design it.
Click the More actions icon ![]() for the intent and choose Go to component.
for the intent and choose Go to component.
This closes the NLU resource panel and shows the desired component on the canvas.
Manage entities
NLU resource panel, Entities tab example

In Mix.dialog you can use the Entities tab of the NLU resource panel to manage entities. You can also create entities on the fly from question and answer nodes. Any changes you make to entities in Mix.dialog become available in Mix.nlu, and vice versa. Use Mix.nlu to link entities to intents by adding sample sentences and annotating them (refer to the Mix.nlu documentation).
Entity data types
Self-hosted environments: This feature requires version 1.3 of the Dialog service.
Nuance-hosted environments: For entities that were created with an earlier version of Mix.dialog or Mix.nlu, the data type will remain undefined (not set), until you specify it.
Just like variables, entities have a data type. It’s important to choose the data type carefully when you create an entity, since this determines formatting options for dynamic messages using the entity, and methods that can be used in conditions that are based on this entity. Entity data types include: generic, alphanumeric, amount, Boolean, date, digits, distance, number, temperature, and time. See Data types, in the Mix.nlu documentation, for more information.
Entity collection methods
When you choose the data type for an entity, this automatically sets a collection method (also known as entity type), which determines the recognition and interpretation services to be invoked at runtime. Collection methods include: list, relationship, freeform, regex-based, and rule-based.
Using the default collection method for your entities allows you to start developing your dialog design quickly. Later on, perhaps after consulting with a speech science specialist, you might opt for a different collection method for some entities (see Data type and collection method compatibility, in the Mix.nlu documentation, for more information).
Predefined entities in Mix.dialog
Mix.nlu shares with Mix.dialog a set of predefined entities from data packs installed with your Mix platform. Mix.dialog supports these:
- nuance_AMOUNT
- nuance_BOOLEAN
- nuance_CARDINAL_NUMBER
- nuance_DISTANCE
- nuance_DOUBLE
- nuance_EXPIRY_DATE
- nuance_GENERIC_ORDER
- nuance_NUMBER
- nuance_ORDINAL_NUMBER
- nuance_TEMPERATURE
In addition to the entities from the data packs, Mix also provides a set of dialog-specific predefined entities. Mix.dialog supports these:
- DATE
- TIME
- YES_NO
Entity attributes
Entities have these attributes:
| Attribute | Type | Description |
|---|---|---|
| .value | Any | The recognized value, in the format specified for the entity. An entity that has not yet been collected does not have a value and is considered null. Use the .clear() method in an assign action to reset an entity to this null state. Note: Freeform entities do not have values; if your dialog handles freeform entities, make sure to use the entity literal (or formatted literal) instead. |
| .literal | String | The exact words collected for the entity. |
| .formattedLiteral | String | Formatted version of the entity literal extracted from the last recognition results. Applies to user inputs coming from ASR results (see Interpretation results: Literals, in the NLU as a Service gRPC API documentation, for more information). |
| .isCompleted | Boolean | true if the entity has a value that is considered valid; otherwise false. By default, question router nodes automatically set .isCompleted to true, for the entities they handle, whenever question and answer nodes return with collected values. You can enable Manual Complete for an entity, in the question router node that handles it, if your dialog design requires this attribute to be set manually. |
| .isRequired | Boolean | true if the entity is required for the associated intent; otherwise false. |
| .isConfirmed | Boolean | true if the entity has a value that does not require further confirmation; otherwise false. |
List entities
The default collection method for custom generic entities, List, represents a list of possible values.
For list entities, literals and values are language-specific, whereas the entities themselves are common to all languages. When you add an entity value, it only applies to the current language in your project. To support language-specific requests, choose the desired language from the menu near the name of the project, and add literal-value pairs as required.
When you attempt to delete the last literal for a specific value, Mix warns you that you will be permanently deleting not only the (last) literal but also the entity value itself for the current languages, and prompts you to confirm the deletion.
In a dialog that collects a list entity, the next step might need to be different for each possible value, or it might be the same for all possible values. It is also possible for your application to perform exclusive actions for some values, and proceed via a common path for all other values. You determine the required behavior for a list entity—that is, whether all values are handled the same way, or individual values determine different paths—, when you set up the question and answer node that collects the entity.
Global command entity
If your application should support global commands (for example, Goodbye, Main menu, Operator), you must reserve an entity to hold recognized command values. This entity becomes the global command entity for your project.
You can also use this entity to extend the scope of specific question and answer nodes, by defining local command overrides. In a question and answer node, command overrides allow you to:
- Override global or channel-level handling for specific commands
- Handle custom commands
- Supplement the intent or entity in focus by allowing the node to recognize additional values
Dynamic list entities
When you create your NLU model, you might realize that, for some list entities, the set of values can only be fully determined at runtime. For example, the set of contacts for a user is specific to that user. Another example is the list of products available at a specific location (such as the restaurant branch closest to the user’s current position), or on specific occasions (seasonal products, holiday products), and so on.
Depending on the number of possible values for a dynamic list entity, you can use inline resources (compiled at runtime) or precompiled resources.
- Entity with up to 100 values: For example, the number of bank accounts for a typical person, or the number of rooms in a house, are typically between 5 and 10. Define a dynamic list entity, and rely on the client application to make additional literal-value pairs available to the dialog, at runtime, via a variable of type Dynamic Entity Data fetched from a data access node. See the workflow for using inline resources.
- Entity with more than 100 values: For example, the number of contacts one might have on their phone could be several hundreds; the number of doctors in a hospital could be thousands. Define a dynamic list entity, and rely on the client application to provide references to the corresponding precompiled resources, via the ExternalResourceReferences session variable. See the workflow for using precompiled resources.
Workflow for using a dynamic list entity (inline resources)
- Add a list entity, and mark it as dynamic.
- Add a few representative literal-value pairs for the entity.
- Create a variable of type Dynamic Entity Data.
- Set up a data access node using your dynamic entity data variable to get additional values for your dynamic entity, from the appropriate external system, at runtime.
- Set up a question and answer node to collect your dynamic list entity.
- In Mix.nlu, make sure you have annotated some samples with your dynamic list entity, and that your NLU model has been trained.
- Preview your dialog design.
When the dialog reaches the data access node that is meant to return the dynamic entity data variable:- Choose the dynamic list entity to be extended with data from your dynamic entity data variable.
- Use the fields that appear to enter literal-value pairs (and define interactive elements if needed).
Tip: Use Copy to Clipboard and save the JSON representation of the stub data, to be able to use the JSON bulk input feature the next time you must provide stub data at this data access node.
Dynamic entity data specification
Dynamic entity data variable example
{
    "moreCoffeeTypes": {
        "COFFEE_TYPE": [{
                "canonical": "cold brew",
                "literal": "cold brew"
            }, {
                "canonical": "iced cappuccino",
                "literal": "iced cappuccino"
            }
        ]
    }
}
The Nuance Mix Platform’s NLU and ASR services support dynamic list entities by using inline wordsets. In Mix.dialog, when using the TRY tab to preview your dialog design, the stub data you provide at a data access node is a JSON representation that includes both the inline wordset and data to support interactivity. For more information on using wordsets to extend your NLU and ASR models, refer to the gRPC API documentation for NLU as a Service, and ASR as a Service.
Dynamic entity data variable object
Represents a dynamic entity data variable returned by a data access node.
| Element | Type | Description |
|---|---|---|
| variable | Dynamic entity data object | Where variable is the dynamic entity data variable specified in the data access node |
Dynamic entity data object
Represents dynamic entity data for a dynamic list entity.
| Element | Type | Description |
|---|---|---|
| entity | Array of Dynamic entity data items | Where entity is the dynamic list entity to be extended with the dynamic entity data |
Dynamic entity data item
Represents an additional value for a dynamic list entity, and attributes to support interactivity for the value.
| Element | Type | Description |
|---|---|---|
canonical |
String | (Optional) The value of the entity |
literal |
String | The written or spoken form of the value; doubles as the value when canonical is omitted |
spoken |
Array | (Optional) One or more additional spoken forms of the value—used by ASR; ignored for NLU |
label |
String | (Optional) A label, such as the text to show on a button |
image_url |
String | (Optional) A link (URL or relative path) for the image to use on a button |
description |
String | (Optional) A description |
Workflow for using a dynamic list entity (precompiled resources)
- Add a list entity, and mark it as dynamic.
- Add a few representative literal-value pairs for the entity.
- In Mix.nlu, add a few samples to the NO_INTENT intent, and annotate them with your dynamic list entity.
These samples and literal-value pairs allow you to preview your dialog design directly in Mix.dialog. They are ignored at runtime. - In your dialog design, identify the context where the external data is relevant, and set up a data access node or an external actions node with the predefined variable ExternalResourceReferences as a Get data parameter, to fetch references to compiled ASR and NLU resources from the appropriate external system.
Make sure to clear this variable when the data it references is no longer required, to avoid adding unnecessary latency to the subsequent recognition and interpretation requests.
Relationship entities
A relationship entity has a specific relationship to an existing entity, either the isA or hasA relationship. For example, for an airline application, the entities that represent departure and arrival airports typically have the same possible values. If you first create a list entity (for example, CITY) to represent all the airports served by the airline, you can share its definition with other entities meant to represent departure and arrival cities by making these isA relationship entities: for example, ORIGIN isA CITY, and DESTINATION isA CITY. Assuming your NLU model has representative samples annotated with ORIGIN and DESTINATION, the application will be able to recognize what a user means when they say, for example, “I would like to book a flight to Barcelona from Helsinki.” Refer to the Mix.nlu documentation for more information.
Freeform entities
A freeform entity is used to capture user input that you cannot enumerate in a list. For example, a text message body could be any sequence of words of any length. Unlike other entity types, for which the keywords in the user input that allow the NLU service to recognize an entity are directly associated with the entity values, a freeform entity is like a black box—at runtime, the NLU service relies on the surrounding text to identify where the entity itself starts and ends. When the user says, for example, "Send Joe this message: I'll be there tonight," the words "this message" are what tells the NLU service that what follows is the freeform entity to collect. The value attribute of a freeform entity is always empty—therefore, if your dialog design involves collecting freeform entities, make sure to refer to their literal or formatted literal attributes instead. Refer to the Mix.nlu documentation for details.
Regex-based entities
A regex-based entity represents a sequence of characters matching a pattern defined by a regular expression. For example, account numbers, postal/zip codes, order numbers, and other pattern-based formats. Refer to the Mix.nlu documentation for details.
Rule-based entities
A rule-based entity defines a set of values based on a GrXML grammar file. Refer to the Mix.nlu documentation for detailed information.
Anaphoras
The dialog context service supports resolving anaphoras recognized by your project’s NLU model, such as “there” (REF_PLACE), “then” (REF_TIME), or “her” (REF_PERSON) to a corresponding entity value that was previously collected (up to the previous two recognition steps) in the dialog flow. Once anaphoras have been tagged and your model trained in Mix.nlu, your dialog can handle them automatically. You do not need to configure anything in your dialog model. At runtime, the dialog uses the data that is has available to determine how to resolve the anaphora. Refer to the Mix.nlu documentation for details.
Show the Entities tab of the NLU resource panel
Click NLU, on the toolbar, to open the NLU resource panel, and then switch to the Entities tab.
(Click NLU again to close the panel.)
Add an entity
- In the search field, type a unique name for the entity (see Naming guidelines)—for example, COFFEE_SIZE.
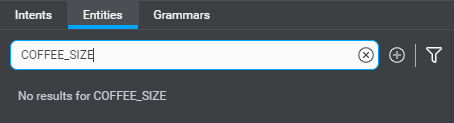
- Click the Add Entity icon .
- Select the desired data type for this entity (for example, Generic), from the list that appears in the upper-right area of the panel.
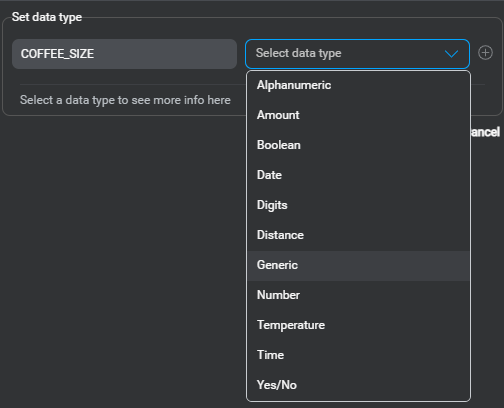
- Click the Add icon .
The new entity appears in the list of custom entities.
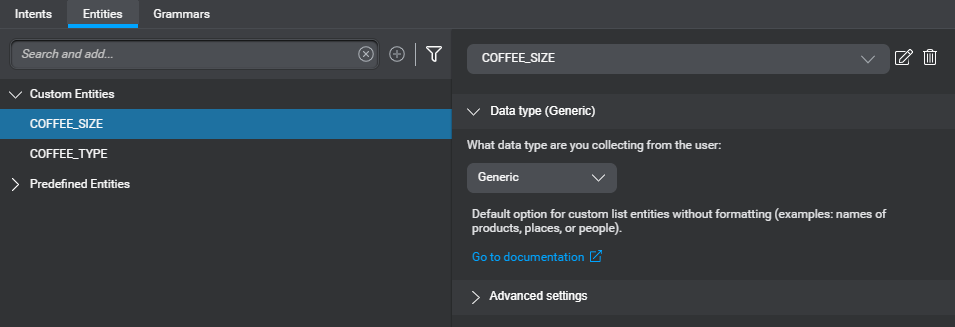
- Expand the Advanced settings section.
A collection method for the new entity is selected by default (see Data type and collection method compatibility, in the Mix.nlu documentation, for more information).

- Choose a different collection method, if desired.
- For a list entity, add literal-value pairs.
- For a dynamic list entity, mark it as dynamic.
- If this entity will hold sensitive information that must be masked in application logs, mark it as sensitive.
- If this is an entity for which you want to be able to recognize anaphoras, mark it as referable.
Rename an entity
- In the list of custom entities, click the entity you want to rename.
Alternatively, choose the entity from the list in the upper-right area of the panel.
Tip: Use the filter icon or the search field, to narrow down the list. - Click the Edit icon , next to the selected entity in the upper-right area of the panel.
The name becomes editable. - Modify the name as desired (see Naming guidelines).
Delete an entity
- In the list of custom entities, click the entity you want to delete.
Alternatively, choose the entity from the list in the upper-right area of the panel.
Tip: Use the filter icon or the search field, to narrow down the list. - Click the Delete icon
 , next to the selected entity in the upper-right area of the panel.
A message appears prompting you to confirm your intention. - Click Confirm (or Yes, export project and delete entity).
If the entity you want to delete is the global command entity for your project, Mix.dialog will export the JSON representation of your design to your local file system for backup purposes, before deleting the entity.
The entity and all associated literals and values are no longer available.
Add literals for a list entity
- In the list of custom entities, click the entity for which you want to add literals.
Alternatively, choose the entity from the list in the upper-right area of the panel.
Tip: Use the filter icon or the search field, to narrow down the list. - Expand Advanced settings.
- Use the fields at the bottom of this section, to add a few representative literal-value pairs.
The literal text automatically doubles as the value, by default. If you want the value to be different, press Tab and type the desired value before pressing Enter.
Multiple literals can have the same value, to help your application recognize the different ways a user might say an entity. - To add a literal for an existing value, click the Add icon , next to the existing literal, type the new literal and press Enter.
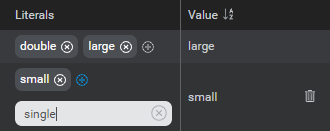
- If your project supports multiple languages, use the menu near the name of the project to switch to another language, and proceed in the same fashion, until you have representative literal-value pairs for every language in your project.
Delete a value
- In the list of custom entities, click the entity for which you want to delete a value.
Alternatively, choose the entity from the list in the upper-right area of the panel.
Tip: Use the filter icon or the search field, to narrow down the list. - Expand Advanced settings.
- Click the Delete icon , next to the value you want to delete.
A message appears prompting you to confirm to confirm your intention. - Click Yes.
If the value belongs to the global command entity for your project, Mix.dialog will export the JSON representation of your design to your local file system for backup purposes, before deleting the value.
The value and all associated literals are no longer available.
Delete a literal
- In the list of custom entities, click the entity for which you want to delete a literal-value pair.
Alternatively, choose the entity from the list in the upper-right area of the panel.
Tip: Use the filter icon or the search field, to narrow down the list. - Expand Advanced settings.
- Click the Delete Literal icon, next to the literal you want to delete.
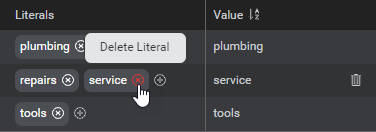
A message appears prompting you to confirm your intention. - Click Yes, Delete Literal.
Mark a list entity as dynamic
- In the list of custom entities, click the entity you want to use as a dynamic list entity.
Alternatively, choose the entity from the list in the upper-right area of the panel.
Tip: Use the filter icon or the search field, to narrow down the list. - Expand Advanced settings.
- Click the Dynamic check box.
Mark an entity as referable
- In the list of custom entities, click the entity for which you want to be able to recognize anaphoras.
Alternatively, choose the entity from the list in the upper-right area of the panel.
Tip: Use the filter icon or the search field, to narrow down the list. - Expand Advanced settings.
- Expand the list next to Referenced as, and choose the appropriate anaphora type:
- REF_MOMENT: References a time (for example, “then”, “at that time”)
- REF_PERSON: References a person (for example, “him”, “her”, “them”)
- REF_PLACE: References a place (for example, “there”, “here”, “that place”)
- REF_THING: References a thing (for example, “it”)
Mark an entity as sensitive
Entities marked as sensitive are masked in application logs. (Depending on your purposes, you might consider marking specific question and answer nodes as sensitive by configuring data privacy settings.)
- In the list of custom entities, click the entity you want to mark as sensitive.
Alternatively, choose the entity from the list in the upper-right area of the panel.
Tip: Use the filter icon or the search field, to narrow down the list. - Expand Advanced settings.
- Click the Sensitive check box.
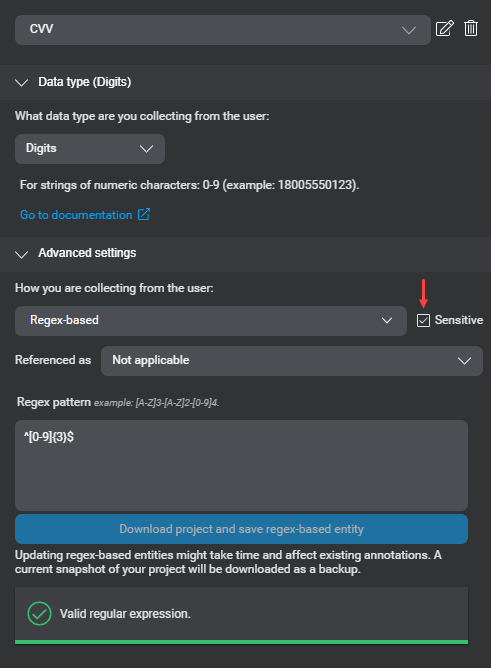
Change the collection method for an entity
- In the list of custom entities, click the entity for which you want change the collection method.
Alternatively, choose the entity from the list in the upper-right area of the panel.
Tip: Use the filter icon or the search field, to narrow down the list. - Expand the Advanced settings section.
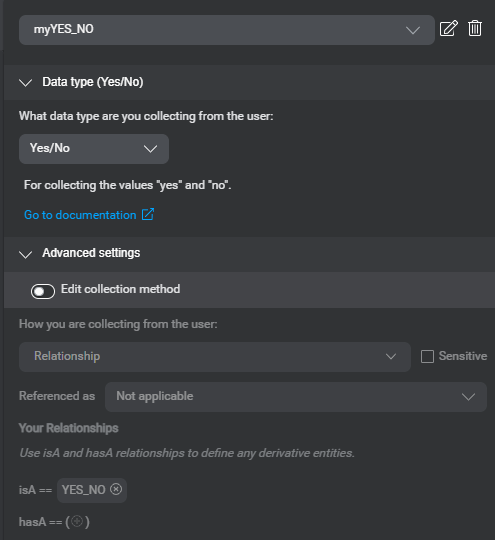
- Turn on Edit collection method.
Note that this switch is only present if the current collection method is not List.
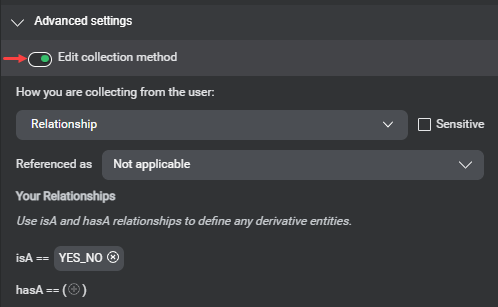
- Choose the desired collection method from the list under How you are collecting from the user.
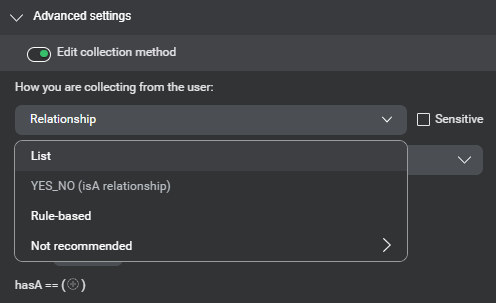
Filter custom entities by type
Click the filter icon ![]() , and choose the desired entity type (a collection method or the predefined entity for a relationship entity) from the list:
, and choose the desired entity type (a collection method or the predefined entity for a relationship entity) from the list:
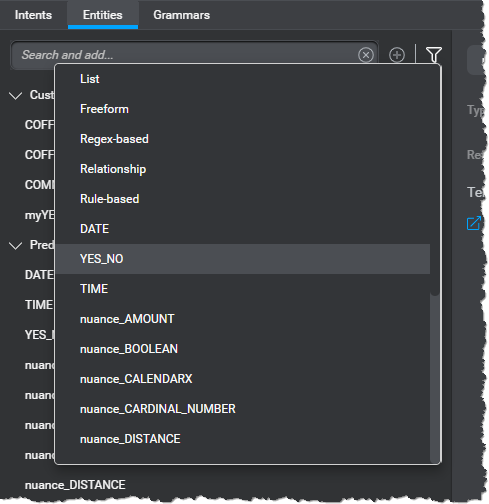
Only custom entities of the type you chose remain visible, and an indication showing that filtering is in effect appears under the search field.
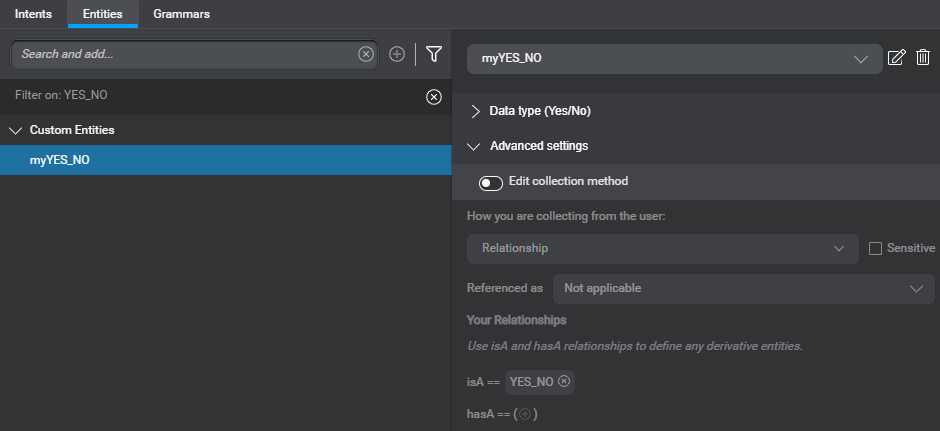
To stop filtering by entity type, click the Clear filter icon ![]() , next to the indication.
, next to the indication.
Manage grammars
Use the Grammars tab of the NLU resource panel to export a grammar specification document, to help design and manage grammars that will be referenced by a VoiceXML application.
A grammar specification document lists all speech and DTMF grammar references found in your dialog design:
- In question and answer nodes that collect entities whose values are determined by a grammar (as opposed to being subject to NLU)
- In question and answer nodes that support command overrides, if command entity values are determined by a grammar
- In your project settings, if you specified global confirmation or global command grammars
The document also includes any DTMF mappings you may have specified in your dialog design, for commands, confirmation, entity values, and command overrides.
A grammar specification document includes these columns:
| Column | Description |
|---|---|
| channel | Name of a channel, or Global Commands |
| node name | Name of a specific question and answer node, or All Nodes for a global command or confirmation grammar |
| speech enabled | T (true) if the the speech grammar referenced at the specified node is enabled; T (true) for All Nodes, if your project supports a global speech grammar for command or confirmation interactions; otherwise, F (false) |
| speech grammar name | Speech grammar referenced for global command or confirmation interactions, or at the specified question and answer node: either a filename including extension—for example, myGrammar.grxml—, or a variable name followed by “(dynamic)”—for example, myGrammar (dynamic) |
| dtmf enabled | T (true) if the the DTMF grammar referenced at the specified node is enabled, in the context of a channel that support DTMF input; T (true) for All Nodes, if your project supports a global DTMF grammar for command or confirmation interactions; otherwise, F (false) |
| dtmf grammar name | DTMF grammar referenced for global command or confirmation interactions, or at the specified question and answer node: either a filename including extension—for example, myDtmfGrammar.grxml—, or a variable name followed by “(dynamic)”—for example, myDtmfGrammar (dynamic) |
| intent | For a question and answer node that collects an entity, applicable intent, if any; otherwise, blank |
| entity name | Name of the entity collected at the question and answer node specified under node name; or name of the global command entity (for a global command grammar); or nuance_BOOLEAN (for a global confirmation grammar)—matches the slot/root name that the grammar should return for speech and DMTF |
| language | Language of a literal-value pair for an entity, as a language code (for example, en-US, fr-CA) |
| entity value | A specific entity value |
| entity literals | The literals for the specified entity value, if the specified entity is a list entity |
| dtmf value | The DTMF key, if any, for the specified entity value |
Show the Grammars tab of the NLU resource panel
Click NLU, on the toolbar, to open the NLU resource panel, and then switch to the Grammars tab.
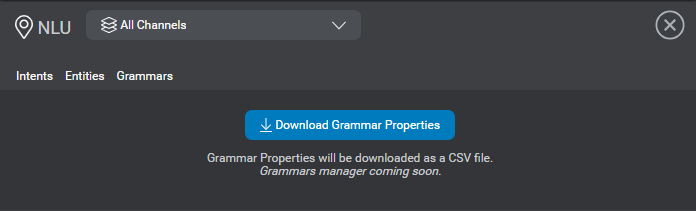
(Click NLU again to close the panel.)
Export the grammar specification document
- Navigate to the Grammars tab of the NLU resource panel.
- If you want to restrict the grammar specification document to a specific channel, choose the desired channel.

By default, the grammar specification covers all channel in your project. - Click Download Grammar Properties.
This downloads a CSV file, whose filename has this format: project_timestamp_grammars.csv, where project is the name of your Mix project, and timestamp reflects the current date and time.
Manage variables
Variables resource panel example showing predefined variables and one custom Boolean variable
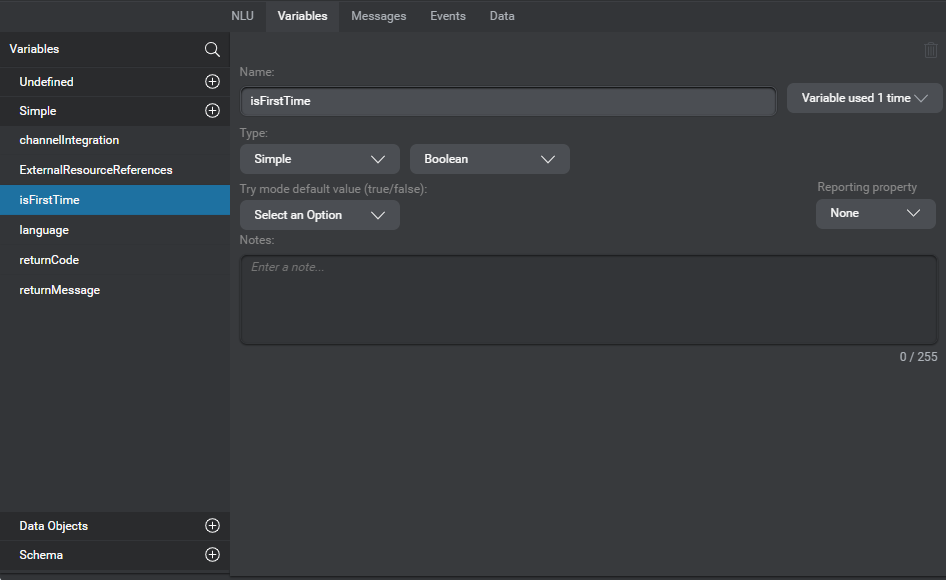
Variables are named objects in a dialog project. For example, you can use a variable:
- To hold a value returned from a database lookup
- To hold a value returned by a recognition engine
- As a placeholder in a message—for example, to produce a dynamic message at runtime, with the variable holding a value that depends on something the user said
- In a logical condition, to determine the course of a dialog flow, or which action to perform in a node
Mix.dialog provides several predefined variables, and predefined schemas which you can see in the Variables resource panel. The Variables resource panel organizes simple and complex variables into categories. Use the Variables resource panel, for example, to:
- Create and manage simple variables, custom schemas, and complex variables
- Set the type of undefined variables
- View usage information for a variable
Simple variables, and complex variable fields have a data type that determines which entities are compatible for use in assignments and conditions. The type of a variable also determines which methods are available when the variable is used in a dynamic message, a conditional expression, or on the right-hand side of an assignment. You can determine how certain variables are used in reports or logs by using reporting properties.
Categories in the Variables resource panel
The Variables resource panel organizes your variables into these categories:
| Category | Description |
|---|---|
| Undefined | Variables whose data type has yet to be set. In some situations, you might prefer to quickly add a variable and wait until later to fully define its data type. For example, while setting up a node, you realize you need a new variable to store a value: you can add a variable on the fly and start using it immediately. The new variable is considered undefined, until you set its data type, upon which it will appear under Simple, or under Data Objects. |
| Simple | Variables of type string (default), alphanumeric, digits, Boolean, integer, decimal, amount, date, time, distance, temperature, list, or dynamic entity data. Note: Use dynamic entity data variables to support dynamic list entities with up to 100 values. Dynamic entity data is not a supported type for list elements. |
| Data Objects | In Mix.dialog, data objects represent complex variables comprising multiple variables, including nested data objects. For example, the data object for a person might include the person’s name, address, phone number, date of birth, and so on, where the address is also a data object specifying street number, street name, city, and so on. Before adding data objects you must first define their underlying schema. A data object is always based on a schema. |
| Schemas | A schema represents the structure of a data object. You can create multiple data objects, or lists of data objects, based on a common schema. Schemas can also refer to other schemas. For example, the schema for a postal address may appear in schemas that represent a user, a company, and so on. Note: Dynamic Entity Data is not a supported type for schema fields. |
Variable types
Choose the type of a simple variable based on what you want it to hold. When you use a variable of a specific type in a dynamic message, its value can be rendered with appropriate formatting.
Dynamic Entity Data is a special variable type, meant to extend a list entity with a set of literals and values to be compiled at runtime. Use this for entities with up to 100 values. For entities that must support more than 100 values, consider referencing precompiled ASR and NLU resources. See dynamic list entity for detailed instructions.
Compatibility between variables and entities
A variable of type string on the left-hand side of an assign action is compatible with all entities and variable types. However, if you use a variable of type string on the right-hand side of an assign action, you are responsible for making sure its value will comply with the internal format of the variable or entity on the left-hand side. Neglecting this could generate errors in your application, at runtime.
In assignments between a variable and an entity, the variable type in the first column of the table below, and the corresponding entity types (fourth column) are compatible both as left operands and right operands. For example, given variable isFirstTime (Boolean) and entity myFIRST_TIME (isA nuance_BOOLEAN), these assignments are both possible:
- isFirstTime = myFIRST_TIME
- myFIRST_TIME = isFirstTime
In assignments between two variables, for a left operand with a type in the first column of the table, the right operand can be the same type or another type listed in the last column. For example, given the variables myDecimal (decimal), and myInteger (integer), this assignment is possible:
- myDecimal = myInteger
However the reverse is not supported:
- myInteger = myDecimal
In conditional expressions, you cannot directly compare a variable and an entity, or two variables of different types. You must first assign the entity, or one of the two variables, to an intermediate variable of the appropriate type. For example, if you want to compare myDecimal (decimal), and myInteger (integer):
- Create a variable of type decimal—for example, myDecimal2
- Set an assignment—for example, myDecimal2 = myInteger
- Use myDecimal and myDecimal2 in a expression—for example, if myDecimal is greater than myDecimal2
| Variable type | Compatible entity data type | Description | Compatible entity types (collection methods) | Other compatible variable types |
|---|---|---|---|---|
| String | Generic | String of characters (default) | YES_NO, nuance_GENERIC_ORDER, List, Regex, Freeform | Alphanumeric, Digits |
| Alphanumeric | Alphanumeric | String of alphanumeric characters (a-z, A-Z, 0-9) | Regex | Digits |
| Digits | Digits | String of digits (0-9) | nuance_CARDINAL_NUMBER, Regex | Integer |
| Boolean | Boolean | Boolean (true, false) | nuance_BOOLEAN | — |
| Integer | Digits | Whole number | nuance_CARDINAL_NUMBER | Digits |
| Decimal | Number | Decimal-point number | nuance_DOUBLE, nuance_NUMBER | Integer |
| Amount | Amount | Amount, including currency | nuance_AMOUNT | — |
| Date | Date | Date (YYYYMMDD) | DATE, nuance_EXPIRY_DATE | — |
| Time | Time | Time (HHMM) | TIME | — |
| Distance | Distance | Distance, including unit and modifier | nuance_DISTANCE | — |
| Temperature | Temperature | Temperature, including unit | nuance_TEMPERATURE | — |
| Dynamic Entity Data | — | Special type, to support dynamic list entities (for entities with more than 100 values, use the ExternalResourceReferences predefined variable instead) | Dynamic list entities | — |
| List | — | List of values of a single simple variable type (except for Dynamic Entity Data), or complex values based on a single schema | Depends on the type of the list elements | Type of the list elements |
Supported methods
This table shows the methods that are available for each simple variable type, when a variable is used in a dynamic message, a conditional expression, or on the right-hand side of an assignment.
| Variable type | Methods in assignments | Methods in conditional expressions | Methods in message annotations |
|---|---|---|---|
| String | .length(), .concat(…), .search(…), .substring(…) |
.value(), .length() |
Formatted value, .value(), .length() |
| Alphanumeric | Value (implicit) | Value (implicit) | Formatted value, .value() |
| Digits | Value (implicit) | Value (implicit) | Formatted value, .value() |
| Boolean | Value (implicit) | Value (implicit) | Value (implicit) |
| Integer | Value (implicit) | Value (implicit) | Formatted value, .value() |
| Decimal | Value (implicit) | Value (implicit) | Formatted value, .value() |
| Amount | .getNumber(), .getUnit() |
.value(), .getNumber(), .getUnit() |
Formatted value, .value(), .getNumber(), .getUnit() |
| Date | .getDay(), .getMonth(), .getYear(), .isBefore(…), .isAfter(…), .addDay(…), .addMonth(…), .addYear(…) |
.value(), .getDay(), .getMonth(), .getYear() |
Formatted value, .value(), .getDay(), .getMonth(), .getYear() |
| Time | .getHour(), .getMinute(), .getMeridiem(), .isBefore(…), .isAfter(…), .addHour(…), .addMinute(…) |
.value(), .getHour(), .getMinute(), .getMeridiem() |
Formatted value, .value(), .getHour(), .getMinute(), .getMeridiem() |
| Distance | getNumber(), getUnit(), getModifier() |
.value(), .getNumber(), .getUnit(), getModifier() |
Formatted value, .value(), .getNumber(), .getUnit(), getModifier() |
| Temperature | .getNumber(), .getUnit() |
.value(), .getNumber(), .getUnit() |
Formatted value, .value(), .getNumber(), .getUnit() |
| List | .length(), .get(…), .contains(…) |
.value(), .length() |
.value(), .length() |
| Dynamic Entity Data | Value (implicit) | Value (implicit) | Value (implicit) |
Reporting properties
If your design has simple variables that will store reporting data, or sensitive information, you can mark these variables with a reporting property: either Attribute, Dimension, Metric, or Sensitive. For complex variables, you can mark sensitive fields in the schema upon which they are based.
| Property | Description |
|---|---|
| Attribute | Information or indicators that can be used for analysis (for example, authentication status, transaction execution status, intents matched during a call)—available for all types of simple variables, except for List and Dynamic Entity Data |
| Dimension | Information that can be used as filter criteria (for example, customer type, brand name)—available for simple variables of types string and Boolean |
| Metric | Numerical data that can be aggregated (for example, to keep track of the value of merchandise sold through a virtual assistant, or the number of complaints that were filed)—available for simple variables of types integer and decimal |
| Sensitive | Sensitive information to be masked in application logs; for example, date of birth, account balance—available for all types of simple variables, and schema fields |
At runtime, variables marked with a reporting property are written to event logs as key-value pairs with additional metadata, at session start (names and types), and whenever they are set or updated (names and values). See Dialog payloads, in the Nuance Mix Runtime Event Logs documentation, for more information.
Predefined variables
All dialog projects have these predefined variables:
| Variable | Description |
|---|---|
| channelIntegration | Channel integration information provided by the client application—not to be confused with channels in your dialog design. For example, a “Social VA” channel might apply to multiple channel integrations, such as WhatsApp, or Facebook Messenger. In a dialog design, you can use this variable to define integration-specific conditions, or for reporting purposes (for example, to report metrics per channel integration). |
| language | Language code (for example, en-US, fr-CA) that represents the current interaction language. Use this variable to switch to another language at runtime when required. When using an assign action to set this variable, make sure your project supports the new language and that the value is in the correct format. |
| returnCode | Return code for data access nodes and external actions nodes. |
| returnMessage | Message that describes the meaning of the return code. |
| Active Intent Value | Value of the active intent. This value is set by an intent mapper node and it primarily comes from the last NLU interpretation result, either at a question and answer node collecting an NLU intent, or at question and answer nodes collecting entities subject to a question router node where intent switching is enabled. Use this variable to switch to another intent programmatically at runtime, when required—for example, in a disambiguation context when the dialog needs to prompt the user for more details in order to correctly identify their intent. See Active Intent behavior for more details. |
| Active Intent Literal | Literal for the active intent from the last NLU interpretation result. |
| Active Intent Formatted Literal | Formatted version of the literal for the active intent from the last NLU interpretation result. Applies to user inputs coming from ASR results (see Interpretation results: Literals, in the NLU as a Service gRPC API documentation, for more information). |
| Active Intent Confidence | Confidence score for the active intent from the last NLU interpretation result. |
| Current Entity Value | Current entity value from the last NLU interpretation result. Use this variable to create dynamic confirmation default messages. Only available in the Confirmation default messages section of the Project Settings panel. Note: Current Entity Value cannot be marked as sensitive, and therefore would never be masked in message event logs. If sensitive data is likely to be presented in confirmation messages, make sure to configure local confirmation messages, at every question and answer node that is set up to collect a sensitive entity. |
| Last Collection Interpretation | Interpretation result from the last collection operation, including literal, formatted literal, possible intents, the confidence score for each possible intent, possible entities, if any, including value and confidence score. Last Collection Interpretation is updated each time recognition happens upon user input at a question and answer node, recovery, global command, or intent switch, including when recognition generates a nomatch event. You could use this, for example, to analyze the literals that generated nomatch events in your application. Use a data access node, an external actions node, or a question and answer node, to send this variable to the client application or to an external system for further processing. If you want to use the last interpretation literal—for example, to use its length in a condition—use the complex variable lastCollectionResultObject. |
| Last Confirmation Interpretation | Interpretation result from the last confirmation operation, including literal, formatted literal, possible intents, possible entities, and confidence scores. Last Confirmation Interpretation is updated each time the dialog prompts the user for confirmation. Use a data access node, an external actions node, or a question and answer node, to send this variable to the client application or to an external system for further processing. If you want to use the last confirmation literal—for example, to use its length in a condition—use the complex variable lastConfirmationResultObject. |
| lastCollectionResultObject | Complex variable based on the interpretationResult schema. Interpretation result from the last collection operation, including literal, formatted literal, possible intents, and the confidence score for each possible intent. You can use this variable to reference the intent literal’s length, for example, in conditions. For logging purposes, this complex variable is always considered sensitive. |
| lastConfirmationResultObject | Complex variable based on the interpretationResult schema. Interpretation result from the last confirmation operation, including literal, formatted literal, possible intents, and the confidence score for each possible intent. For logging purposes, this complex variable is always considered sensitive. |
| userData | Complex session variable based on the userData schema. See Exchanging session data, in the Dialog as a Service gRPC API documentation, for more information. |
| ExternalResourceReferences | Simple session variable to store references to external NLU and ASR precompiled resources. This variable holds a JSON string to be fetched at runtime from an external system, to support dynamic list entities based on compiled wordsets, for example. When this variable is set, the Dialog service automatically relays the information to the ASR and NLU services, to augment and improve recognition and interpretation results. See Referencing compiled resources, in the Dialog as a Service gRPC API documentation, for more information. |
Active intent behavior
Active Intent Value doesn't exactly behave as you would expect from a variable. You might think of it more as a function that returns the active intent at the state where you invoke it. At runtime, only an intent mapper node can update Active Intent Value, based on the latest recognition results (built-in intent switching), or following an assign action (manual intent switching).
When the system recognizes that the user wants to fulfill a different intent, Active Intent Value does not immediately reflect the new intent: if you follow Active Intent Value as the dialog flows (for example, by using it in dynamic messages or by sending it to external systems), you'll notice that its value persists from the moment the dialog enters a mapped component—that is, a component that has been mapped to an intent, either in the NLU resource panel or in an intent mapper node—, from an intent mapper node, all the way until the dialog eventually returns to the same intent mapper node, or reaches another one.
When the dialog enters a component via a component call node (as opposed to entering via an intent mapper node), Active Intent Value does not change. In the case of an otherwise mapped component, any required entities can still be collected to fulfill the intent associated with this component but, if you use Active Intent Value for reporting purposes, you might notice that it doesn't match the intent for the component in focus.
Likewise, in a manual intent switching scenario, when an assign action is used to set Active Intent Value, the new value is not immediately applied and only becomes effective at the next intent mapper node. However, in this scenario, you must also make sure there are no other question and answer nodes between the assign action and the intent mapper that will perform the switch since the recognition results from the last question and answer node would take precedence and be applied to Active Intent Value instead of the intent you specified.
Last interpretation behavior
At runtime, whenever the dialog enters a question and answer node, the last interpretation variables (collection and confirmation, simple and complex) are all cleared (null). Therefore, if you have configured the Send Data section of the node properties to send any of these variables to the client application, since the node sends the specified data with each request it makes to the Dialog service, they will be sent as null with the first request, upon entering the node. In case of a nomatch recognition event at this node, the data sent with the next request will include the nomatch recognition results (that is, the literal, NO_MATCH as the intent, and a confidence score). Data specified in Send data is never sent when transitioning out of the node.
Last interpretation specification
Example of last interpretation object
{
    "literal": "from my tfsa account please",
    "formattedLiteral": "from my tfsa account please",
    "interpretations": [{
            "intent": "CHECK_BALANCE",
            "confidence": 0.27720454,
            "literal": "from my tfsa account please",
            "formattedLiteral": "from my tfsa account please",
            "entities": [{
                    "name": "ACCOUNT_TYPE",
                    "value": "TFSA",
                    "confidence": 1.0,
                    "literal": "tfsa",
                    "formattedLiteral": "tfsa"
                }
            ]
        }, {
            "intent": "TRANSFER_FUNDS",
            "confidence": 0.51478267,
            "literal": "from my tfsa account please",
            "formattedLiteral": "from my tfsa account please",
            "entities": [{
                    "name": "TO_ACCOUNT",
                    "value": "TFSA",
                    "confidence": 1.0,
                    "literal": "tfsa",
                    "formattedLiteral": "tfsa"
                }
            ]
        }, {
            "intent": "TECH_SUPPORT",
            "confidence": 0.09913357,
            "literal": "from my tfsa account please",
            "formattedLiteral": "from my tfsa account please",
        }
    ]
}
Represents the last interpretation at the collection or confirmation step of a question and answer node. Except in noinput situations, in which case these predefined variables are null, the predefined simple variables Last Collection Interpretation and Last Confirmation Interpretation contain a key-value pair, where the key is either LAST_COLLECTION_INTERPRETATION or LAST_CONFIRMATION_INTERPRETATION, and the value is a string that contains an object with this structure:
| Element | Type | Description |
|---|---|---|
literal |
String | Literal from the last recognition results |
interpretations |
Array or intent interpretations | Possible intents and entities, including confidence scores |
Intent interpretation
| Element | Type | Description |
|---|---|---|
intent |
String | Intent name |
confidence |
Number | Confidence score |
literal |
String | Literal from the last recognition results |
formattedLiteral |
String | Formatted version of the literal from the last recognition results (applies to user inputs coming from ASR results—see Interpretation results: Literals, in the NLU as a Service gRPC API documentation, for more information) |
entities |
Array of entity interpretations | Possible entities, if any, including value and confidence score |
Entity interpretation
| Element | Type | Description |
|---|---|---|
name |
String | Entity name |
value |
String | Entity value |
confidence |
Number | Confidence score |
literal |
String | Entity literal extracted from the last recognition results |
formattedLiteral |
String | Formatted version of the entity literal extracted from the last recognition results (applies to user inputs coming from ASR results—see Interpretation results: Literals, in the NLU as a Service gRPC API documentation, for more information) |
Predefined schemas
All dialog projects have these predefined schemas:
- DynamicMessageReference
- interpretationResult
- interpretation (used in interpretationResult)
DynamicMessageReference schema
Use this schema to create complex variables, when you need dynamic message references—for example, when a message does not directly depend on something the user said but on something else that can only be determined by the client application at runtime. This schema has two fields:
| Field | Type | Description |
|---|---|---|
| audioFileName | String | Holds an audio filename, extension included. Audio files must be placed in specific directories, relative to the client application, that is basePath/language/prompts/library/channel/, where basePath is where the client application expects to find all required language-specific material (audio files and grammar files), language is the appropriate language code (for example, en-US, fr-CA), library is the name of a message library (must be: “default”), and channel is the name of the channel using the audio files (or “default” for audio files that apply to all channels). |
| ttsBackup | String | Holds alternative TTS verbiage, in case the audio file with the message becomes unavailable. The alternative TTS verbiage is also used in the TRY tab, when you preview your dialog design. |
Workflow for using a dynamic audio file reference
- Create a complex variable based on the DynamicMessageReference schema.
- Set up a data access node using your complex variable to get the required audio file reference, from the appropriate external system, at runtime.
- Add a dynamic message for the Audio Script modality, and use your complex variable as a dynamic placeholder.
- Preview your dialog design for a channel that supports the Audio Script modality (for example, IVR/Voice VA).
- When the dialog reaches the data access node that is meant to return the dynamic file reference, use the fields that appear to enter an audio filename (including the extension), and alternative text.
Notice that the alternative text appears in the chat pane when the dialog reaches the node that has the message with the dynamic audio file reference.
interpretationResult schema
This reserved schema applies to the predefined complex variables lastCollectionResultObject and lastConfirmationResultObject. This schema has two fields:
| Field | Type | Description |
|---|---|---|
| literal | String | Literal from the last recognition results |
| interpretations | List of interpretation | Possible intents and confidence scores |
interpretation schema
This schema has two fields:
| Field | Type | Description |
|---|---|---|
intent |
String | Intent name |
confidence |
Decimal | Confidence score |
userData schema
Represents data collected from the current end user.
| Field | Type | Description |
|---|---|---|
timezone |
String | Time zone of the user—can be used for reporting purposes, or to convert time and date information to the appropriate time zone |
userGlobalID |
String | Global unique identifier of the user across all channels—for example, a member ID (from a banking or healthcare system), or a Social Security number; can be used for reporting purposes |
userChannelID |
String | Channel-specific identifier for the user—for example, the ANI (for IVR, SMS, and WhatsApp channels), or the user's IP address (for webchat); can be used for reporting purposes |
userAuxiliaryID |
String | Secondary identifier for the user—for example, a device ID, tracking number, or package number; can be used to log a secondary identifier of the user |
systemID |
String | Identifies how the system or application was reached by the end user—for example, the DNIS (for IVR, SMS, and WhatsApp channels), or a Facebook page (for Facebook Messenger); can be used for reporting purposes |
location |
location object | Geographic coordinates (latitude, longitude) of the user—can be used for reporting purposes, and for mobile web and mobile native virtual assistant applications |
location schema
Represents geographic coordinates.
| Field | Type | Description |
|---|---|---|
latitude |
String | East-west position, in the format set by the client application |
longitude |
String | North-south position, in the format set by the client application |
Open the Variables resource panel
Click Variables, on the Mix.dialog toolbar, to open the Variables resource panel.
(Click Variables again to close the panel.)
Create a simple variable
- Click the Add icon , next to Simple.
- Enter a unique name for the variable (see Naming guidelines).
The new variable appears in the Simple category. - On the right-hand side of the panel, choose the desired variable type from the Type list.
- If you chose List, choose a type for the list elements from the List Type list.
- Add a display value, to be used when previewing your design, if desired.
(Not available for list and dynamic entity data variables.) - Mark the variable with a reporting property, if required.
- Add notes (maximum 255 characters), if desired.
Set the type of an undefined variable
- In the left-hand pane of the Variables resource panel, expand the Undefined category, if needed, and click the variable whose type you want to set.
- On the right-hand side of the panel, choose the appropriate category: Simple, or Object.
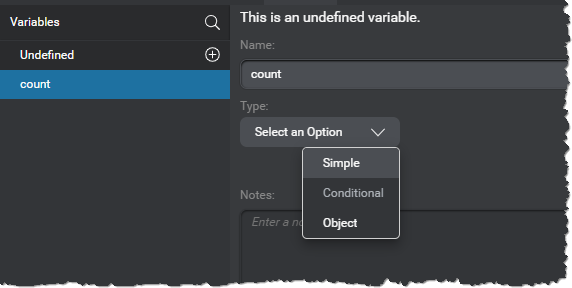
- If you chose Simple:
- Choose the desired type from the second list that appears.
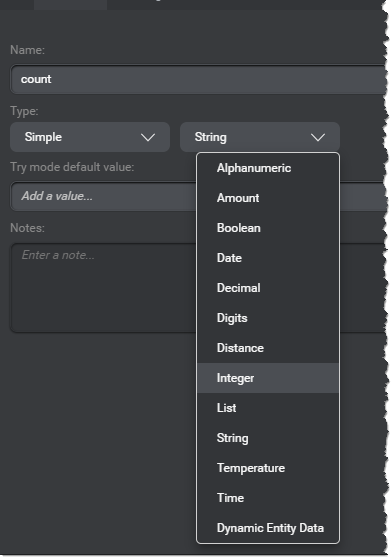
- Mark the variable with a reporting property, if required.
- Choose the desired type from the second list that appears.
- If you chose Object, now choose the appropriate schema from the second list.

Find a variable
Use the search field to narrow down the variables and schemas displayed in the Variables resource panel.
The current section of the Variables resource panel updates as you type, showing only the variables, schemas, and fields that match the search string or that have fields that match the string. Badges indicate the number of matches in each section.
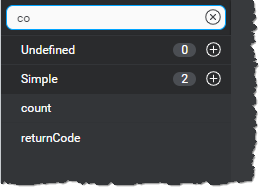
To stop filtering, click the Clear search icon ![]() .
.
Rename a variable
- In the left-hand pane of the Variables resource panel, expand the appropriate category, if needed, and click the variable you want to rename.
Tip: Use the search field to narrow down the list if needed. - In the right-hand pane of the panel, click the variable name.
The name becomes editable. - Modify the name as desired (see Naming guidelines).
Delete a variable
- In the left-hand pane of the Variables resource panel, expand the appropriate category, if needed, and click the variable you want to delete.
Tip: Use the search field to narrow down the list if needed. - In the upper-right corner of the panel, click the Delete icon .
A message appears prompting you to confirm your intention. - Click Confirm.
View usage information for a variable
- In the left-hand pane of the Variables resource panel, expand the appropriate category, if needed, and click the variable of interest.
Tip: Use the search field to narrow down the list if needed.
The number of references to this variable in the current project appears next to the variable’s name in the right-hand pane.
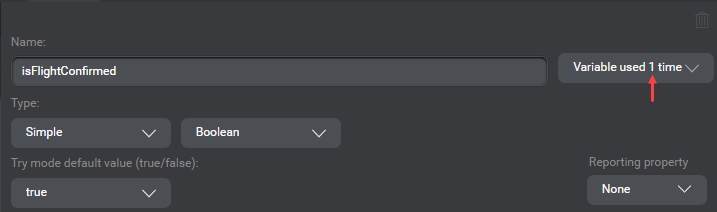
- Click the usage count.
A list of all nodes, global and channel-specific recovery and confirmation messages, as well as any message resources that include references to this variable appears.
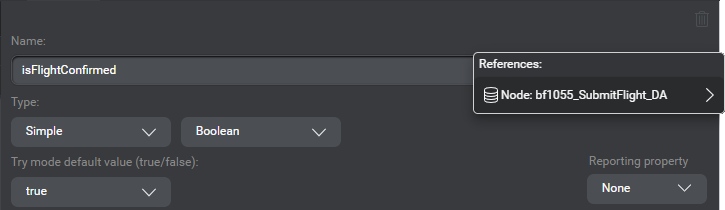
- Click a reference in the list to navigate to the node or Project Settings panel or Messages resource panel section that has the message reference.
Mark a variable with a reporting property
- In the left-hand pane of the Variables resource panel, expand the Simple category, if needed, and click the variable you want to mark with a reporting property.
Tip: Use the search field to narrow down the list if needed. - Expand Reporting property, and choose the desired property: either Attribute, Dimension, Metric, or Sensitive.
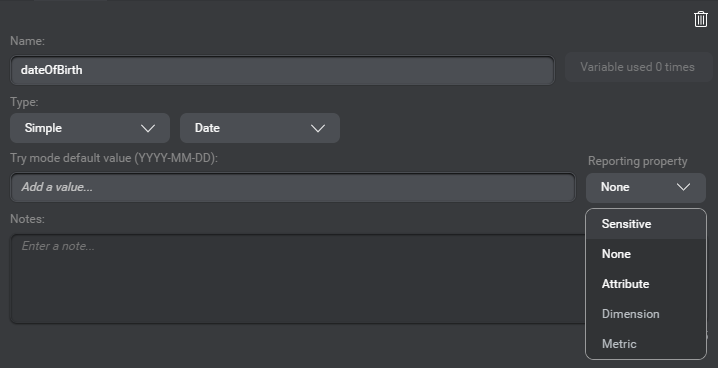
(If a variable no longer has any reporting purposes, choose None.)
Create a schema
- Click the Add icon next to Schema.
- Enter a name for the schema (see Naming guidelines).
The new schema appears in the Schema category.
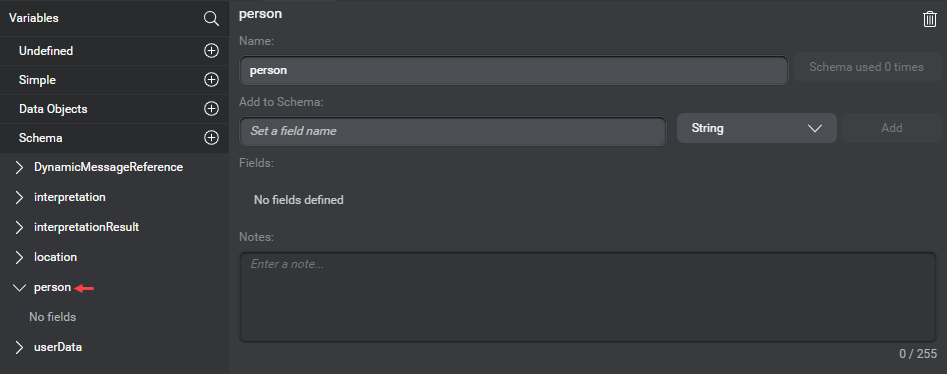
- Use the fields under Add to Schema, in the area on the right-hand side of the panel, to add the desired fields (see Naming guidelines), and set their type.
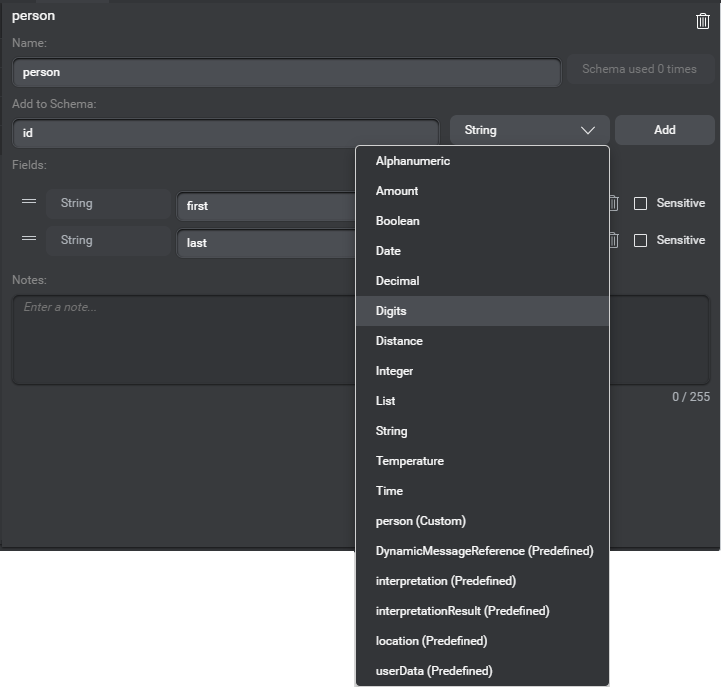
- If some fields will be holding sensitive information, mark them as sensitive.
- Add notes (maximum 255 characters), if desired.
Rename a schema
- In the left-hand pane of the Variables resource panel, expand the Schema category, if needed, and click the schema you want to rename.
Tip: Use the search field to narrow down the list if needed. - In the right-hand pane of the panel, click the schema name.
The name becomes editable. - Modify the name as desired (see Naming guidelines).
Delete a schema
- In the left-hand pane of the Variables resource panel, expand the Schema category, if needed, and click the schema you want to delete.
Tip: Use the search field to narrow down the list if needed. - In the upper-right corner of the panel, click the Delete icon .
A message appears prompting you to confirm your intention. - Click Confirm.
Rename a field in a schema
- In the left-hand pane of the Variables resource panel, click the desired schema.
Tip: Use the search field to narrow down the list if needed. - In the right-hand pane of the panel, click the field you want to rename.
The name becomes editable. - Modify the name as desired (see Naming guidelines).
Change the type of a field in a schema
- In the left-hand pane of the Variables resource panel, expand the appropriate schema, and click the field whose type you want to change.
Tip: Use the search field to narrow down the list if needed. - Use the fields under Type, in the area on the right-hand side of the panel, to set the desired type.
- (Optional) Add a display value, and notes (maximum 255 characters), if desired.
Change the order of the fields in a schema
Use the handle icon ![]() to drag a field up or down, until all fields are in the desired sequence.
to drag a field up or down, until all fields are in the desired sequence.
Delete a field in a schema
- In the left-hand pane of the Variables resource panel, click the appropriate schema.
Tip: Use the search field to narrow down the list if needed. - In the right-hand pane of the panel, click the Delete icon , next to the name of the field you want to delete.
Mark a field as sensitive in a schema
For complex variables, fields marked as sensitive in the base schema are masked in application logs.
- In the left-hand pane of the Variables resource panel, expand the appropriate schema, and click the field you want to mark as sensitive.
Tip: Use the search field to narrow down the list if needed. - Click the Sensitive check box to select it.
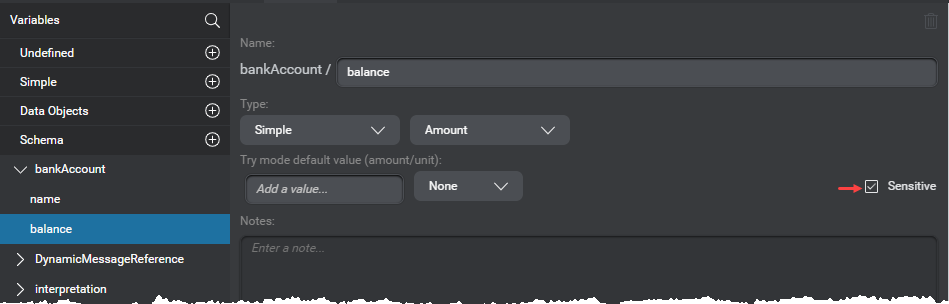
Create a complex variable
- Click the Add icon next to Data Objects.
- Enter a name for the complex variable (see Naming guidelines).
The new complex variable appears in the Data Objects category. - On the right-hand side of the panel, choose the desired schema from the second list, under Type.
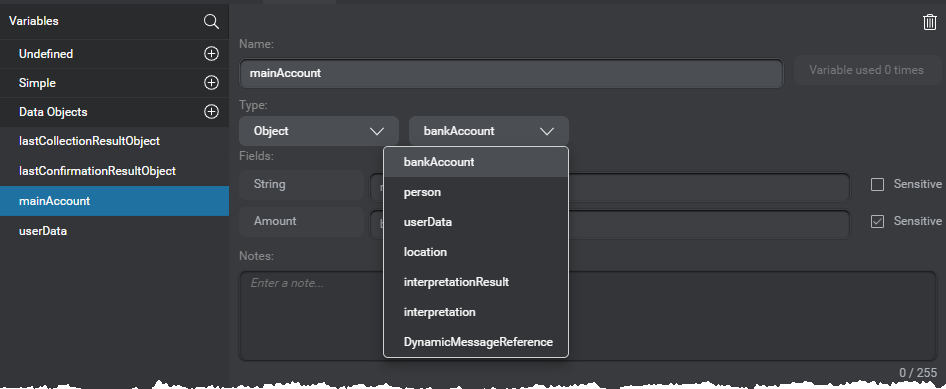
- Add notes (maximum 255 characters), if desired.
Manage messages
Messages resource panel example, table view
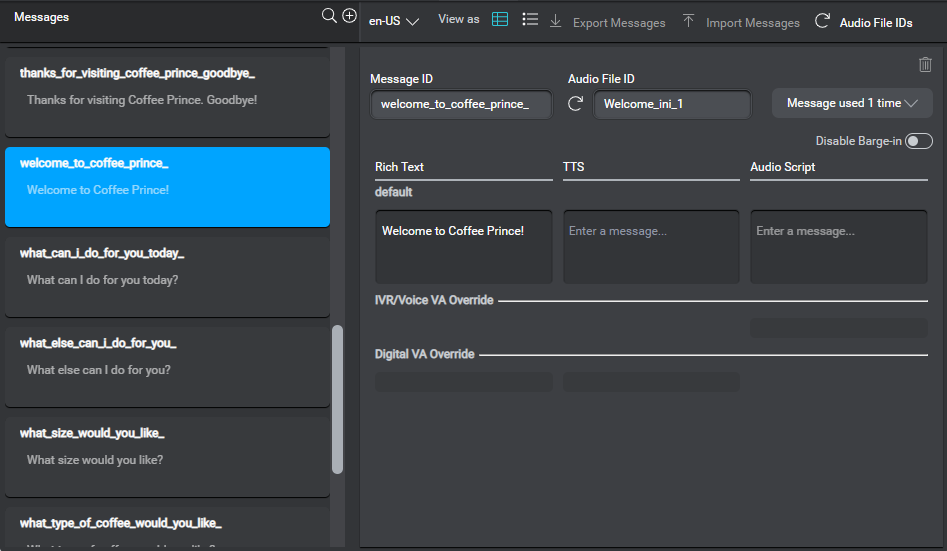
The Messages resource panel allows you to manage all messages in your project. When you set a message in a node, or in the Project Settings panel, or directly in the Messages resource panel, it becomes available for reuse anywhere within your project.
To support language-specific messages, choose the desired language from the menu near the name of the project, or from the menu at the top of the Messages resource panel itself (see Translate a message).
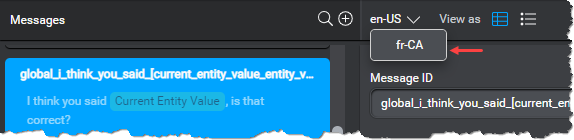
Open the Messages resource panel
Click Messages, on the toolbar, to open the Messages resource panel.
(Click Messages again to close the panel.)
Add a message for your project
- Click the Add icon , in the upper-right corner of the Messages list.
A new message skeleton appears in the list.
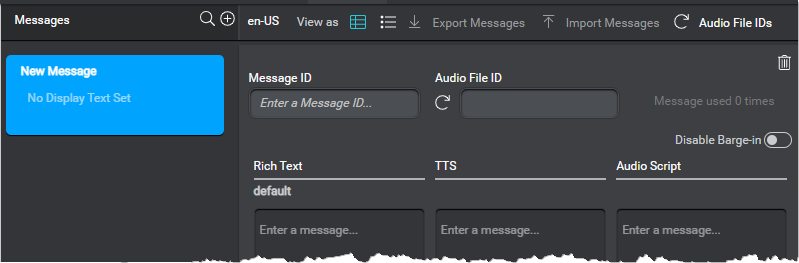
- Enter the text to be used by default for this message.
Mix.dialog automatically generates a name for the message, based on the text of the message. You can rename the message, if desired. - (Optional) if your application must prevent users from interrupting this message, turn on Disable Barge-in.
Disabling barge-in at the message level applies to all channels and message formats. - (Optional) Add format-specific variations, if desired.
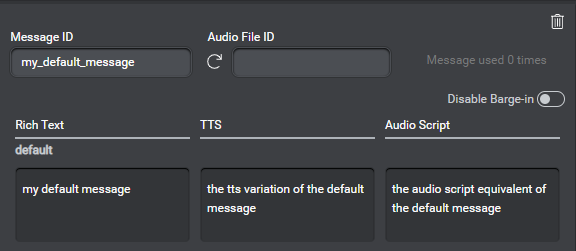
- (Optional) Enter channel-specific variations, if desired.
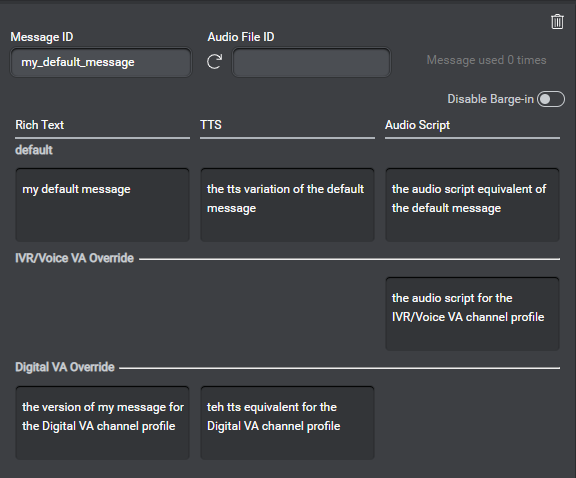
- (Optional) Use the Generate icon
 , to generate a static filename for the audio file to play in channels that use the Audio Script modality (the file extension is determined in the project settings).
The generated audio file ID reflects the location of the message in the dialog design—for example gl_nm1_01, for a global (gl_) no match 1 (nm1_) recovery message created in the Project Settings panel; or Get_intent_ini_01, for the initial (ini_) message of the node called Get intent.

You cannot automatically generate a filename for messages that are not used in your project. However, you can enter one manually, if desired (see Naming guidelines). Only available in projects that support the Audio Script modality.
Tip: Click Audio File IDs, in the upper-right corner of the Messages resource panel to generate static filenames for all messages that don’t already have one.
Find a message
Use the search field in the upper-right corner of the Messages list, to narrow down the list to only messages that include the specified text—in their name or within their content.
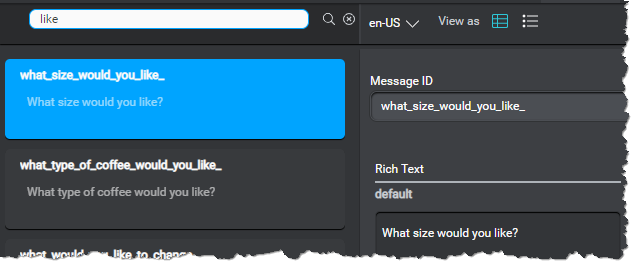
Edit a message
- In the list of messages, click the message you want to edit.
Tip: Use the search field, to narrow down the list.
The message details appear in the right-hand area of the panel. - Modify the text of the default message, or the channel-specific or format-specific variations, as desired.
Tip: In a dynamic message, you can safely edit the text of any annotation—this does not break the link with the dynamic element (variable, entity, or the active intent) represented by the annotation.
Translate a message
- In the list of messages, click the message you want to translate (or view) in another language.
Tip: Use the search field, to narrow down the list.
The message details appear in the right-hand area of the panel. - (Optional) Copy the original text of the message to your clipboard.
- Choose the desired language from the menu on the toolbar of the Messages resource panel.
This menu allows you to alternate between language-specific versions of the selected message without changing the current design language.
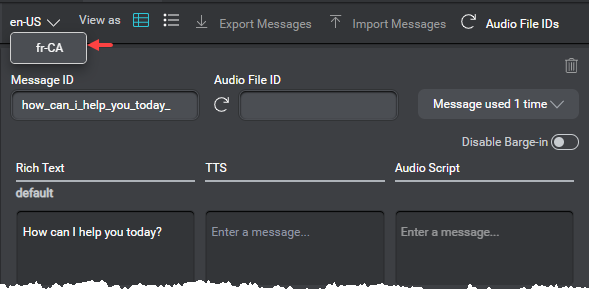
- (Optional) Paste the original text into one of the available message field.
- Translate the message text.
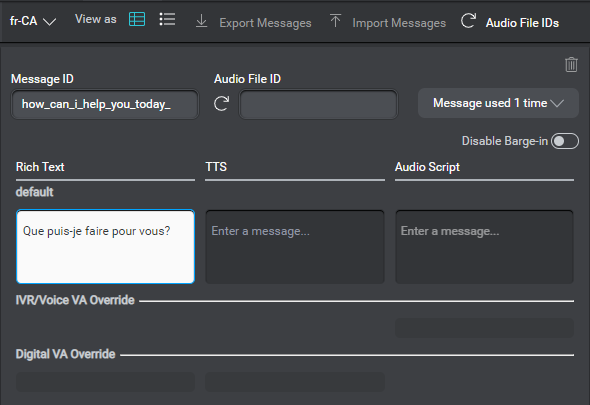
- Add channel-specific or format-specific variations, as desired.
Rename a message
- In the list of messages, click the message you want to rename.
Tip: Use the search field, to narrow down the list.
The message details appear in the right-hand area of the panel. - Enter the desired name in the Message ID field (see Naming guidelines).
Delete a message
- In the list of messages, click the message you want to delete.
Tip: Use the search field, to narrow down the list.
The message details appear in the right-hand area of the panel. - Click the Delete icon , in the upper-right corner of the details pane.
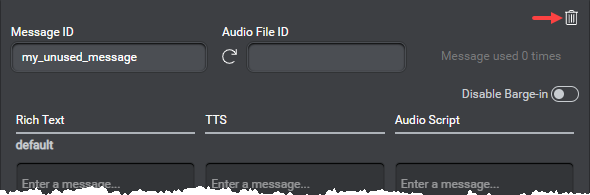
Note: Delete is available only for messages that are not used in the project.
View usage information for a message
- In the list of messages, click the message of interest.
Tip: Use the search field, to narrow down the list.
The message details appear in the right-hand area of the panel, including the number of references for this message.

- Click the usage count.
A list of all nodes as well as global and channel-specific recovery or confirmation behaviors that use the selected message appears.

- Click a reference in the list to navigate to the node or Project Settings panel section that has the message reference.
Manage events
Events resource panel example showing all predefined events and one custom event
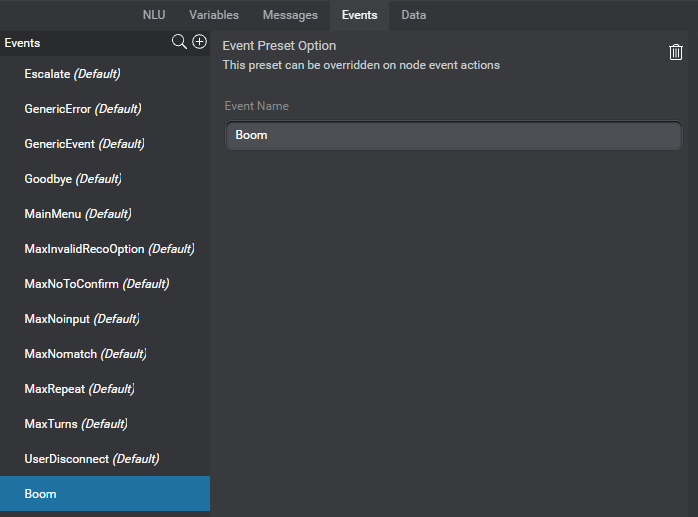
All dialog projects have these predefined events:
| Category | Events |
|---|---|
| Global commands | Escalate, Goodbye, MainMenu |
| Conversation | MaxTurns |
| Collection | MaxNomatch, MaxNoinput |
| Recognition | MaxInvalidRecoOption, MaxNoToConfirm |
| Generic | GenericError, GenericEvent, UserDisconnect |
You cannot delete or rename predefined events. Use the Events resource panel to add custom events for your project. You can also create a custom event on the fly when setting up an event handler.
Global command events (Escalate, Goodbye, and MainMenu) are thrown automatically, when a question and answer node happens to recognize the corresponding global command entity value.
You set global handlers for specific command or dialog events in your project’s Start node. You can override global event handlers by setting component-level event handlers in the Enter node for a component.
If you set an event handler for GenericEvent, it will catch any event for which you haven’t set a specific handler.
Default dialog events (such as MaxTurns, MaxNomatch, MaxInvalidRecoOption) are thrown automatically when their respective threshold is reached at a question and answer node. You can configure these thresholds globally, or by channel, in the global settings of the project. You can set local event handlers for dialog events, in individual question and answer nodes, as needed.
Question and answer nodes do not support local handlers for commands and custom events. That is, you cannot create node-level handlers for commands recognized at question and answer nodes. In a question and answer node, such events must be handled through system actions, just like intents or entity values. To add local handling for such events at a question and answer node, configure command overrides.
Use throw event actions, in question and answer nodes, message nodes, or decision nodes, to throw custom events. It is also possible use a throw action to throw a global command event, if you want to handle a situation the same way as the global command—for example, if you want to transfer the user to a live agent to handle some error situations where a maximum threshold is reached, you can set a throw event action to throw the Escalate event.
Open the Events resource panel
Click Events, on the Mix.dialog toolbar, to open the Events resource panel.
(Click Events again to close the panel.)
Add a custom event
- Click the Add icon in the upper-right corner of the Events list.
- Enter a unique name for the custom event (see Naming guidelines).
The new event appears at the bottom of the list.
Find an event
Use the search field in the upper-right corner of the Events list, to narrow down the list to only events that include the specified text in their name.
Rename a custom event
- In the Events list, click the custom event you want to rename.
- In the right-hand pane of the panel, click the event name.
The name becomes editable. - Modify the name as desired (see Naming guidelines).
Delete a custom event
- In the Events list, click the custom event you want to delete.
- In the upper-right corner of the panel, click the Delete icon .
A message appears prompting you to confirm your intention. - Click Confirm.
Change log
Below are changes made to the Mix.dialog documentation since the initial Beta release.
2022-10-26
Updated Set messages to reflect support for square brackets and emojis in messages
2022-10-19
Added Use the current date and time
2022-09-27
- Updated Naming guidelines to reflect support for hyphens in intent and entity names
- Removed “Model” from Reserved keywords
- Updated these topics, to reflect support for entity data types (this requires version 1.3 of the Dialog service):
2022-09-20
Added Protection against infinite loops to mention the maximum number of times allowed looping through a node before reaching a question and answer node
2022-09-08
2022-08-17
Updated Define interactive elements to reflect support for language-specific interactivity in multilingual projects, and that it is no longer required for an entity value to exist in every language to be able to configure an interactive element for this value
2022-08-05
Updated Channels, to mention the ability to add, modify, and disable channels after a project has been created
2022-07-04
Removed “company” from Reserved keywords
2022-06-13
Added “Model” to Reserved keywords
2022-05-31
- Added Resize the Components pane, and Resize sections of the Components pane
- Updated View usage information for a variable to reflect the ability to navigate to variable references found in the Project Settings panel and in the Messages resource panel
- Updated View usage information for a message to reflect the ability to navigate to message references found in the Project Settings panel
2022-04-20
Updated Fulfill the intent, in Get started, and Set up a question router node, to reflect UX change in the question router node properties
2022-04-13
Updated Dynamic messages to reflect that, for new projects, the dialog service will no longer automatically add spaces in dynamic messages (it is possible to migrate existing project to take advantage of this change, if needed)
2022-04-07
- Added the Data privacy setting category, which includes a node-level setting that allows marking a question and answer node as sensitive
- Expanded the description of the Advanced properties for question and answer nodes, and updated Configure node-level settings to reflect the new Data privacy setting category
2022-03-29
Updated Create a simple variable, to mention that Try mode default value is intended as stub data for Get parameters of data access nodes only
2022-03-09
Updated Configure TTS settings to reflect the ability to specify a custom voice manually
2022-02-23
- Updated Specify grammars, Set DTMF mappings, and Configure global commands, to mention that you should avoid setting DTMF mappings directly in Mix.dialog, for entities meant to be collected based on an external DTMF grammar
- Updated Use a mathematical expression, and Set an expression, to mention that, in expressions, the operations are evaluated based on the same operator precedence order that is used in JavaScript and Java
2022-02-14
Updated requirements and examples for confirmation grammars
2022-02-09
Added Naming guidelines
2022-01-10
- Added Duplicate a node
- Updated Reporting properties to reflect that the predefined variables lastCollectionResultObject, and lastConfirmationResultObject are always considered sensitive
2021-12-08
- Updated System Actions properties to mention that the execution order of messages and actions in question and answer nodes (assignments first) is different than in message nodes (messages first)
- Updated Dynamic messages to describe how dynamic messages are concatenated at runtime, including a related limitation and workaround
2021-11-29
Updated Send data to the client application, Set up a data access node, and Set up an external actions node, to reflect the ability to reorder Send data and Get data parameters
2021-11-23
Updated Filter custom entities by type to reflect UI changes
2021-11-11
- Updated Set up a question and answer node to reflect the ability to view recovery and confirmation messages by modality
- Added Configure TTS settings, Configure collection default messages, and Configure confirmation default messages
- Updated Manage entities to reflect that the value attribute of a freeform entity is not relevant (always blank) and that you should therefore use its literal or formatted literal attribute instead
2021-10-27
- Updated Get started, Manage intents, Manage entities, and Manage variables to reflect UX changes
- Updated Set Messages to describe the behavior of the pair of View messages as channel and modality selectors
- Updated Validate your design to reflect changes to the message validation experience
2021-10-13
- Updated Set Messages to reflect support for TTS output formatting options in Audio Script messages
- Updated Set Messages and Supported methods, to reflect output formatting options for string values in TTS and Audio Script messages
2021-10-04
Updated to reflect UX changes:
- Create a variable on the fly
- Set an expression
- Create a grammar reference variable on the fly
- Create an input or return variable on the fly
- Create a custom event on the fly
2021-09-28
- Added Reporting properties
- Added Mark a variable with a reporting property
- Added ExternalResourceReferences, in Predefined variables, and updated Dynamic list entities to cover referencing external ASR and NLU precompiled resources to augment and improve recognition and interpretation results at runtime
- Updated Set up a data access node to cover adding a latency message
- Updated Global settings and behaviors to cover fetching properties for data access latency messages
- Added Change the user interface language
- Updated images in Use the note editor, Add a description and Show or hide a node description to reflect the enlarged text field
- Updated Use the message editor, Use the note editor, and Add a description, to cover forcing line breaks in Rich Text messages, notes, and node descriptions
2021-09-08
- Removed note in System Actions properties to reflect that assignments and dynamic messages are now evaluated in the expected order in question and answer nodes
- Added notes in Set up a message node, Set assign actions, and Dynamic messages, to reflect that dynamic messages are still evaluated before any assignments in message nodes
- Added note in Create a complex variable to refer to Preinitialize a complex variable
2021-07-22
- Added Active Intent Formatted Literal, in Predefined variables
- Added .formattedLiteral, in Entity attributes
- Added
formattedLiteralfor intent and entity interpretations, in Last interpretation specification
2021-07-20
Added integer, as a compatible type for the right operand of an assignment, when the left operand is of type decimal—see Compatibility between variables and entities
2021-07-13
Added Collapse or expand a condition
2021-06-23
- Added Channels
- Added Set notes
- Updated Get started, Dialog design elements, and Set messages and actions to reflect UX changes, such as compact actions, conditions, messages, and notes
- Added Move a message, action, note, or condition
- Updated Add a reentry message to reflect UX changes
2021-06-04
Updated Specify grammars (for question and answer nodes), Specify grammars for commands, and Specify grammars for confirmation, to clarify that question and answer nodes can use the NLU model, for collection, and grammars for confirmation; or use grammars for collection, and the NLU model for confirmation, if desired
2021-05-17
- Added Rename an intent
- Added Remove a broken mapping for an intent
- Added Relink an intent component
- Added Unlink an intent component
- Separated Node operations and Component operations from Basic operations and updated them all to reflect UX changes
- Updated Specify grammars (for question and answer nodes), and separated Specify grammars for commands from Enable global commands, to clarify that using both a speech grammar and the NLU model concurrently at a question and answer node is not a supported use case
2021-05-12
- Updated Validate your design to reflect that the Start node is no longer created with event handler placeholders for the default global command events
- Updated Preview your design and Add an event handler to reflect UX changes
2021-05-03
- Updated Global settings and behaviors, Manage events, Manage entities, Manage grammars, and Set up a question and answer node, to cover node-level command overrides
- Updated Configure global commands, and Manage entities to mention that Mix.dialog prompts you to export the JSON representation of your project before replacing, removing, or deleting the global command entity, and before removing any of its values
- Updated Manage variables, to mention the ability to filter the Variables resource panel by using its search field
2021-03-29
- Updated Add a component call node, to mention the ability to filter the list of components by using the search field
- Removed the mention that Mix.dialog limits creating interactive elements to entities that have 20 values or less (no longer a limitation)
- Added Train the NLU model
- Added Review notifications
- Added GrXML confirmation grammar examples
2021-03-08
- Updated Manage entities, to mention that support for regex-based entities is limited to text input
- (Obsolete) Updated Define interactive elements, to mention that Mix.dialog supports creating interactive elements for custom list entities that have up to 20 values
2021-03-03
- Updated Predefined entities in Mix.dialog to mention all unsupported entities
- Updated Manage variables, to cover preinitializing complex variables
2021-02-17
Updated Set messages and Supported methods, to cover output formatting for dynamic messages
2021-01-28
Specified maximum length (255 characters) for notes in Manage variables
Specified maximum length (1000 characters) for node descriptions
Added Show or hide the Components pane, and Show or hide the Node properties pane
2021-01-20
- Added Active Intent behavior
- Updated Switch intent manually
- Updated Configure intent switching
- Updated Global settings and behaviors, and Manage grammars, to cover DTMF and speech grammar support for global commands, and for confirmation
2020-12-08
- Updated Global settings and behaviors, Manage messages, and Set up a message node, to cover the ability to disable barge-in at specific message nodes, and for individual messages in a project
- Updated Manage variables, Manage entities, and and Set up a question and answer node, to cover marking variables and entities that store sensitive information to be masked in application logs
- Added Rule-based entities
2020-12-02
Updated Manage variables to cover predefined variables: channelIntegration and userData
2020-11-25
- Added Convert an intent component into a generic component
- Updated Manage variables to cover predefined complex variables: lastCollectionResultObject and lastConfirmationResultObject
- Updated Basic operations to reflect extended naming rules for generic components
- Added Switch intent manually
- Updated Set DTMF mappings, to cover the ability to create entities on the fly
- Updated Add a throw event action, and Add a global command mapping, to mention the ability to create a custom event on the fly in these contexts
- Updated Manage entities, and Set up a question and answer node, to reflect that value-specific actions, interactivity, and DTMF mappings are only available for entity values that exist in every language, for multilingual projects
2020-11-09
2020-10-28
- Updated Manage intents with details on how to set global intent mappings in the NLU resource panel and on inheritance of global mappings by intent mapper nodes
- Added Set up an intent mapper node
- Added Anaphoras
- Updated Manage events to mention the new UserDisconnect event
- Updated Last interpretation specification to reflect the addition entity interpretations
2020-10-16
- Added Variable types, covering new types, available methods, and compatibility with predefined entities
- Added Workflow for using a dynamic audio file reference
- Updated Manage messages to cover the new Audio File ID for a message group
- Added Manage grammars
2020-10-06
- Added details about the last interpretations in Predefined variables
- Replaced current intent with active intent to reflect the nomenclature change
2020-10-01
- Updated Global settings and behaviors
- Updates to reflect changes to the question and answer node, including support for recovery messages and confirmation messages at the node level, as well as for grammars, DTMF mappings, and node-level setting overrides
- Updated Manage variables to cover new predefined variables (Active Intent Value, Active Intent Literal, Active Intent Confidence, Current Entity Value, Last Collection Interpretation, Last Confirmation Interpretation)
- Updated Preview your design to clarify the Try mode behavior when switching languages during a preview session
2020-08-28
- Updated Manage entities with details about setting the type of a custom entity, and about supporting menu-type entities in a multilingual project
- Updated Preview your design to document that the Try mode doesn’t support switching languages during a preview session
2020-08-19
Updated Manage entities to reflect that the literal-value pairs for list entities are now language-specific, and to cover regex-based entities
2020-08-03
- Updated Manage entities and Manage variables to cover dynamic list entities
- Added Set up a data access node
- Updated Set up an external actions node to cover the ability to send the current intent value or literal, and to create variables from the variable selector
- Expanded notes to reflect that names must be unique across all intents, entities, and variables
2020-07-20
Added Set up a decision node
2020-07-14
Added Set up a message node
2020-07-03
- Added Create a custom event on the fly
- Updated Rename a field in a schema to reflect UX change
2020-06-26
- Added Set a question router reference
- Updated Manage entities, Get started, and Set up a question and answer node, to reflect the redesigned entity management features
- Updated the sample scenario, in Get started, to use an intent component
- Added Change the active language; updated List entities, Set Messages, Manage messages, and Get started to reflect support for multilingual projects
2020-05-25
- Added Set throw event actions
- Updated Set messages and actions
- Updated Manage events
2020-05-14
- Updated Set up a question and answer node to cover local event handling, the ability to send variables to the client, and the ability to specify a question router node to handle any captured entity or intent that is not the entity in focus
- Added Set messages and actions
- Added Manage resources
- Added Use a random number
- Added Clear a complex variable
- Added Clear an entity
- Updated Entity attributes
2020-05-06
Added Set Messages
2020-04-24
Added Manage events
2020-04-14
- Added Add an event handler
- Added Configure intent switching
- Updated Set transitions
2020-04-04
2020-03-31
- Updated Get started to reflect UX changes
- Added Set conditions
- Added Set transitions
- Added Set up an external actions node
- Updated Set up a question and answer node to cover reentry messages, interactivity and nomatch recovery
- Updated Manage messages to cover formats and channels
2020-02-19
- Added Set up a question and answer node
- Added Set up a question router node
- Updated Manage entities to cover entity attributes
- Updated Set assign actions to cover mathematical expressions
2020-01-22
- Added component operations in Basic operations
- Added Set assign actions
- Updated Manage variables to cover complex variables (schemas and data objects) and usage information
2019-12-18
Explained how to create dynamic messages. See Manage messages
2019-12-11
Added Manage intents, Manage entities, Manage variables, and Manage messages
2019-12-02
Minor changes. See Get started and Dialog design elements
2019-11-25
Sample scenario simplified and further revised to match UX changes. See Get started
2019-11-15
Sample scenario revised to match UX changes. See Get started